Windows 10 is the latest operating system released by Microsoft that’s being used in the majority of the desktop and laptops all over the world. It was first released in 2015 and has been updated numerous times with several new features added. If you are using this operating system on a laptop then you will want to know the different power modes that’s available. In this latest installment of our troubleshooting series we will be showing you how to adjust power mode level in windows 10.
Change Power Mode Level in Windows 10
Windows 10 has different Power Mode levels that you can use for different situations. If you don’t have access to a power outlet then you might want to use the Power Saver mode or if you want your laptop to perform well then you might want to use the High Performance mode.
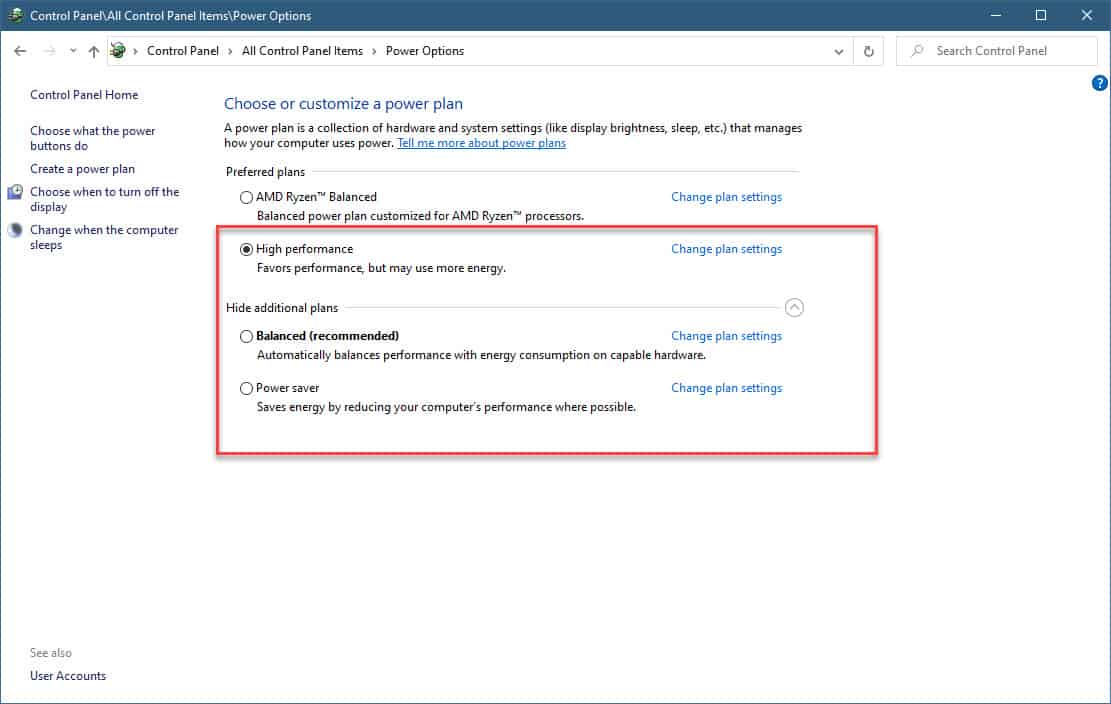
Description of the Power Mode levels
Here are the different modes available for you to choose from.
- Balanced: This is the recommended plan as it balances performance with energy consumption on your laptop.
- High Performance: This setting favors performance and will use more battery power.
- Power Saver. This saves battery power by reducing your laptop performance whenever possible.
Changing Power Mode
If you would like to adjust the power mode of your laptop then here’s how you can do it.
Time needed: 2 minutes.
Adjust Power Mode
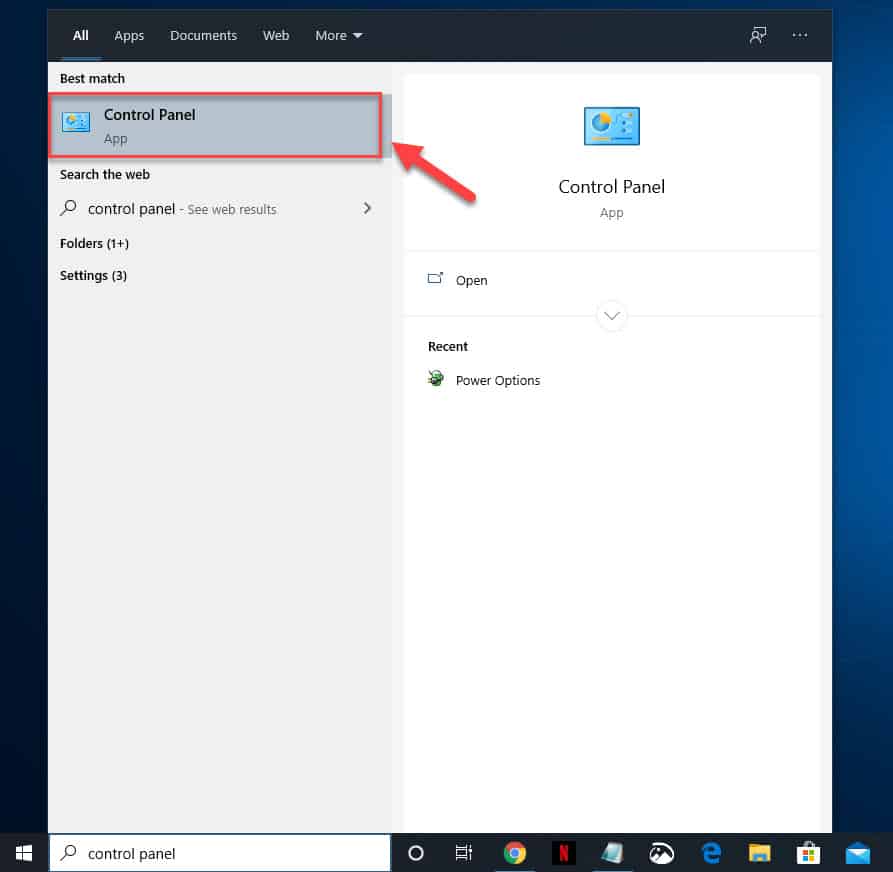
- Type “control panel” without the quotation marks on the search bar.
This is located on the lower left side of the screen.

- Click on the Control Panel app that appears.
This will open the Control Panel window.

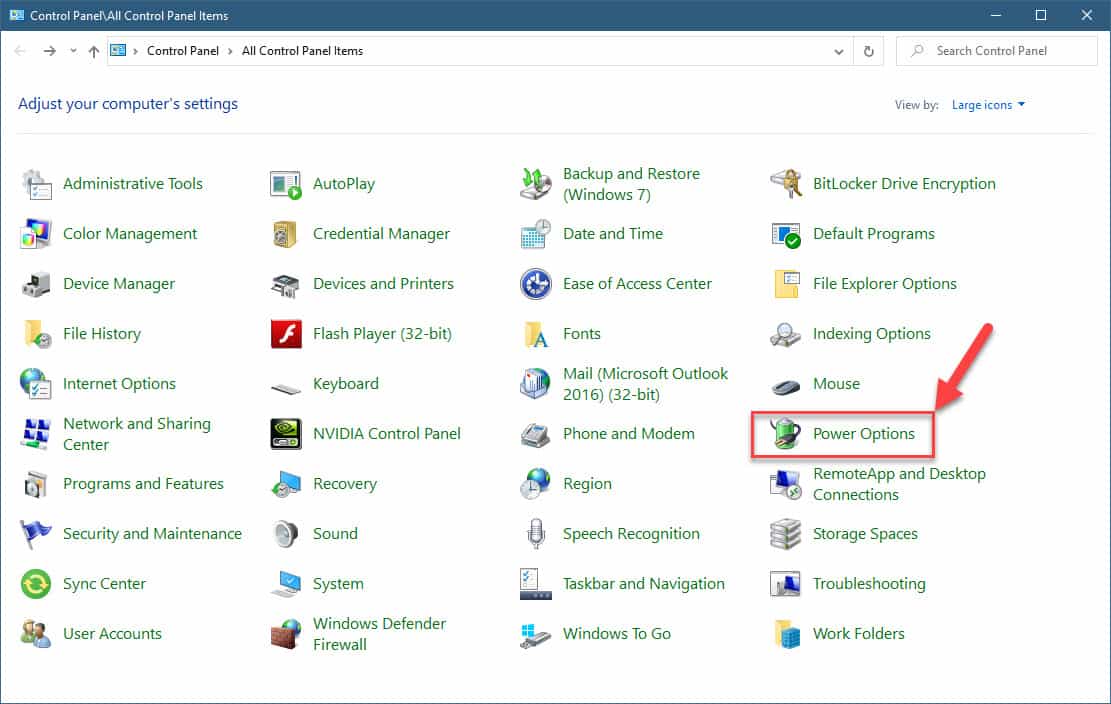
- Click on Power Options.
This uses the green battery icon with a power cord wrapped around it.

- Choose from any of the power modes available.
This will adjust the power and battery setting of your laptop.

After performing the steps listed above you will successfully adjust the power mode level in Windows 10.
Having Issues with your computer? Feel free to contact us using this form. We’ll try to help.


