A monitor refresh rate is its ability to update the images being displayed per second. If your monitor has a refresh rate of 60Hz then this means that it will update the display 60 times per second. The higher the refresh rate your monitor has the smoother images it will produce. In this latest installment of our troubleshooting series we will show you how to change monitor refresh rate in windows 10.
Change Refresh Rate in Windows 10
Adjusting the refresh rate of the monitor was common during the time when the CRT monitor was popular. This was because these monitors were prone to flickering and the only way to fix this was to increase the refresh rate. Today, with our modern LCD displays the flickering issues at lower refresh rates don’t occur anymore. You would still however want to use the highest refresh rate that the monitor can support to have a smoother picture.
Time needed: 3 minutes.
Adjust Refresh Rate
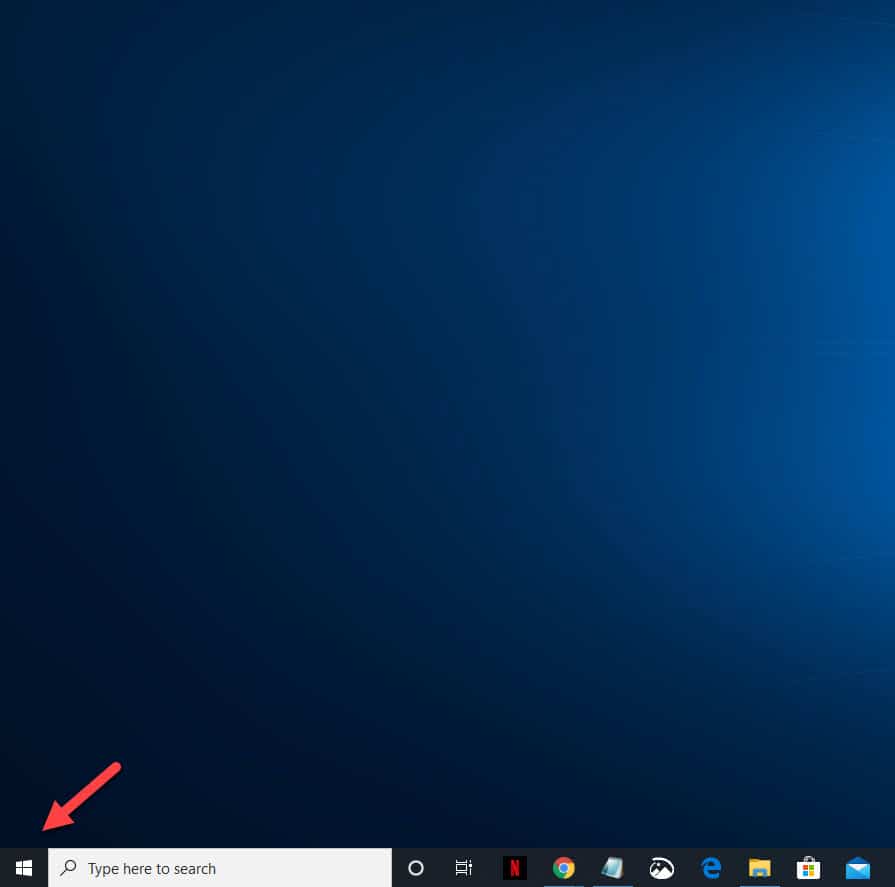
- Click on the Start button.
This is located on the lower left side of the screen.

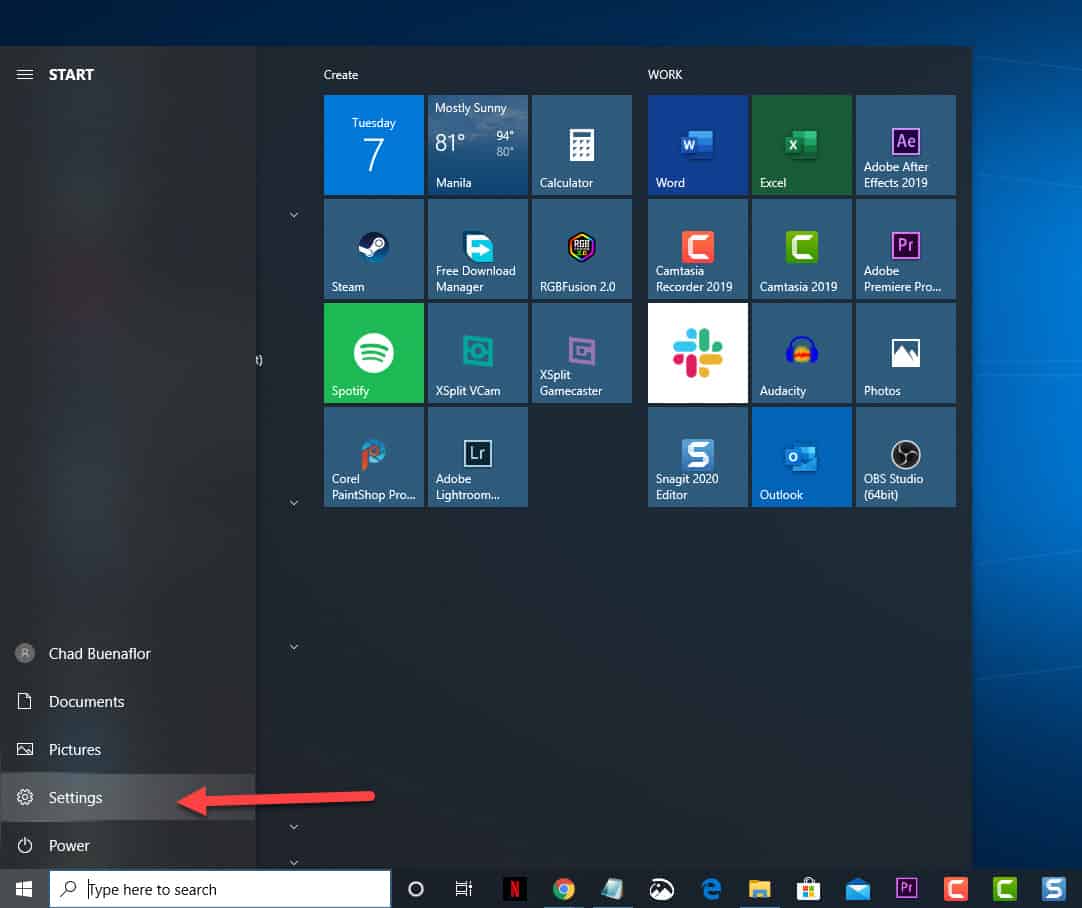
- Click on Settings.
This will open the Settings window.

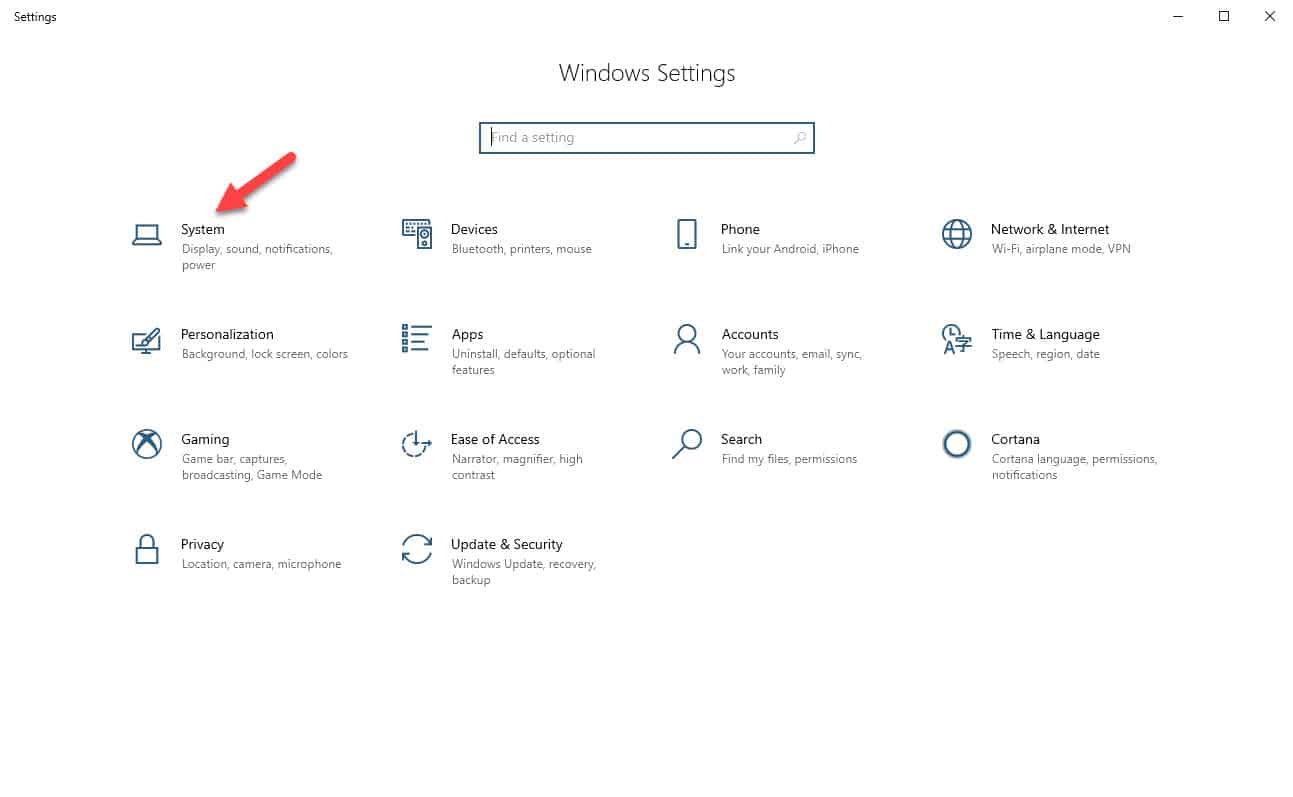
- Click on System.
This is usually the first choice on the top left of the Settings window.

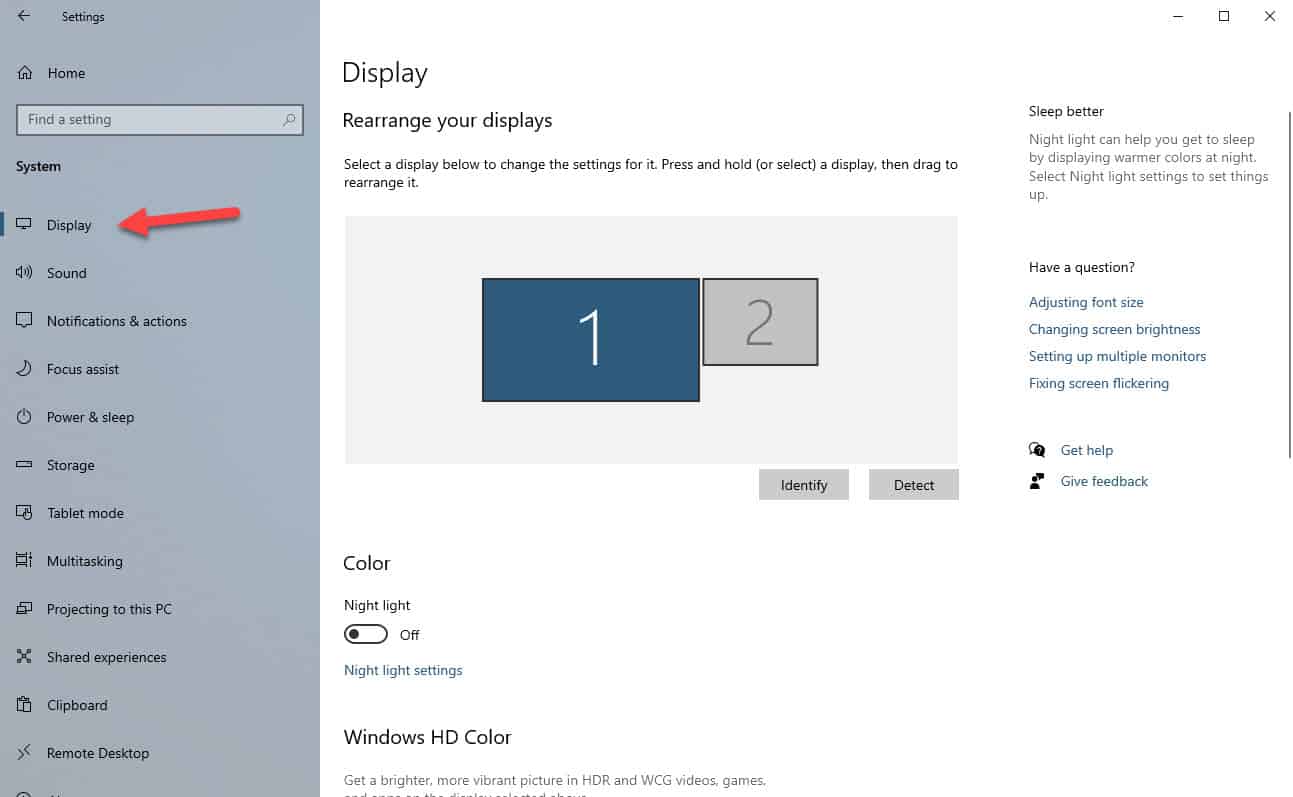
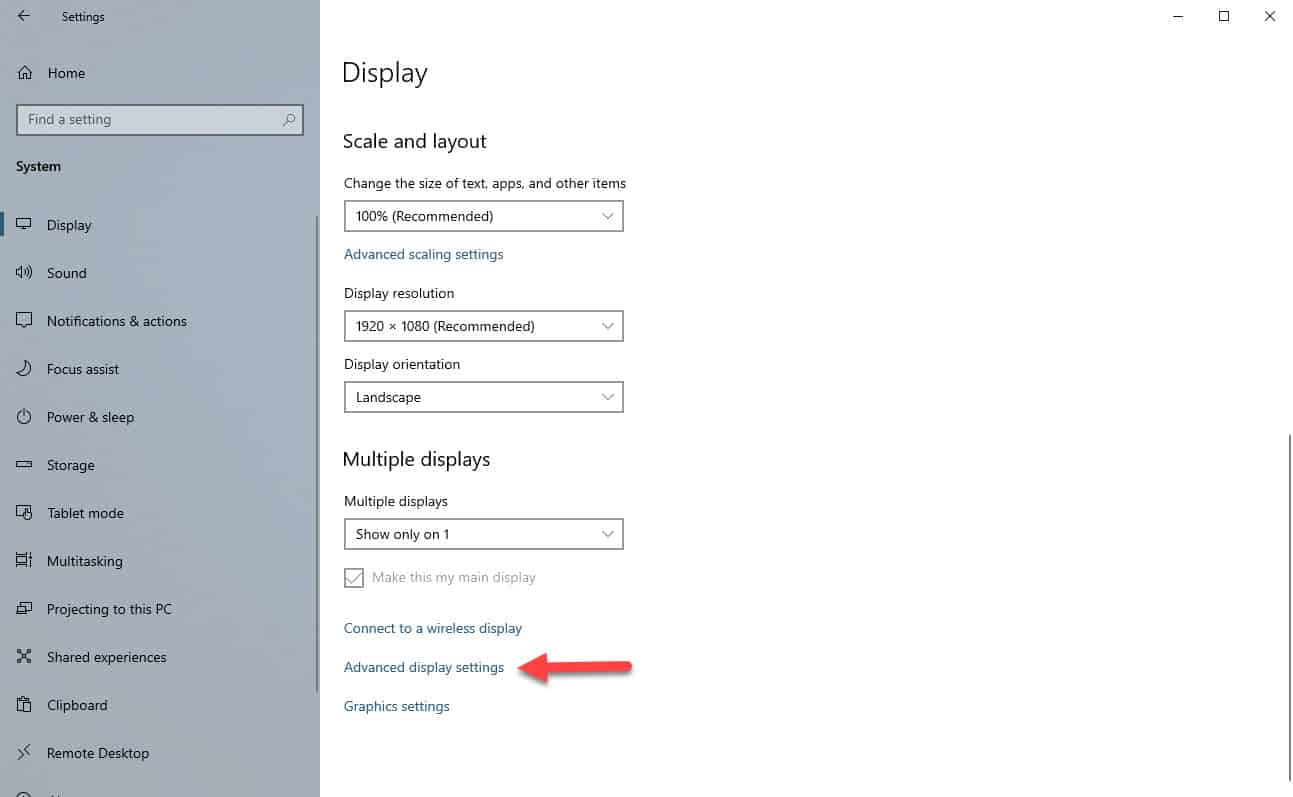
- Click on Display.
This can be found at the left pane.

- Click on Advanced display settings.
This link can be found near the bottom of the right pane.

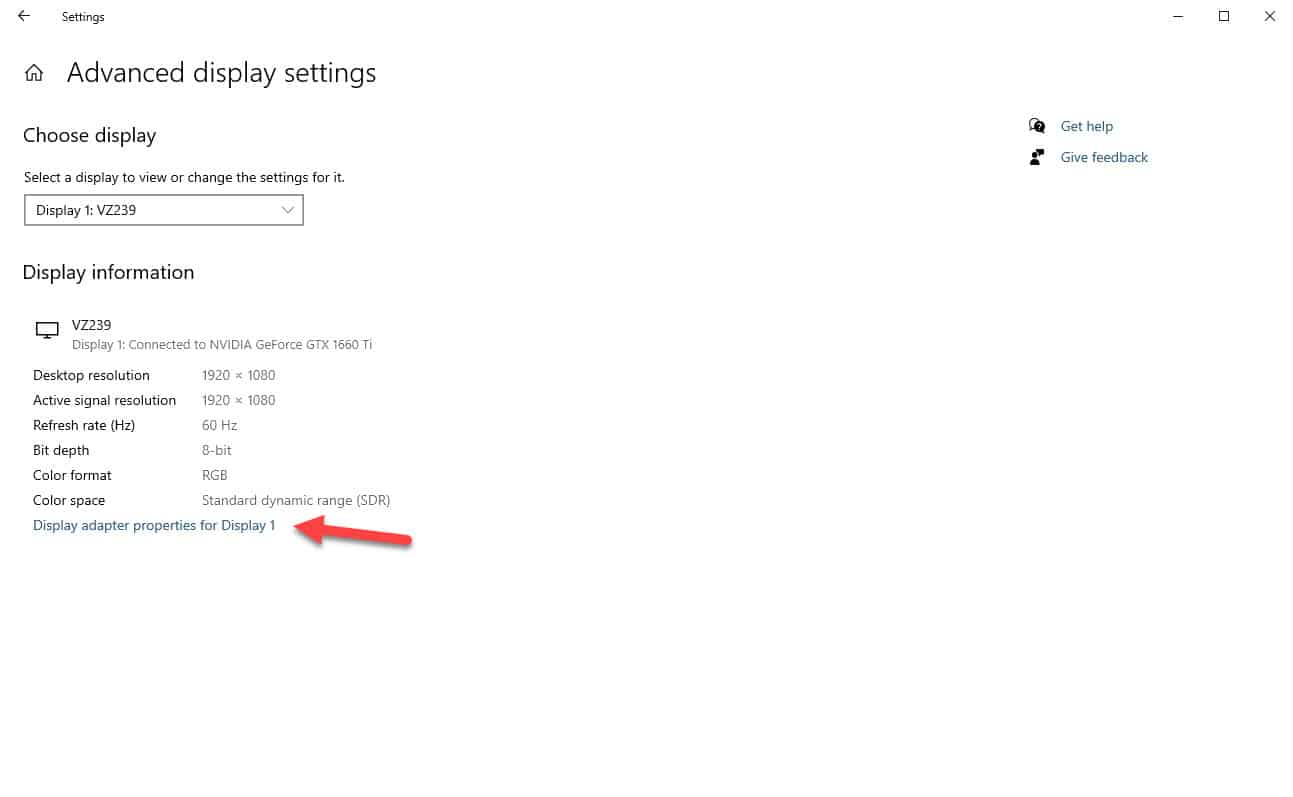
- Click on adapter properties for Display 1.
This will open the monitor properties window.

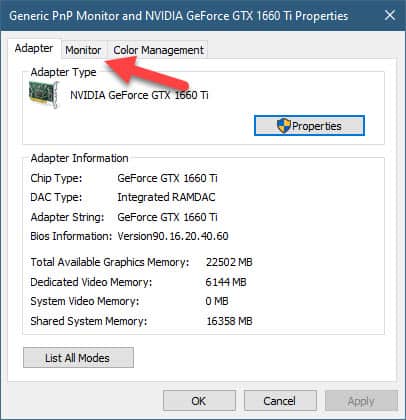
- Click on the Monitor tab.
This is the second tab on the Monitor properties window.

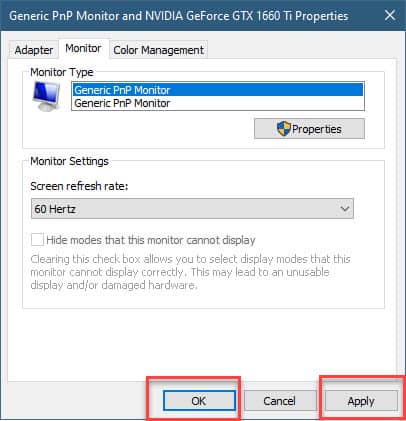
- Select the screen refresh rate.
Do this on the drop down menu under Monitor Settings.

- Click on Apply then OK.
This will save any changes that you made.

After performing the steps listed above you will successfully change monitor refresh rate.
If your monitor can support a higher refresh rate but the option is not available then you should try to update your graphics driver.
Having Issues with your computer? Feel free to contact us using this form. We’ll try to help.
