Windows 10 is currently the most popular operating system being used in the world today that’s being used in most business and home computers. First released in 2015, it has received several updates which has made it even better. In this latest installment of our troubleshooting series we will show you how to disable Windows 10 startup delay.
Remove the startup delay in Windows 10
Have you noticed that when you start your windows 10 computer it takes a few seconds for it to open your startup programs? This delay allows the drivers and other services to finish loading so that you can use your computer without any issues. There is a way to remove this delay to shorten the boot up time. Take note though that this only works well if the operating system is installed in a Solid State Drive since this has a much faster read and write speed when compared to conventional hard drives.
Edit the startup delay from the registry editor
The best way to disable the startup display is from the Registry Editor. This is a graphical tool available in Windows 10 that allows authorized users to view and make changes to the Windows registry. Here are the steps you need to perform.
Time needed: 5 minutes.
Change startup delay time
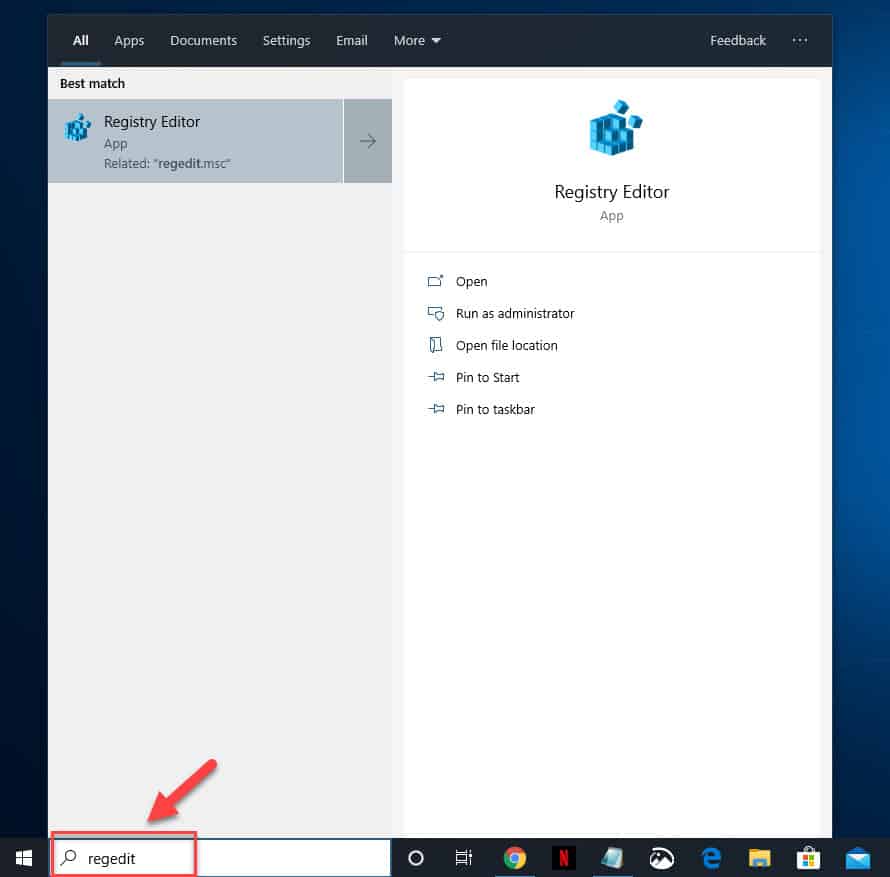
- Type “regedit” without the quotation marks in the search bar.
This is located in the lower left side of the screen.

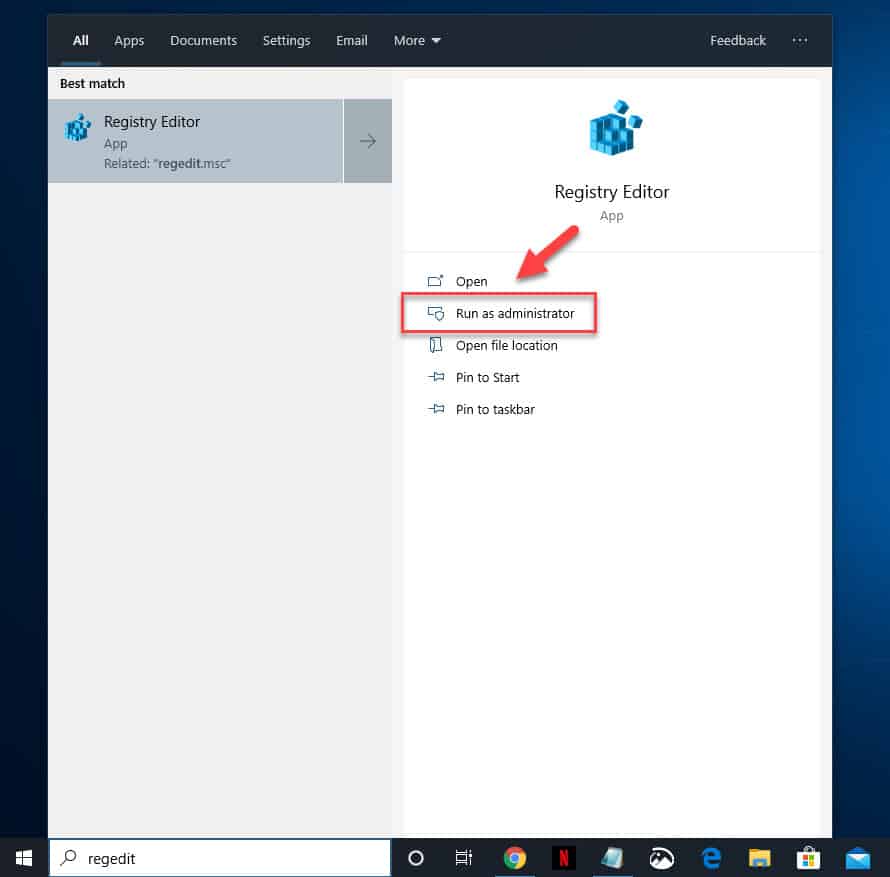
- Click on Run as administrator for the Registry Editor app that appears.
This will open the Registry Editor.

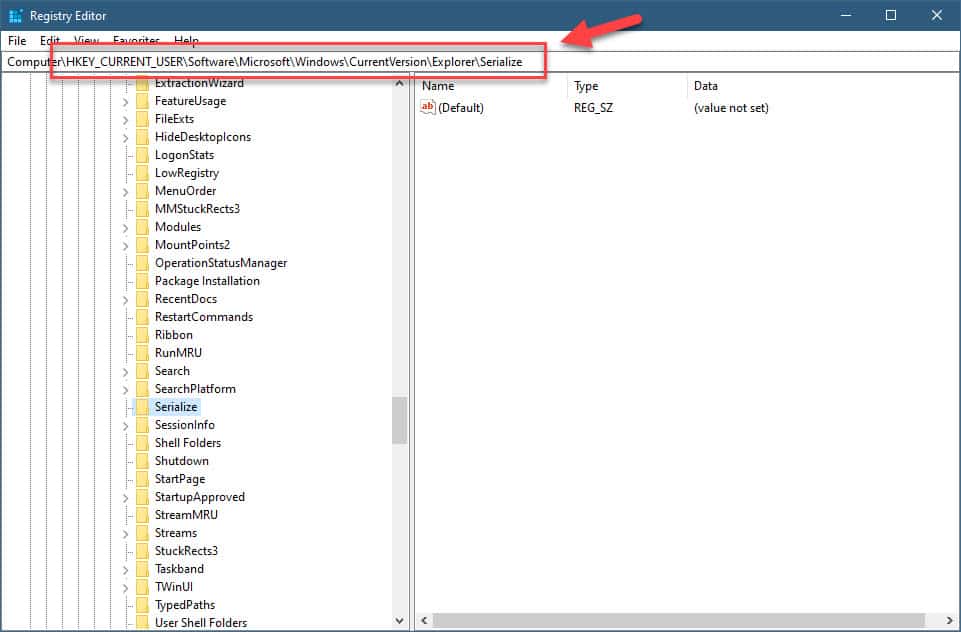
- Go to HKEY_CURRENT_USER\Software\Microsoft\Windows\CurrentVersion\Explorer\Serialize.
You can navigate this from the left pane.

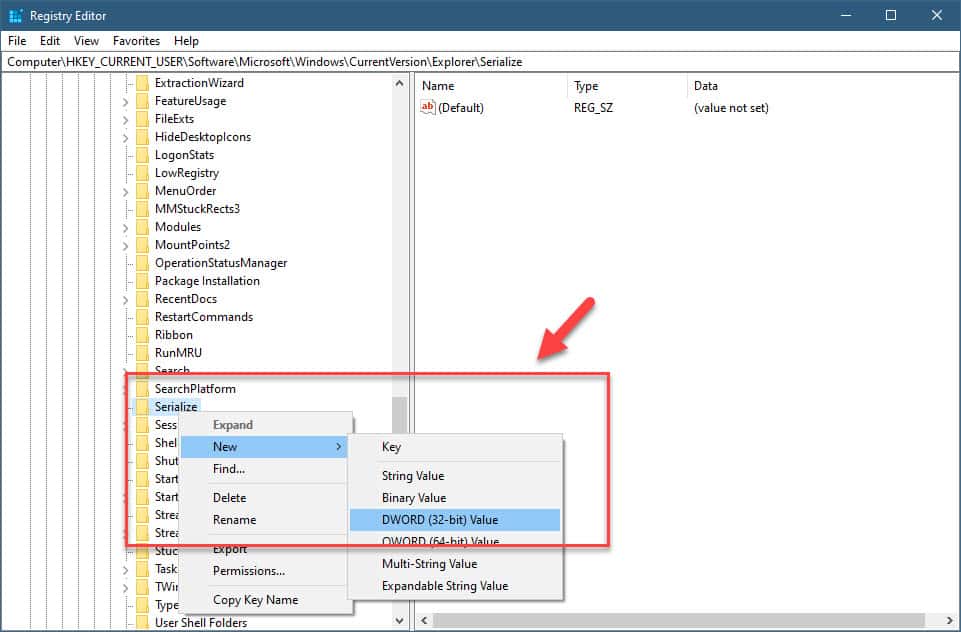
- Right click the Serialize folder and select New > DWORD (32-bit) Value.
You can do this from the left pane.

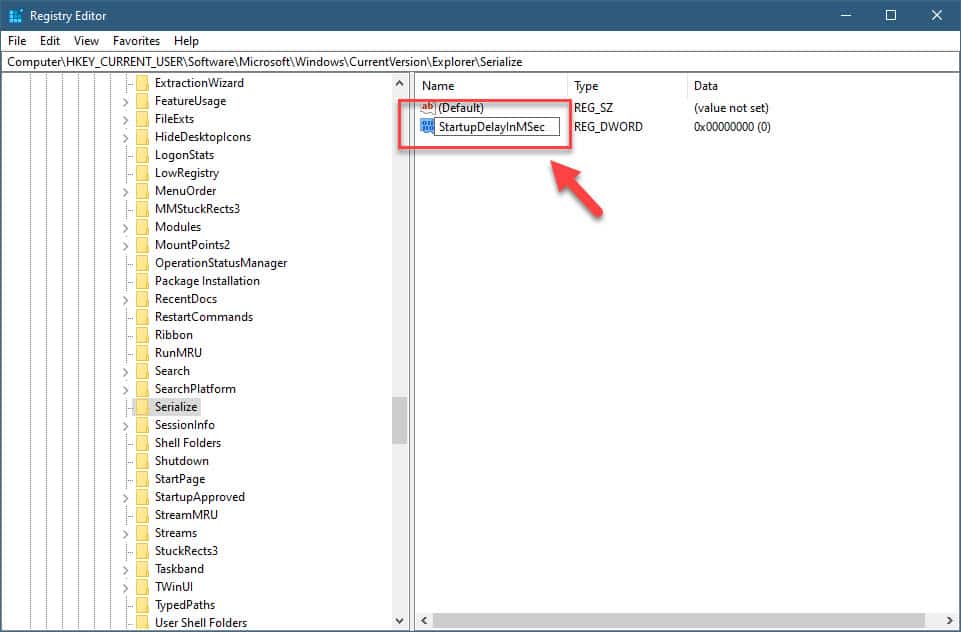
- Right click the new value then select Rename and name it StartupDelayInMSec.
You can do this from the right pane.

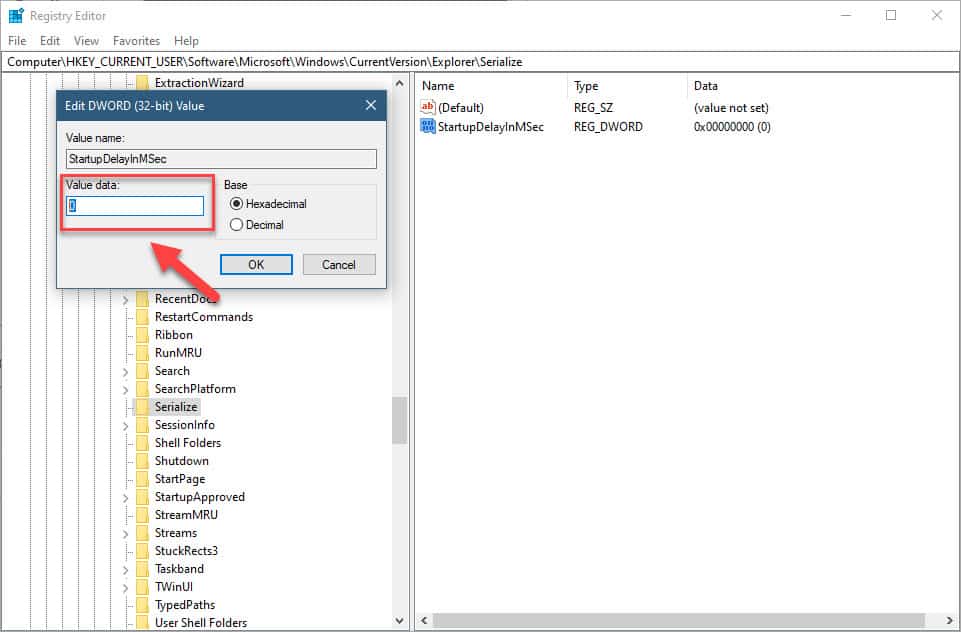
- Double click the DWORD and set the value to 0.
This sets the delay to zero.

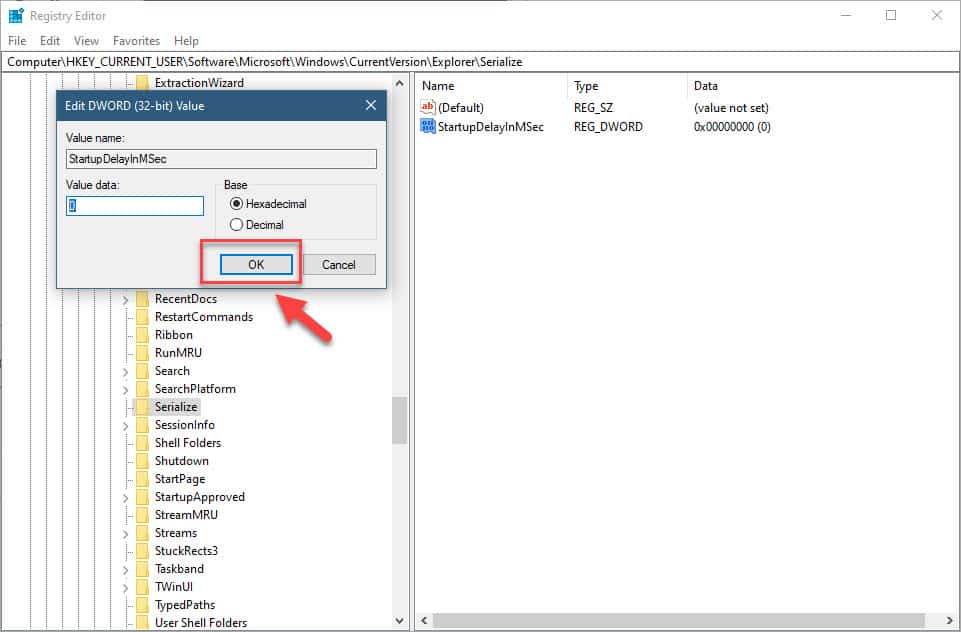
- Press the OK button.
This will save the changes that you made.

After performing the steps listed above you will successfully disable the Windows 10 startup delay.
Having Issues with your computer? Feel free to contact us using this form. We’ll try to help.
