Skype is one of the most popular video conferencing software that’s available in almost any computing platform. It allows users to communicate via video, audio or text using their computer or mobile devices. Although this is a solid performing application there are instances when certain issues can occur. In this latest installment of our troubleshooting series we will tackle the Skype no audio problem.
Skype no sound during call
One of the problems that you might experience with Skype in windows 10 is that you might not hear a sound during a call. This can be caused by various factors which we will try to determine by following the troubleshooting steps listed below.
Method 1: Check the speaker and microphone setting to fix Skype no audio
The first thing you will need to do is to make sure that you are using the correct speaker and microphone for your Skype app.
Time needed: 5 minutes.
Check Skype Audio Settings
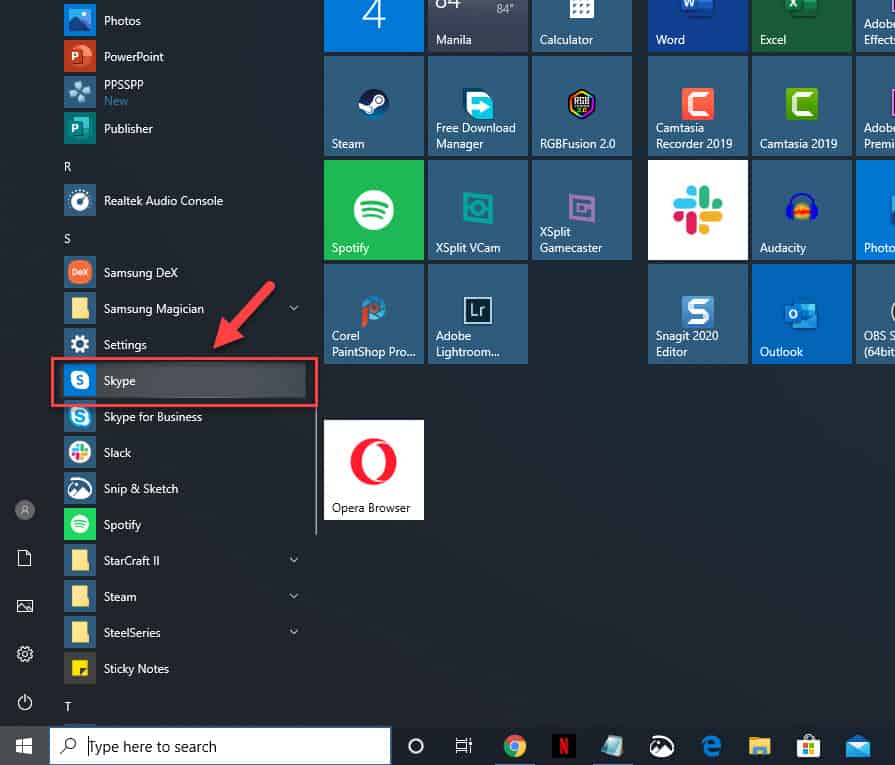
- Open Skype.
You can do this by clicking on its icon from the Start menu list of applications.

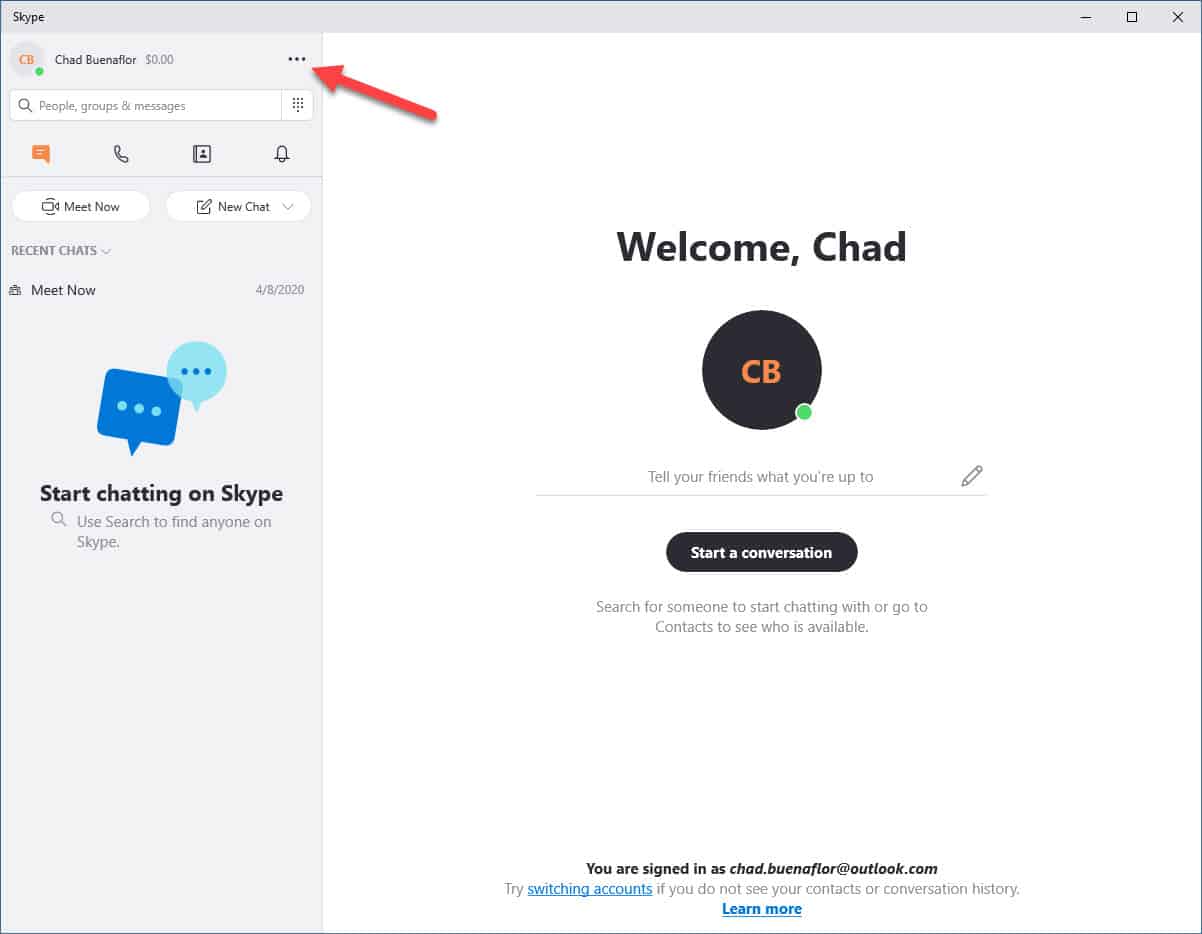
- Click on More.
This is the three horizontal dots located just after your name on the upper left side of the Skype window.

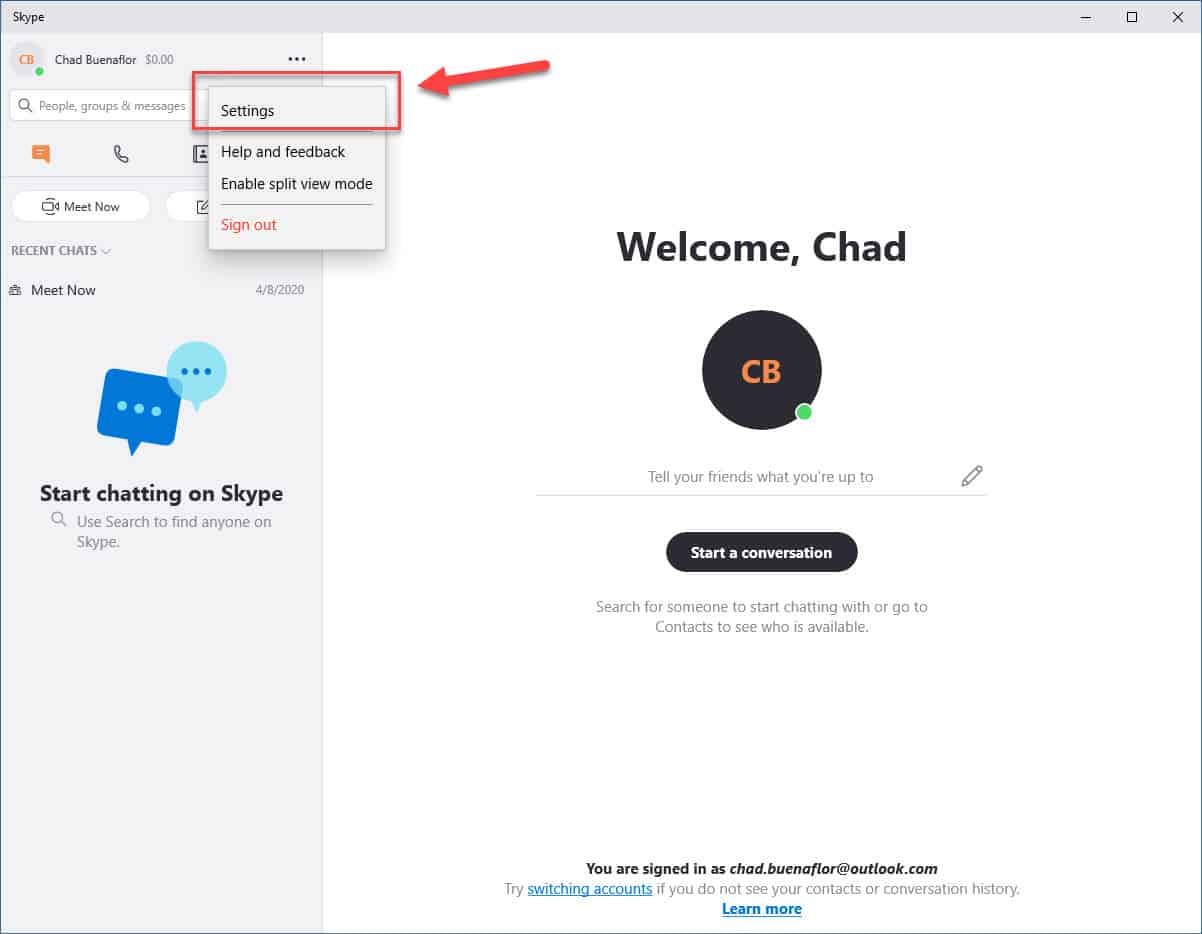
- Click on Settings.
This will open the Settings window.

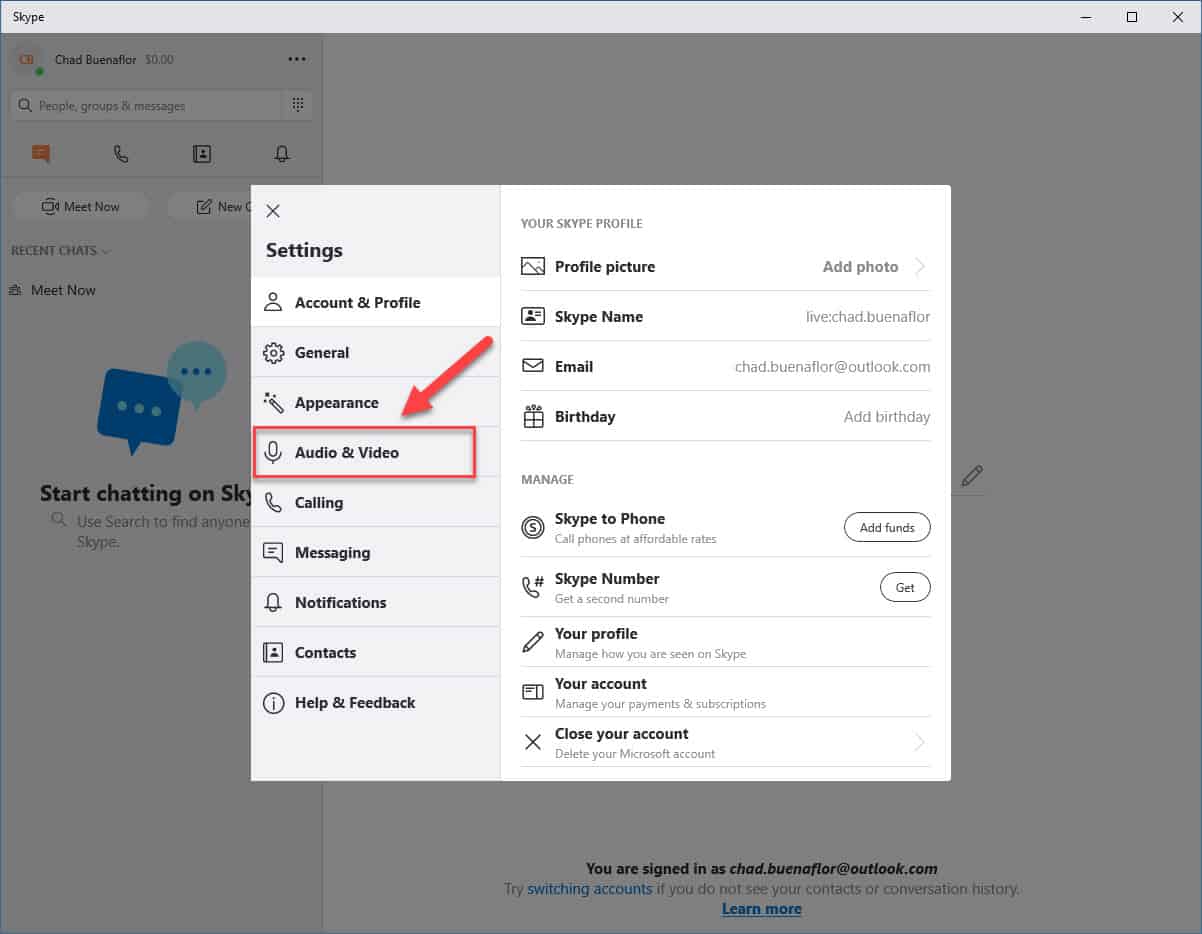
- Click on Audio and Video.
This will open the audio and video settings.

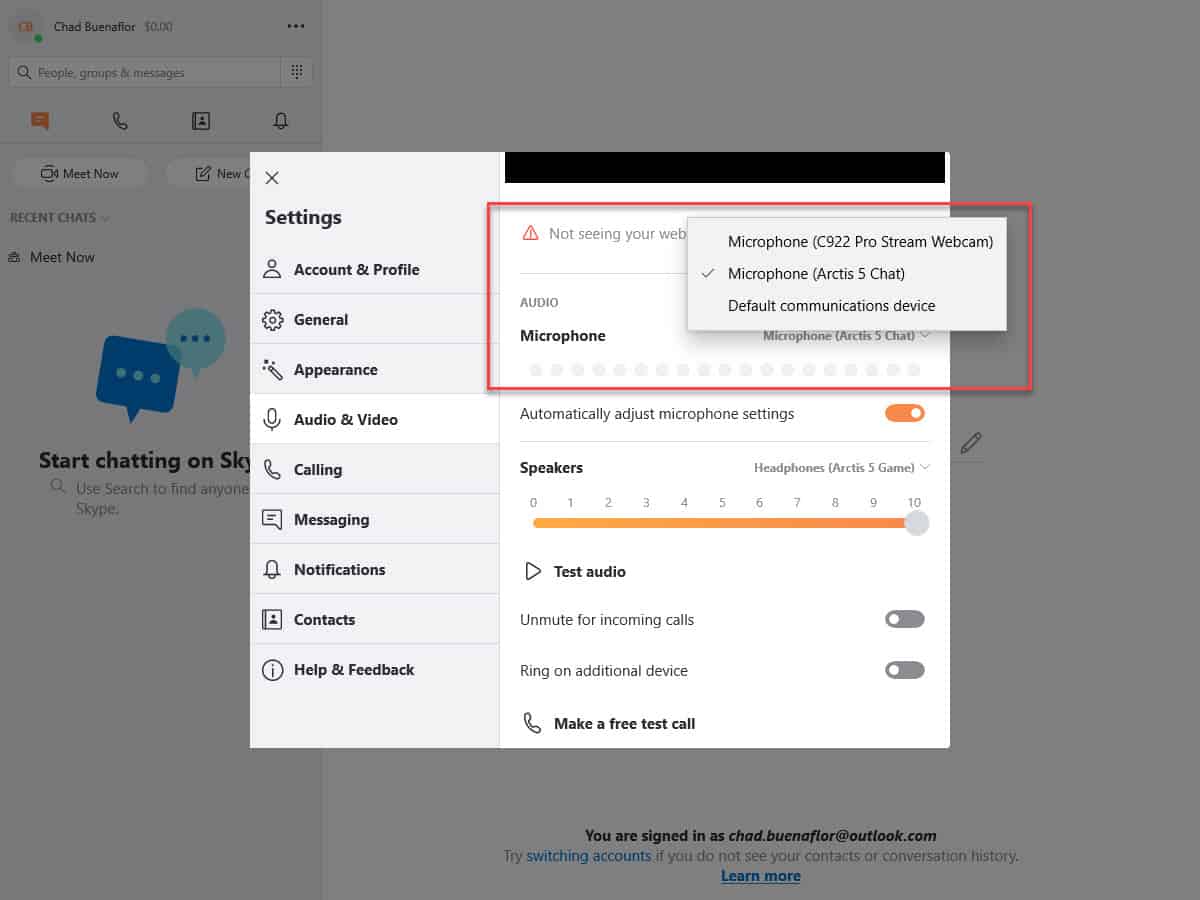
- Select the correct microphone.
You can do this from the microphone drop down box.

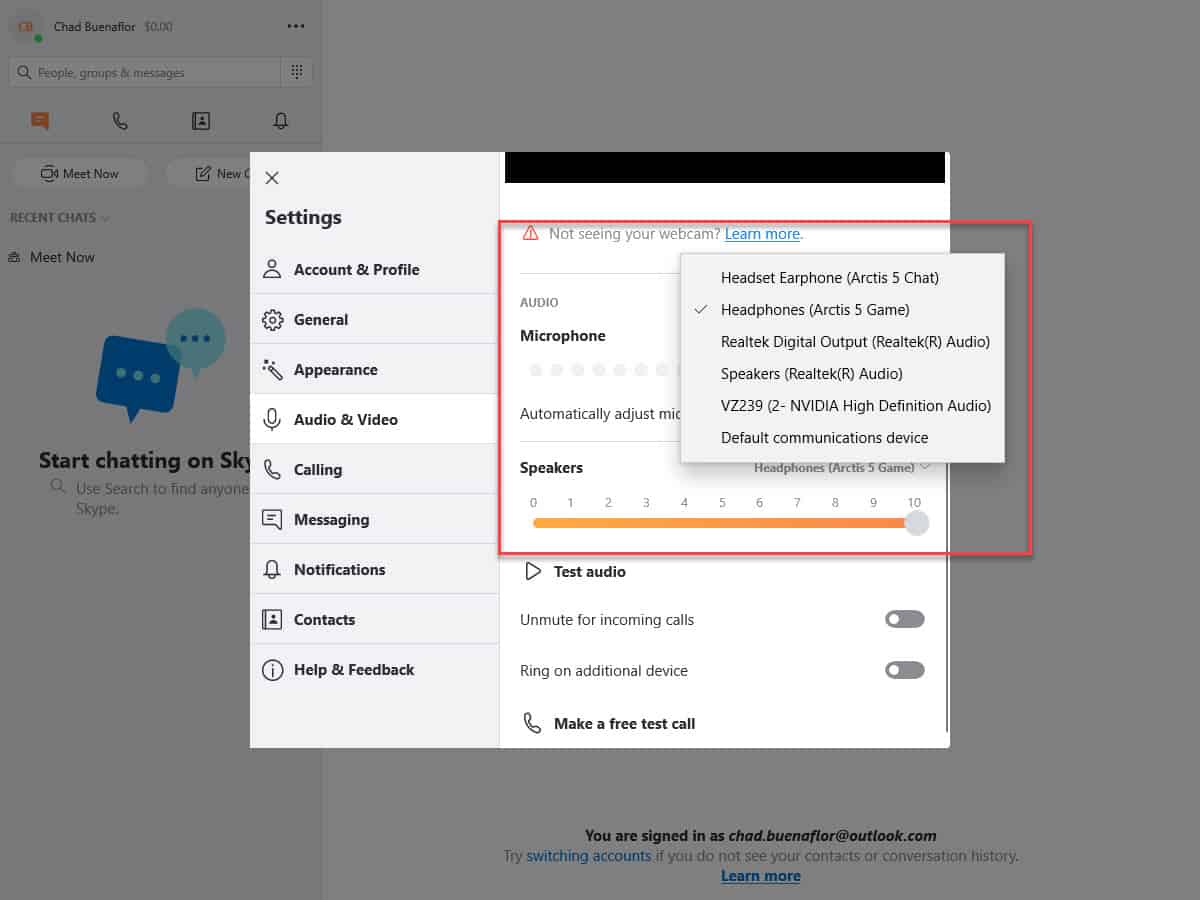
- Select the correct speaker.
This can be done on the speaker drop down box.

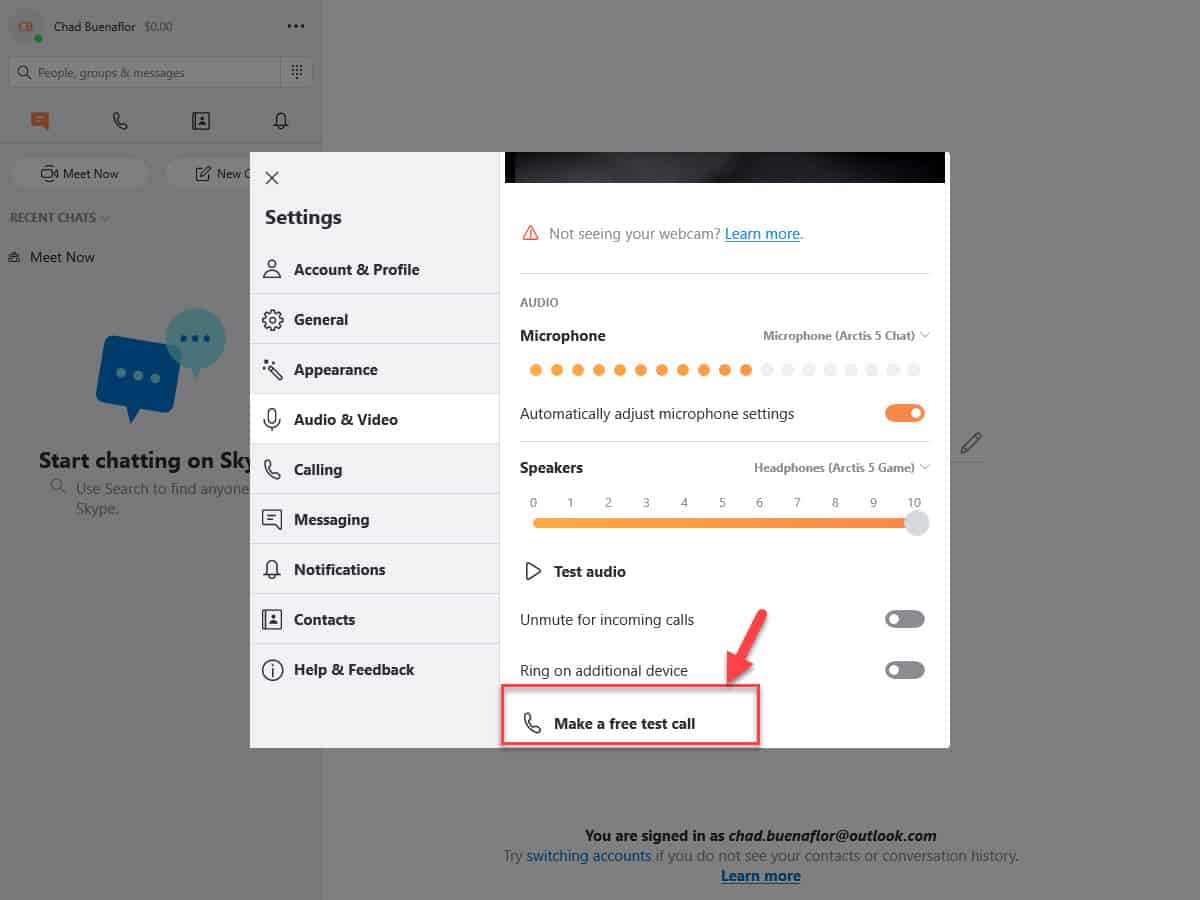
- Click on Make a free test call.
This will allow you to test if the speaker and microphone are working.

Method 2: Allow Skype to access your microphone
There’s a possibility that Skype can’t access your microphone due to a permission setting. Try giving Skype access to the microphone then check if the issue still occurs.
- Click on Start.
- Click on Settings.
- Click on Privacy.
- Click on Microphone. This can be found on the left pane.
- Turn on the switch for “Allow apps to access your microphone”.
Method 3: Run the Windows 10 audio and microphone troubleshooter to fix Skype no audio
Windows 10 has a built-in troubleshooter that can fix most of the common audio related problems. Try using this tool.
- Click on Start.
- Click on Settings.
- Click on Update & Security.
- Click on Troubleshoot. This can be found on the left pane.
- Click on Playing Audio then “Run the troubleshooter”. Follow the on-screen instructions to fix the problem.
- Click on Recording Audio then “Run the troubleshooter”. Follow the on-screen instructions to fix the problem.
After performing the steps listed above you will successfully fix the Skype no audio problem.
Having Issues with your computer? Feel free to contact us using this form. We’ll try to help.
