Is your internet agonizingly slow on your Windows PC? Don’t worry – there are several easy fixes you can try to speed up your internet connection. In this article, we’ll walk through the top methods on how to fix slow internet issues on Windows 10 and 11.

1. Disable Peer-to-Peer Updates
Peer-to-Peer updates allow your computer to share Windows updates with other PCs over the internet. This can eat up your bandwidth and cause slow speeds.
To disable Peer-to-Peer updates:
- Open Settings and go to Windows Update > Advanced options
- Turn off ‘Allow downloads from other PCs’
Disabling Peer-to-Peer updates prevents your bandwidth from being consumed by distributing updates to others. This often provides an immediate boost in internet speeds.
2. Adjust Internet Bandwidth Settings
By default, Windows reserves 20% of your internet bandwidth for system activities like updates. You can remove this bandwidth limit to free up more of your connection speed.

Follow these steps:
- Open the Run command (Win + R) and type ‘gpedit.msc’
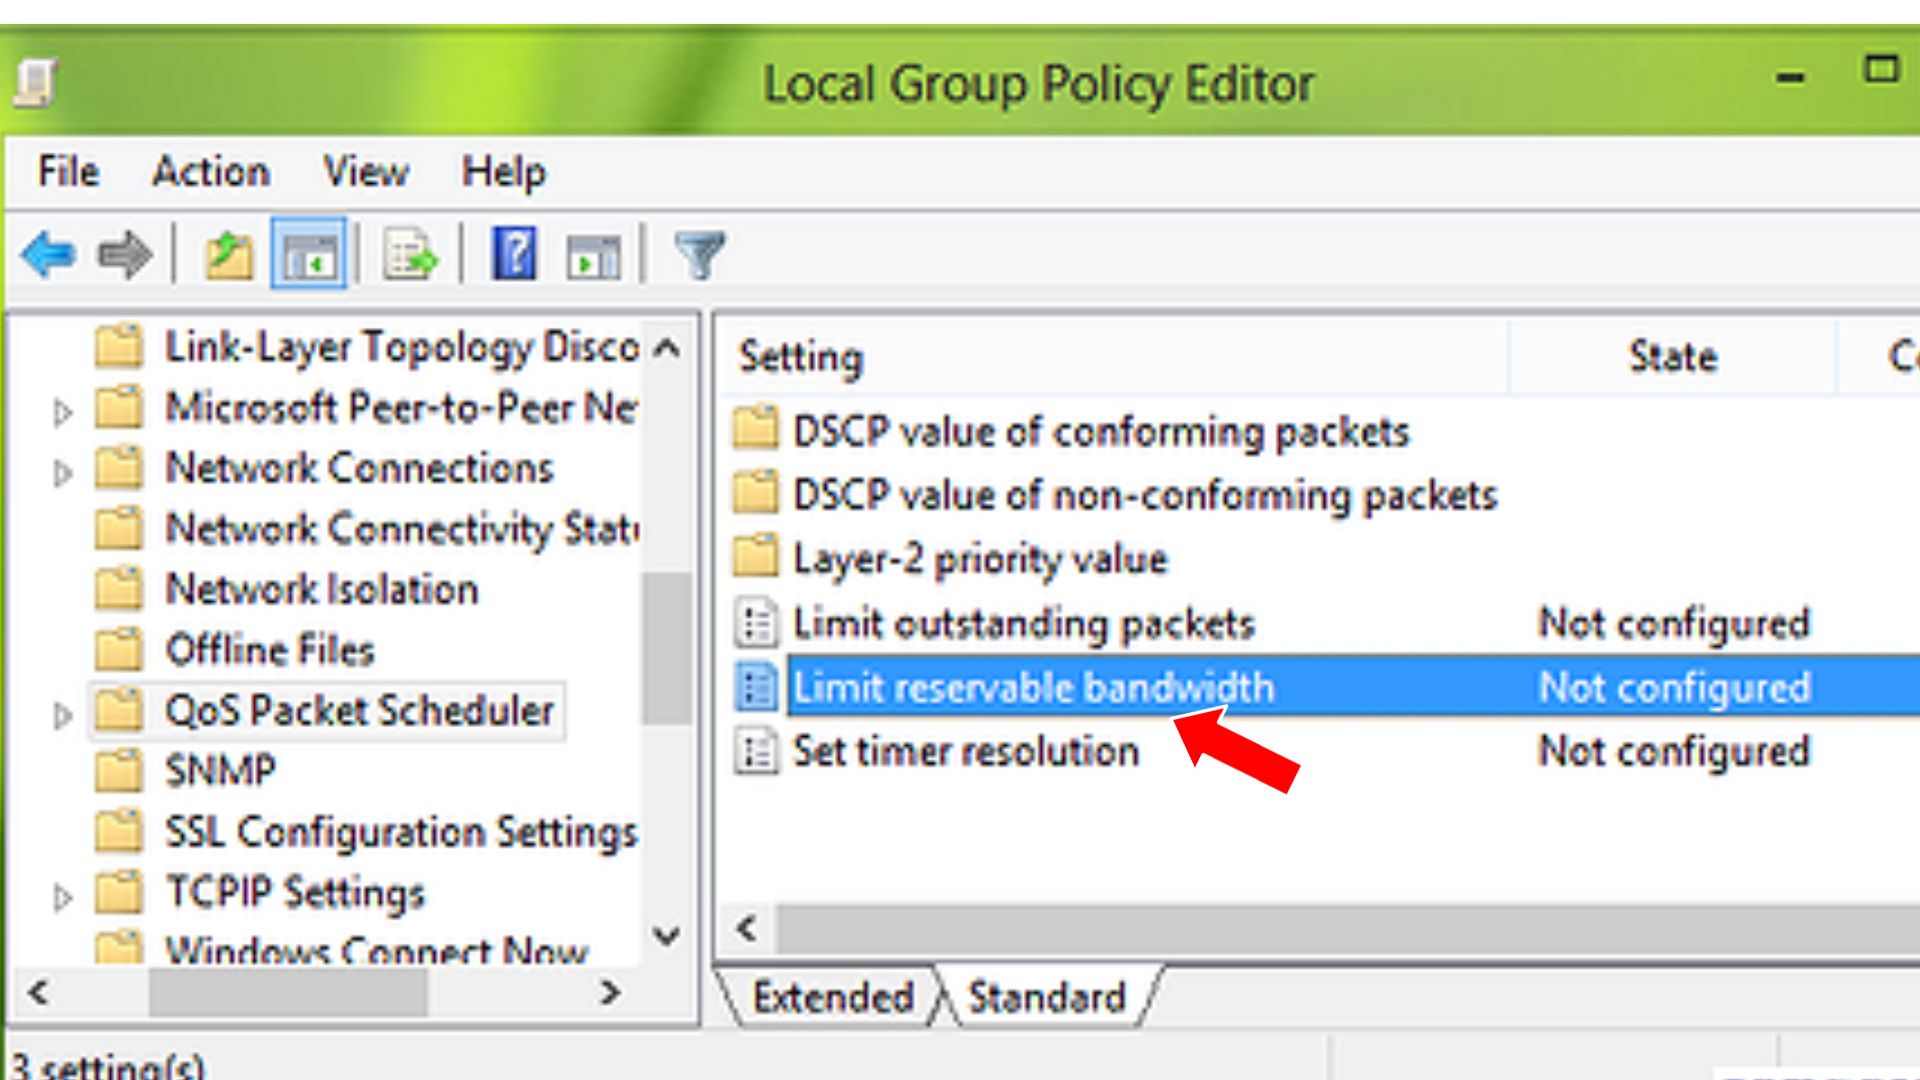
- Go to Computer Configuration > Administrative Templates > Network > QoS Packet Scheduler
- Double click ‘Limit reservable bandwidth’ and set it to Disabled
- Set the ‘Bandwidth limit’ to 0 to remove the reserved bandwidth completely
Saving these changes and restarting your PC will stop Windows from reserving a chunk of your bandwidth, giving you full access to your maximum speeds.
3. Update Network Drivers
Outdated network adapter drivers can hamper performance and slow down your internet connection. Keeping your drivers updated is an easy way to fix internet issues.

To update your network drivers:
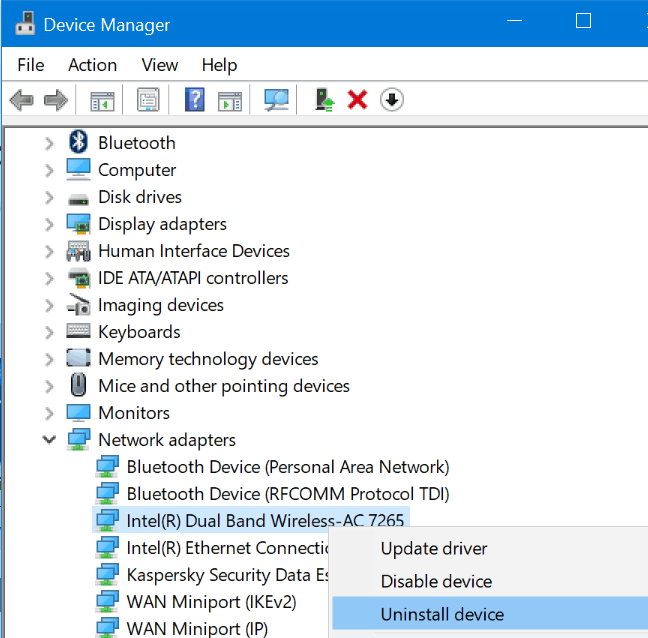
- Open Device Manager (right-click the Start button)
- Expand ‘Network adapters’
- Right-click your network adapter and select ‘Update driver’
- Choose to automatically search for updated drivers
Allow the driver update to complete, then restart your PC. This will install the latest driver tailored for your network adapter hardware.
4. Disable Background Apps
Apps running in the background can silently consume your internet bandwidth and slow down your connection. Identify and disable any unnecessary background apps:
- Open Task Manager (CTRL + Shift + Esc)
- Go to the Startup tab
- Right-click apps you don’t need and select ‘Disable’
This prevents background apps from starting up and using bandwidth when you boot your PC. You can also monitor bandwidth usage in real-time in the Processes tab of Task Manager.
5. Disable Windows Auto-Tuning
Windows Auto-Tuning is designed to optimize network data transfers but sometimes impedes performance. You can disable Auto-Tuning as follows:
- Open an elevated Command Prompt
- Type ‘netsh int tcp show global’ and check if Auto-Tuning is enabled
- Enter ‘netsh int tcp set global autotuninglevel=disabled’ to turn off Auto-Tuning
After a restart, your network traffic will no longer be subject to any Auto-Tuning adjustments. For some configurations, this results in faster internet speeds.
Slow internet speeds don’t have to be tolerated. Try out these fixes to resolve internet issues and enjoy faster browsing on your Windows PC. Let us know which methods worked best for you!