How To Fix Steam Client Goes Offline Randomly Issue

Steam is a popular digital distribution platform that allows anyone with an account to download their favorite PC games. It is currently the largest digital games distributor with over a billion registered accounts and 90 million active users. Although this is a solid performing platform there are instances when certain issues can occur which we will be addressing today. In this latest installment of our troubleshooting series we will tackle the Steam client goes offline randomly issue.

Fixing Steam going offline randomly problem

Before performing the recommended troubleshooting steps for the  Steam client goes offline randomly issue I suggest that you try restarting your computer first. This will refresh the operating system as well as remove corrupt temporary data and is quite effective in fixing most software related issues.

There are several factors that can cause this particular problem ranging from the client being blocked by the Firewall to interference from antivirus software. Listed below are the troubleshooting steps you need to do to fix the problem.

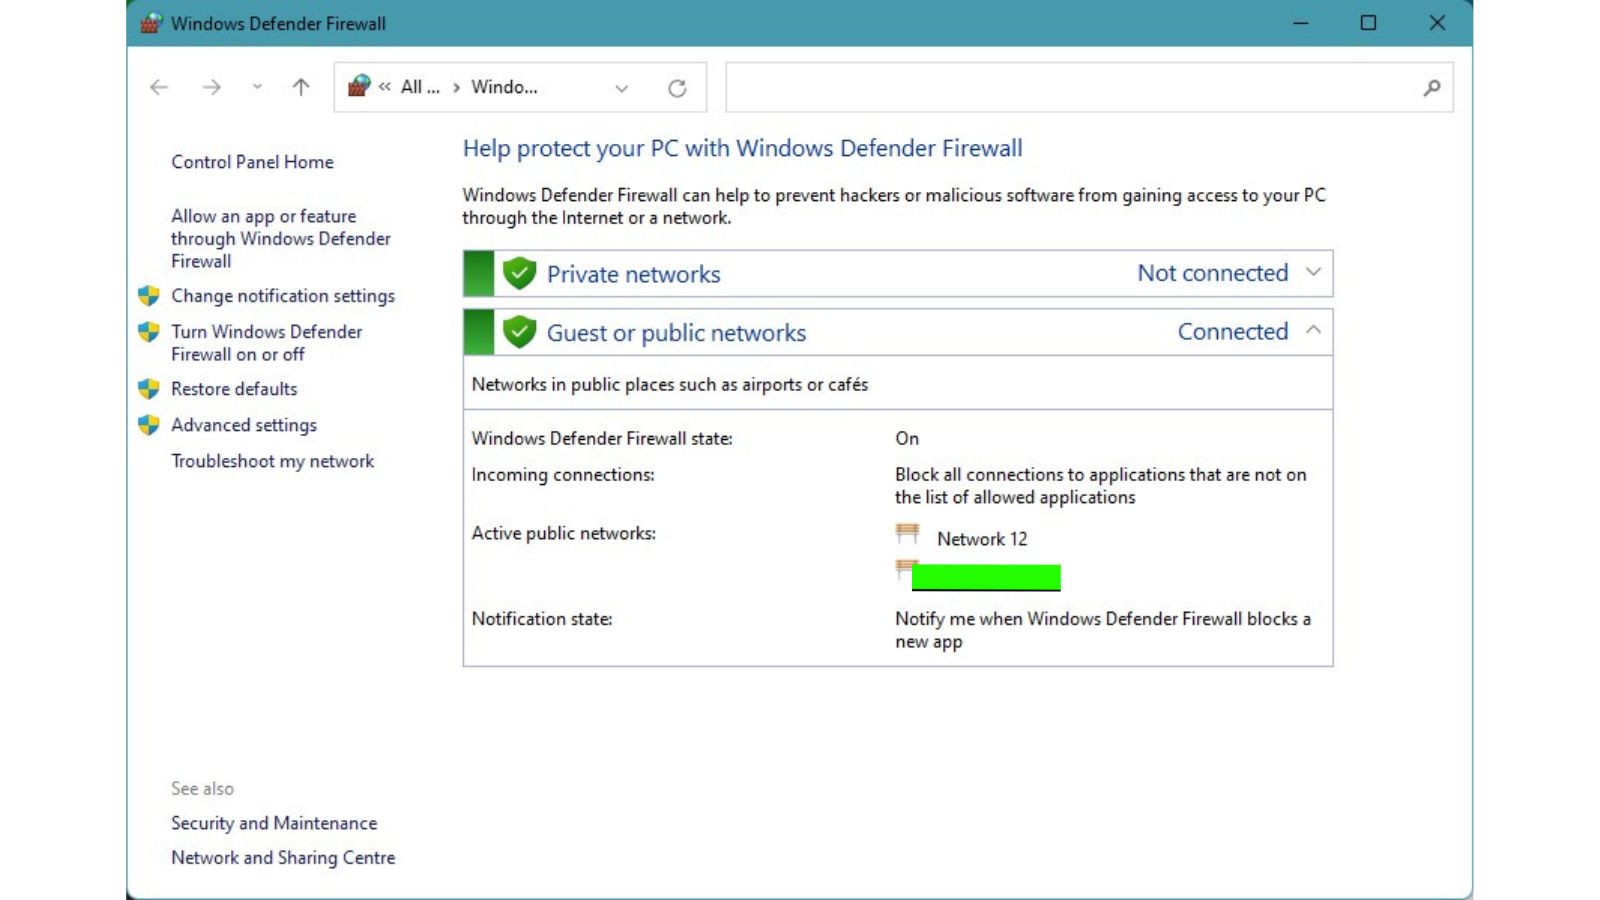
Allow Steam through the firewall

One of the main reasons why this issue occurs is because it is being blocked by the Firewall. Make sure to give access to the Steam client to communicate on the private and public networks.

  • Click on the Start button then click on Settings
  • Click on Update & Security then click on Windows Security which can be found on the left side of the window.
  • Click on Firewall and Network Protection
  • Click on Allow an app through Windows Firewall.
  • Click Change settings > find the Steam app and make sure it has both Public and Private boxes ticked.

Check if the client going offline randomly issue still occurs.

Turn off the antivirus

Sometimes the problem can be caused by the antivirus software installed in your computer. To eliminate this possibility you should try to disable the antivirus.

Sometimes the problem can be caused by the interference of the antivirus software. You can check if this is what’s causing the problem by turning off your computer security software.

Avast

  • Right-click on the avast! icon in the system tray. Select avast! shields control and there will be options to disable avast for 10 minutes, 1 hour, until the computer is restarted or permanently.

Bitdefender

  • Double click on the system icon for Bit Defender.
  • When the Bit Defender window appears, move the mouse arrow to the left side and click >> Virus Shield.
  • Move mouse arrow to the black check by Virus Shield is enabled and click.
  • The black works will change to red, >> Virus Shield is disabled.
  • Move mouse arrow to the top right corner and click the down arrows.
  • Bit Defender is now inactive.
  • To enable Bit Defender, do the same steps except click to enable.

Microsoft Security Essentials

  • Right-click on the MSE icon in the system tray and choose Open.
  • Click the Settings tab, then click Real Time Protection.
  • Uncheck the box next to “Turn on real time protection”.
  • Click the “Save changes” button.
  • Exit MSE when done.

ESET

  • Double click on the system tray icon to open the main application window.
  • Or via Start >> All Programs >> ESET >> ESET Smart Security.
  • Click Setup >> Antivirus and antispyware >> Temporarily disable Antivirus and Antispyware protection.
  • When prompted to confirm temporarily disable select Yes.
  • Note: Protection will be automatically started after a system reboot.

McAfee

  • Navigate to the system tray on the bottom right hand corner and look for the McAfee icon.
  • Right-click it -> chose “Exit.”
  • A popup will warn that protection will now be disabled. Click on “Yes” to disable the Antivirus guard.

In case the issue does not occur when the antivirus software is turned off then you should add Steam to the exception list.

Avira

  • Go to your taskbar on the bottom right of your screen and press the tiny umbrella you see there.
  • A window named Professional Security will open. Click on the option of “Extras” located on the top and a drop down menu will appear. From the drop down menu, click on Configurations.
  • Select PC Protection and then navigate to Scan. In the Scan, you will be given a number of different options. Select Exceptions and you will see a dialogue box.
  • In the dialogue box, you have to enter the address/pathway to your Steam directory so it can be excluded. You can press the browse button and through the file explorer, select the Steam directory to add it to the list of exceptions. Once you have selected the folder, press OK and click ADD. Steam should now be added to your exceptions list.

Bitdefender

  • Open Bitdefender and go to the Protection Window by clicking the Shield Icon.
  • Click on the link which says View Modules.
  • Click on the Settings icon which you can see on the upper right corner of the antivirus.
  • Go to the Exclusions tab present in the window.
  • Click on “List of files and folders excluded from scanning”.
  • Click on the ADD button. Navigate to your Steam directory and select the folder named Steam to excluded it from the scanning process. You should also select the Both options before you add an exception
  • Click ADD and Save changes.
  • You can also add Steam.exe in the exceptions list by clicking on “List of processes excluded from scanning”. When the window pops up, you can navigate to Steam.exe which is present in your main Steam directory. Select both and save changes.

Avast

  • Open the Avast interface.
  • Click on Settings found at the bottom left corner of the screen.
  • Go to General and scroll down the options until you find Exclusions.
  • Expand the section and you will see a dialogue where you can add global exceptions. Navigate to your Steam directory using the browse option. The default location for Steam is (C:\Program Files\Steam). If you installed Steam another directory, you can also browse to that.
  • Once you have selected the Steam folder, click on ADD found at the bottom left side of the screen. Press OK and Steam is now added to global exceptions of Avast antivirus.

Windows Defender

  • Click Windows button and in the search bar type “Windows defender”. Open “Windows Defender Security Center”
  • You will find a list of options available in the new window. Select the option “Virus and threat protection”.
  • Navigate to Virus and Threat Protection Settings. Windows may prompt you to allow an administrator access to use this feature. If so, press YES.
  • Look for the window which says “Add or remove exclusions”. Click it and you will be navigated to a menu where you can add exclusions. You can exclude folders, extensions, and even files. In this case, we will exclude the whole Steam folder which is located in the directory you downloaded it.
  • Click on the option which says “Exclude a folder” and navigate to your Steam directory. The default location for your steam folder should be “C:\Program Files (x86)\Steam”. Once you reach the location select the folder and save changes.

Malwarebytes

  • Open your Malwarebytes window by clicking on the icon in the taskbar located at the bottom right side of the screen.
  • Click on the Malware Exclusions tab located on the left side of the window.
  • In this tab, you find an option which says “Add folder”. Click it and you will be navigated to File Explorer from where you can select your Steam directory easily. The default location for your steam folder should be “C:\Program Files (x86)\Steam”. Once you reach the location select the folder and save changes.

Norton

  • Open your Norton application using the icon present in your task bar at the bottom right of your Windows screen.
  • Go to its Settings.
  • Select the tab of Scams and Risks. You will be presented with a number of options. Look for Exclusions/Low Risks at the near bottom. Click it to expand. On the “Items to Exclude from scans” click the Configure button in front of it.
  • You can add the Steam directory to the list of exclusions. Click ADD Folders and navigate to your Steam directory. The default location for your steam folder should be “C:\Program Files (x86)\Steam”. Once you reach the location select the folder and save changes.

Kaspersky

  • Open Kaspersky AV from the icon present in your taskbar at the bottom right of the screen.
  • G to the Settings menu.
  • In the Settings, select the tab of Additional and select the tab of Threats and Exclusions from the list of options given.
  • In the Threats and Exclusion settings, click on the Configure Exclusions present in the middle of the screen.
  • In the Exclusions window, select the option of Add present in the bottom right of the screen.
  • Now navigate to the Steam directory using the Browse button. The default location for your steam folder should be “C:\Program Files (x86)\Steam”. Once you reach the location select the folder and save changes.

ESET NOD 32

  • Open the ESET product using the icon present on your taskbar at the bottom right.
  • Select the Setup tab and from the list of options, select Computer Protection.
  • Select the gear icon present next to “Real-time file system protection”. After clicking it, you will get an option regarding edit exclusions. Click it.
  • Click on the icon of Add and then browse to your Steam directory. The default location for your steam folder should be “C:\Program Files (x86)\Steam”. Once you reach the location select the folder and save changes.

McAfee

  • Open McAfee Antivirus by clicking on its icon present on the toolbar on the bottom right side of your Windows
  • Click on Manage Security.
  • Select the option of Schedule and run scans option present in the box of Virus and Spyware Protection.
  • Select the option of Schedules scans from the list of options that follow. A new window will open and from there you will see the ADD button present under the tab of Excluded Files and Folders. Select Steam directory after clicking ADD through the file explorer. The default location for your steam folder should be “C:\Program Files (x86)\Steam”. Once you reach the location select the folder and save changes.

Check if the going  offline randomly issue still occurs.

Check your internet connection

There’s a possibility that the problem is caused by an intermittent connection. You can check if you are currently experiencing an intermittent connection by following the steps listed below.

  • Open a Command Prompt window.
  • Type in the command prompt window “ping google.com -t
  • If you are getting packet losses in the result then you are experiencing an intermittent internet connection and this could be what’s causing the problem.

Perform the basic troubleshooting steps for intermittent connection. You should also contact your ISP regarding this connection problem.

Reinstall the Steam client

If the above steps fails to fix the problem then the best thing that you can do right now is to uninstall then reinstall Steam.

Backup your game

  • Open your Steam PC client by double-clicking it on the Desktop.
  • Click the Steam button at the top right part of the window and choose Settings from the dropdown menu. Navigate to the Downloads tab in the Settings window and click on Steam Library Folders.
  • Here you should see the full list of all libraries you currently use and the folders you should look for when backing up. Since the default folder is C >> Program Files (x86) >> Steam >> steamapps.
  • Go to the location above by clicking to open any folder or the File Explorer and clicking This PC or My Computer at the right pane. After that, open the location above and find the “steamapps” folder.
  • Right-click the folder and choose the Copy option from the context menu. Go to any location outside the Steam folder on your computer and paste the folder by right-clicking and choosing Paste. The best location would be your Desktop.
  • Repeat the same process for all library folders. After uninstalling Steam, you will have to add the folders again as the Steam library folders as you did the first time.

Uninstall Steam

  • Log in with an admin account on your computer.
  • Click on the Start button then on the gear icon in order to open settings if you are using windows 10.
  • Click on Apps which should immediately open a list of all installed programs on your PC.
  • Locate the Steam entry on the list and click on it once. Click on the Uninstall button above the list and confirm any dialog boxes which may appear. Follow the instructions on-screen in order to uninstall Steam and Restart your computer afterwards.
  • Open the official Steam website then download the Steam installer. Follow the instructions on how to install Steam.

Check if the Steam  goes offline randomly issue still occurs.