Windows 10 is currently the most popular operating system in the world today. It was first released in 2015 and ever since then has undergone several updates. You will notice that the first time you run a computer running on this OS it will ask you to login to your Microsoft account. If you don’t want to use this online account then here is how you can switch to local account in windows 10.
Using a local account in Windows 10
A local account is a combination of a username and a password which will allow you to login to your computer. It allows you to access your computer resources, customize various settings, and install desktop applications.
Advantages of using a local account
There are several reasons why you will want to choose a local account over a Microsoft account on your computer.
- It is relatively more secure as you can create a complex password that will only work for one computer.
- It is more private as your computer settings are not transmitted to the Microsoft servers.
- Does not need internet connectivity to retrieve your user settings and preferences.
- Your email address is kept private as you can assign a custom login name.
Switch to local account from Settings
You can choose to use a local account instead of a Microsoft account from the Windows 10 settings.
Time needed: 5 minutes.
Using a Local account in Windows 10
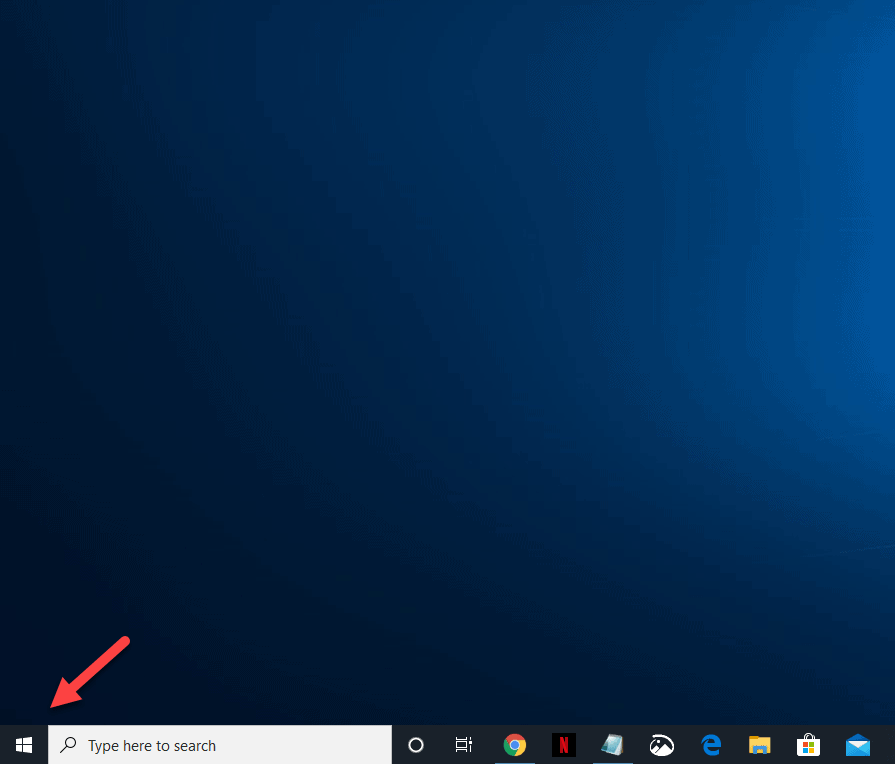
- Click on the Start button.
This is located on the lower left side of the screen.

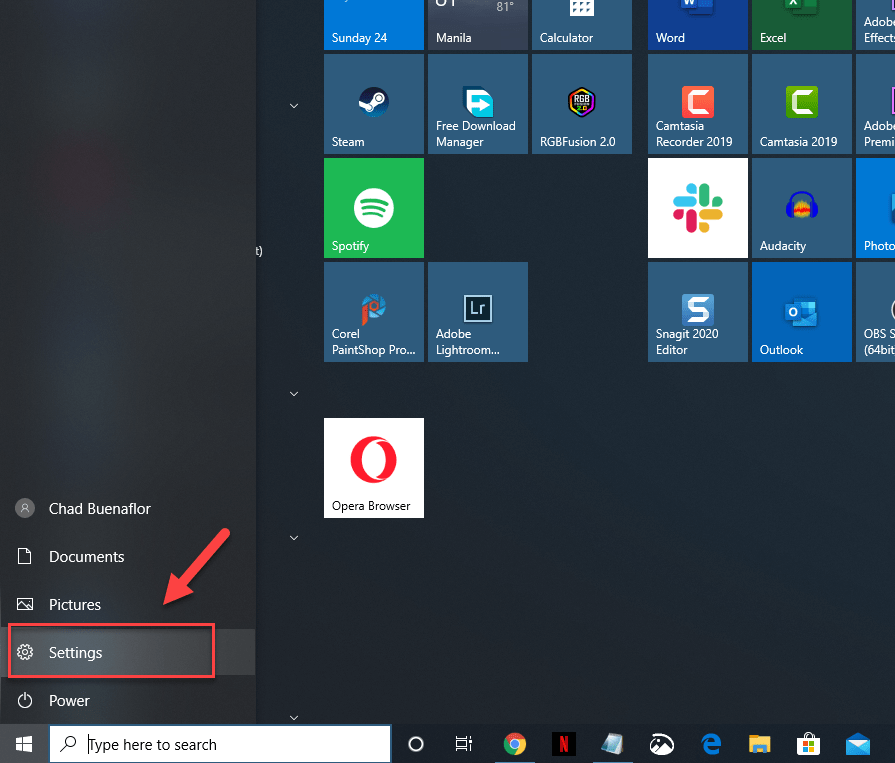
- Click on Settings.
This will open the Settings window.

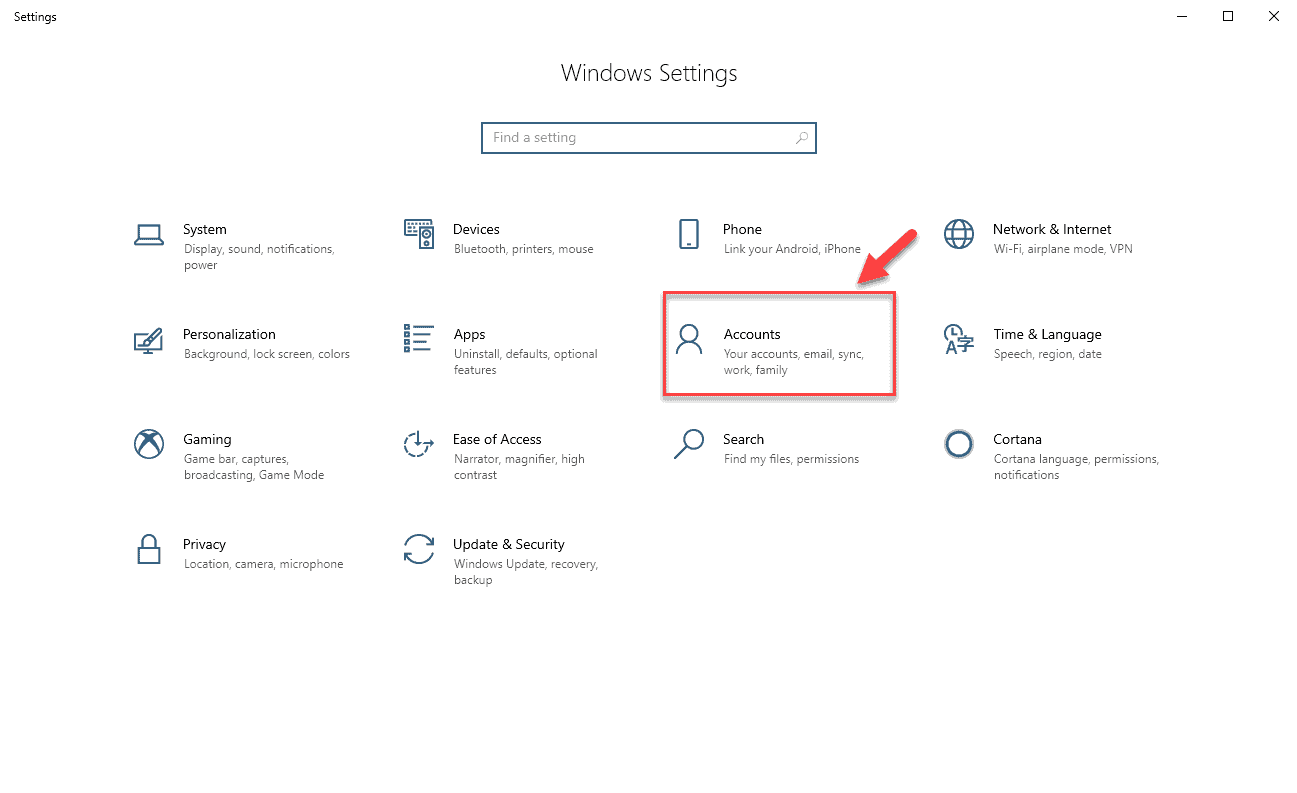
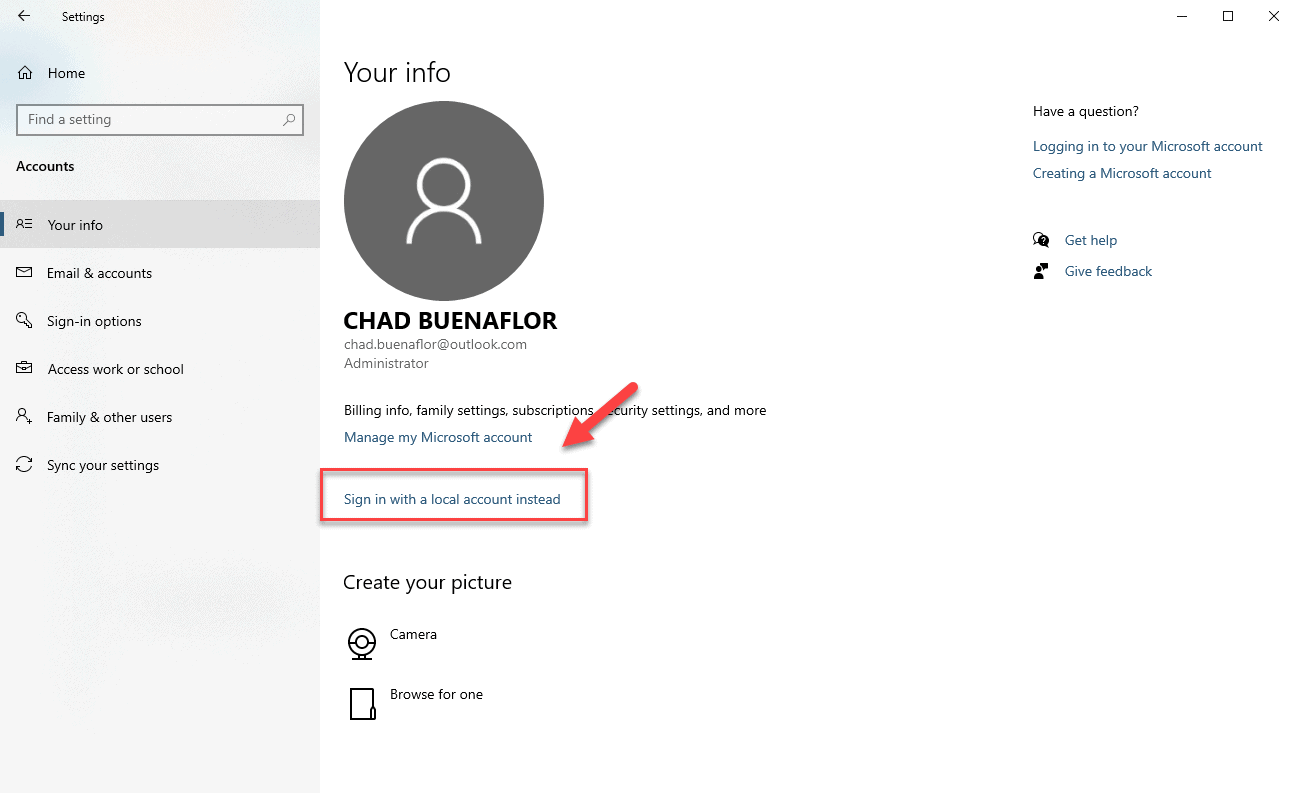
- Click on Accounts.
This opens your info screen.

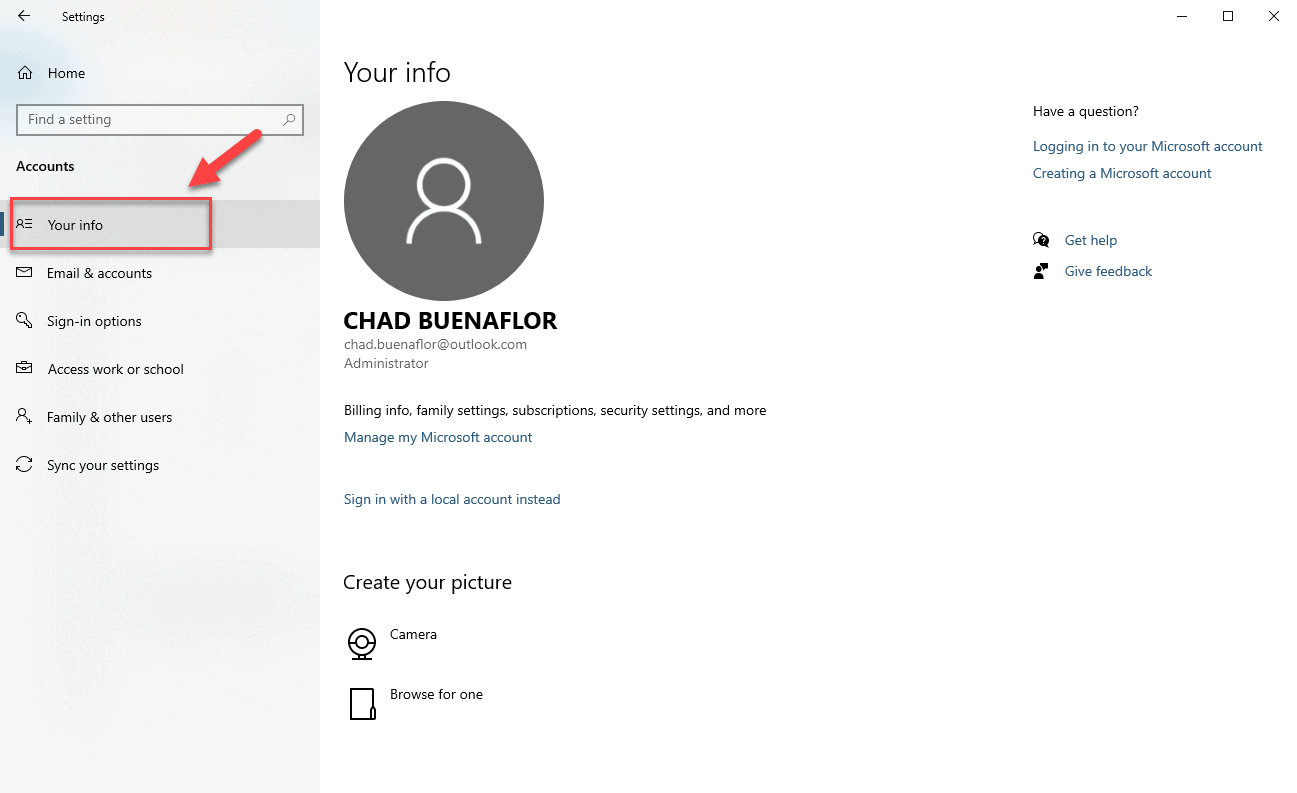
- Click on Your Info.
This is located on the left pane.

- Click on Sign in with a local account instead.
This is located on the right pane.

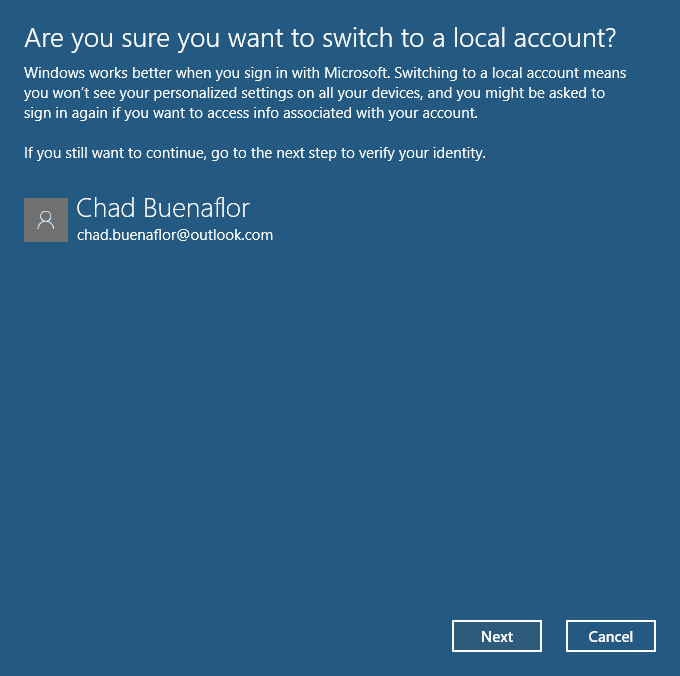
- Click on Next.
The computer will verify if you want to proceed with using a local account.

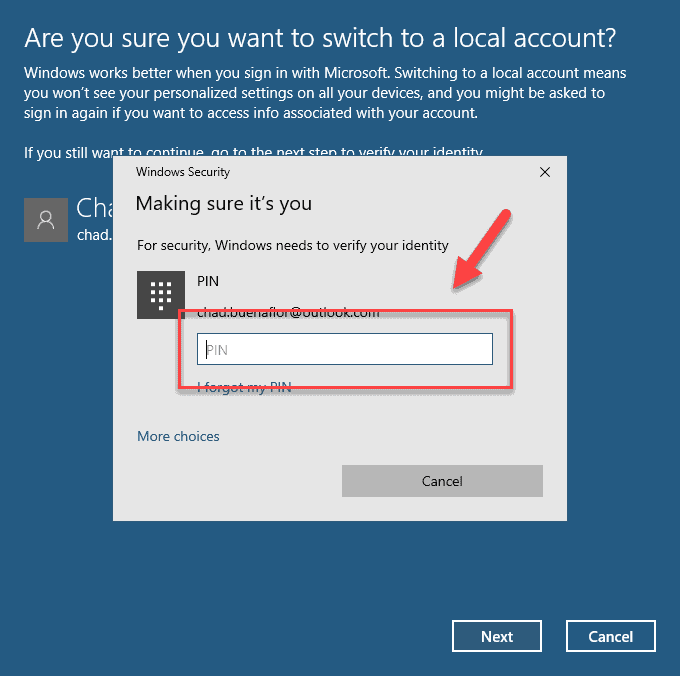
- Type your password or PIN.
This will verify your identity.

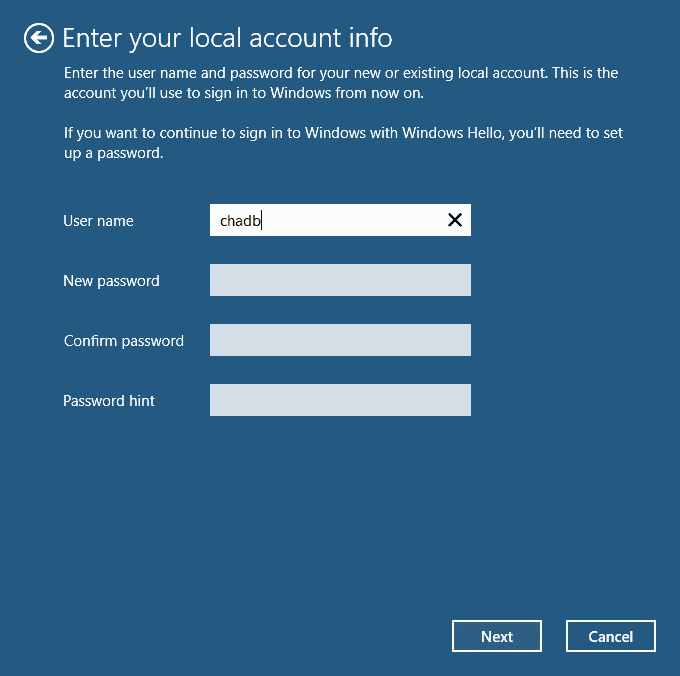
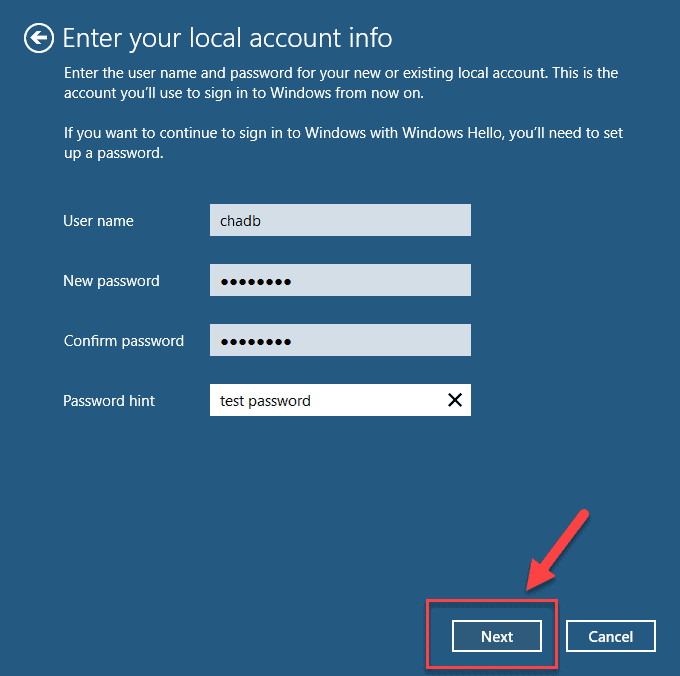
- Enter your local account information.
You need to enter the preferred username and password. You will need to confirm the password and create a password hint as well.

- Click on Next.
This will accept the changes you made.

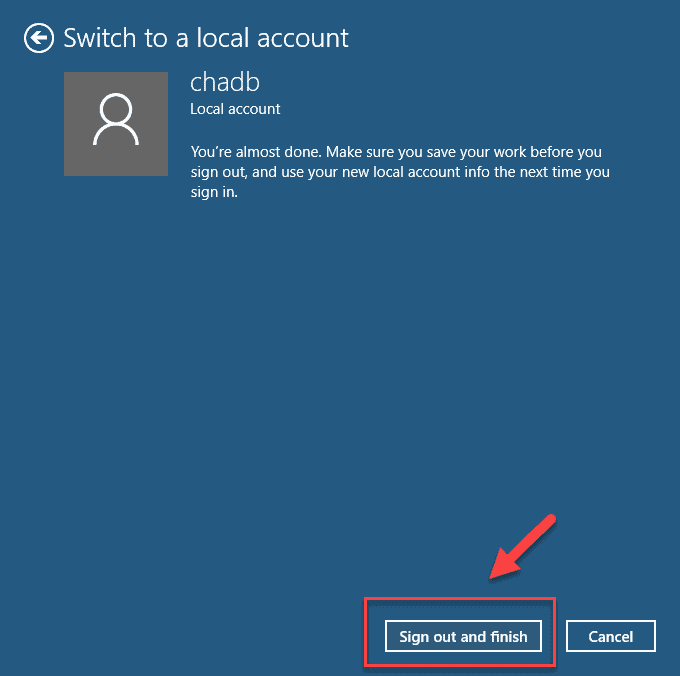
- Click the Sign out and finish button.
This will save the changes that you made.

After performing the steps listed above you will successfully switch to local account in Windows 10.
Having Issues with your computer? Feel free to contact us using this form. We’ll try to help.
