Windows 10 is considered as the most stable and secure version of the Windows operating system to date. It’s not perfect though so expect to experience some issues with it. One such issue is the Kernel power event 41 error. This occurs when the computer shuts down or restarts unexpectedly and is usually caused by several factors. In this latest installment of our troubleshooting series we will show you how to fix the Kernel power event 41 error in windows 10.
Fix Kernel power 41 error in Windows 10
This particular issue occurs when the hardware reports loss of power or fluctuation causing the computer to restart. It’s usually a sign of a faulty power supply unit or power input. Before performing the recommended troubleshooting steps listed below make sure to perform these initial steps. After performing each step proceed with checking if the problem still occurs.
- Make sure that all power cables, cables from power supply into motherboard and GPU are all in place and tight.
- Try to use a different cable between power supply and wall socket. you should also plug the computer on a different wall socket.
- Try to swap any UPS, surge protectors, extension leads or multi-plugs.
- Remove all extra drives, USB devices (aside from keyboard and mouse) and anything aside from critical components you have drawing power from the computer.
- Disable any overclocking done on your computer.
Are you still experiencing the problem? Here’s what to do next.
Set power setting to maximum performance
Since this is a power related problem then you should make sure that the computer power setting is set to maximum performance.
Time needed: 3 minutes.
Maximum performance power setting
- Click on the Start button.
This is located on the lower left side of the screen.

- Click on Settings.
This will open the Settings window.

- Click on System.
This is usually the first choice on the upper left side of the Settings window.

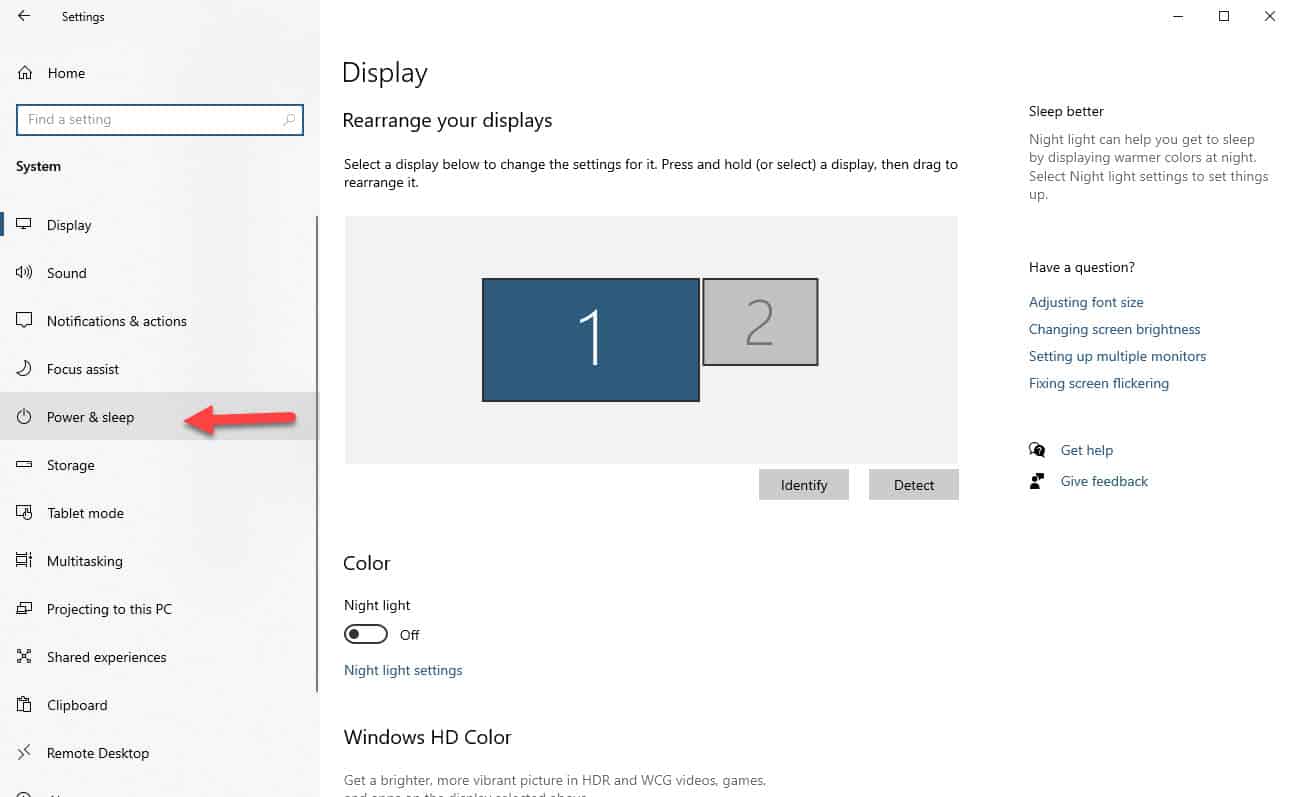
- Click on Power & Sleep.
This can be found on the left pane.

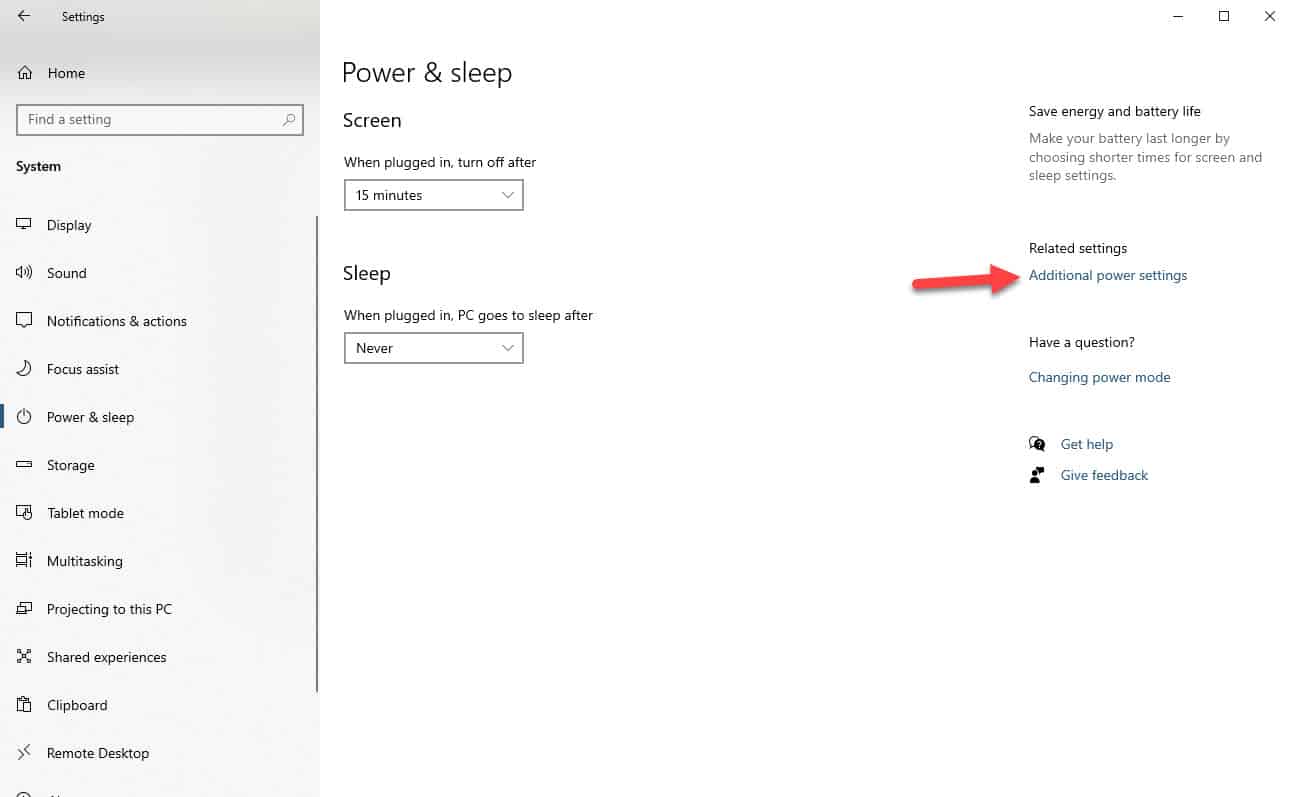
- Click on Additional power settings.
This can be found on the upper right pane.

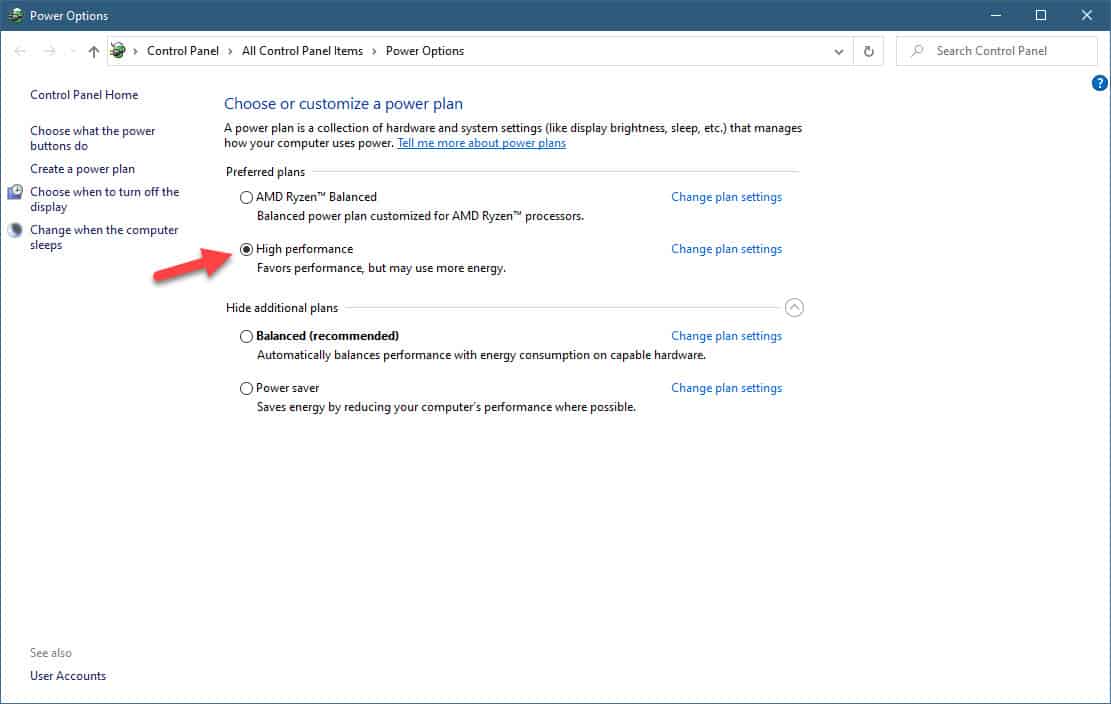
- On the preferred plans choose High Performance.
This will favor performance and use more energy.

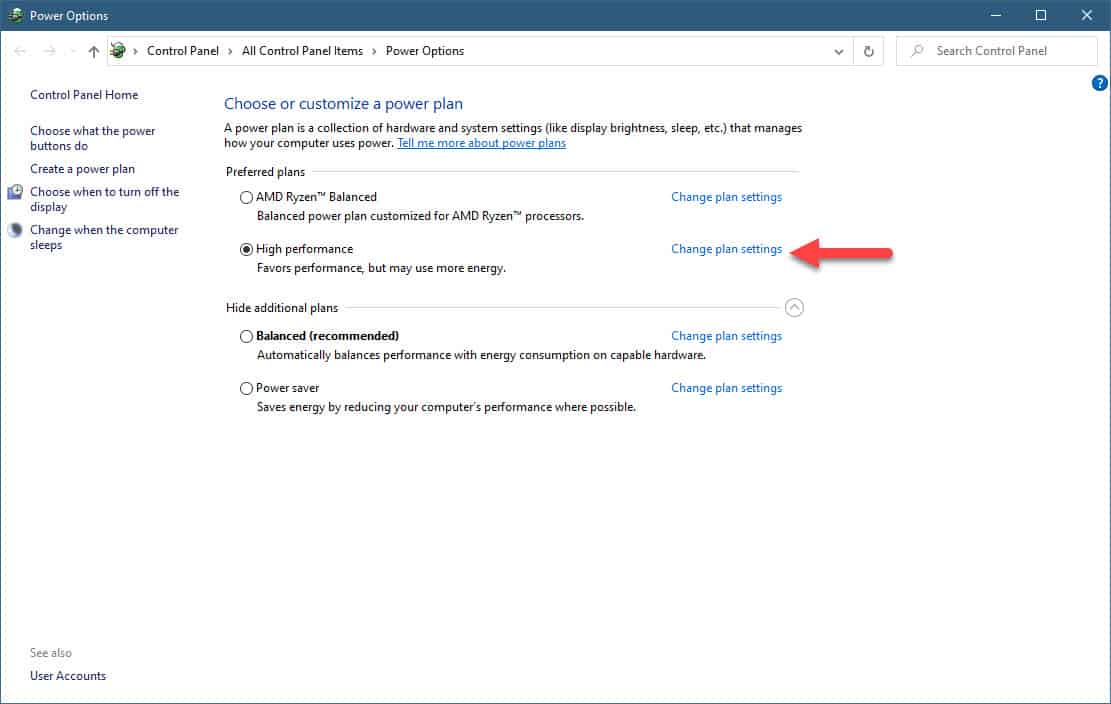
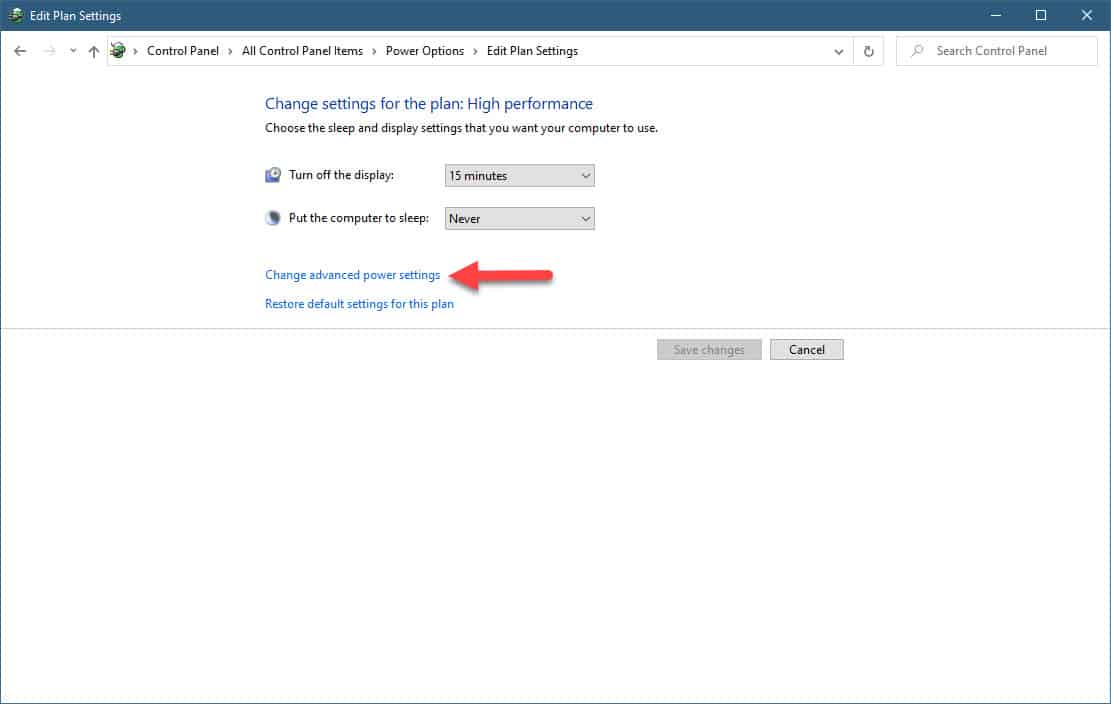
- Click on Change Plan settings.
This link should be beside the high performance option.

- Make sure to choose Never on the drop down box of “put the computer to sleep”.
This prevents the computer from sleeping.

- Click on Change advanced power settings.
This will open the Power options window.

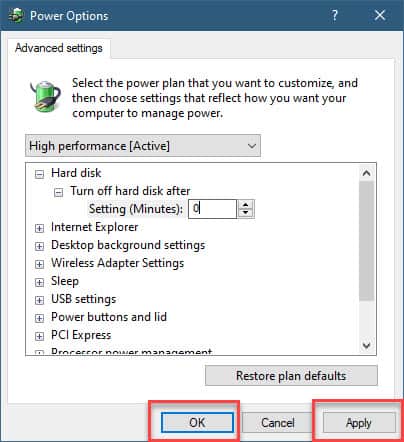
- Locate Hard disk and set turn off hard disk after 0 minutes.
This prevents the hard disk from turning off.

- Click Apply then OK.
This will save the changes made.

Turn off Fast Startup to fix Kernel Power Event 41
Sometimes this problem can be caused because fast startup is enabled on the computer. When enabled your computer will boot faster. One downside to this is that the computer will not perform a complete shutdown which is usually required when a new update has been applied.
- Click on the Start button.
- Click on Settings.
- Click on System.
- Click on Power & Sleep.
- Click on Choose What the power buttons do.
- Click on Change settings that are currently unavailable.
- Uncheck the box for Turn on fast startup.
- Click on Save changes.
Update your computer
To eliminate the possibility of the problem being caused by a software glitch you will need to make sure that your computer is using the latest Windows 10 update.
- Click on Start.
- Click on Settings.
- Click on Update & Security.
- Click on Check for updates. Wait for the updates to be downloaded and applied.
- Restart the computer.
Run the power troubleshooter tool
One last troubleshooting step to consider is to use the Windows 10 troubleshooter tool. This is a built-in tool that can detect and fix most of the common issues that occur on your system.
- Click on Start.
- Click on Settings.
- Click on Update & Security.
- Click on Troubleshoot. This can be found on the left pane.
- Click on Power. This can be found on the right pane under the Find and fix other problems section.
- Click on Run the troubleshooter. Apply the fix that the system recommends.
The troubleshooting steps listed above should fix the Kernel power 41 error in Windows 10.
Having Issues with your computer? Feel free to contact us using this form. We’ll try to help.


