Your Windows 10 computer has a built-in administrator account which you won’t usually see as it is disabled by default. The first time you turn on a new laptop you will usually create an account, which is also categorized as an administrator account. The difference between the built-in administrator account and the administrator account you created is that the former does not receive any UAC prompts while the latter does. If you would like to know how to enable built-in windows 10 administrator account then you have come to the right place.
Enable the Windows 10 administrator account
The best way to enable the hidden administrator account is from the command prompt. It’s actually quite easy as you will only need to run a few commands.
Time needed: 1 minute.
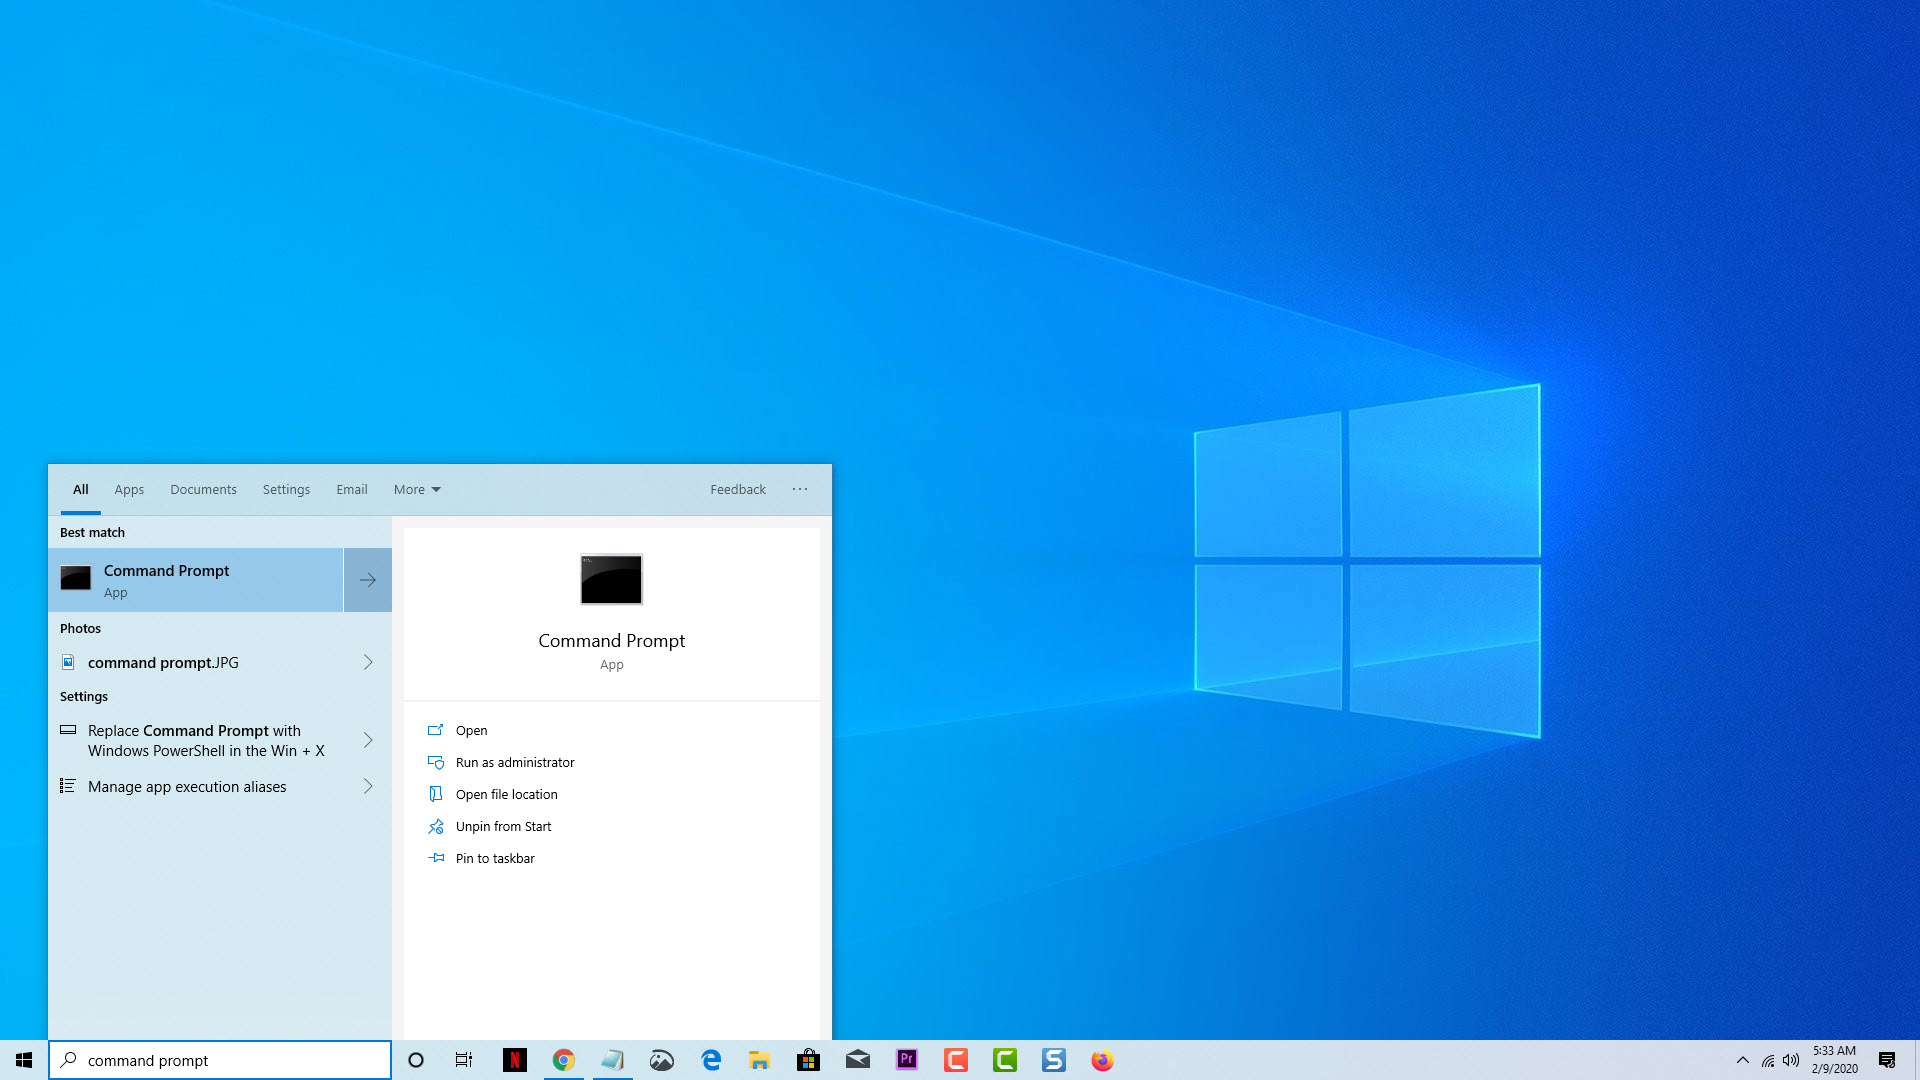
- Type command prompt on the search bar.
The command prompt app will soon appear.

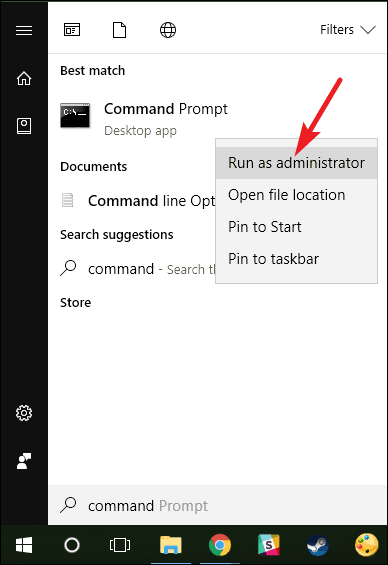
- Right click on the command prompt app then click on run as administrator.
This will allow you to run the app with an elevated permission.

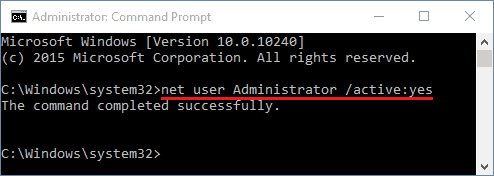
- Type ” net user administrator /active:yes “.
This command activates the hidden administrator account. Windows returns “The command completed successfully” if the operation is successful.

With the three easy steps listed above you will already enable built-in Windows 10 administrator account.
Aside from activating the administrator account from the command line you can also do this from Admin tools or the Group Policy.
Enable Administrator account from Admin tools
- Hold the Windows Key while pressing “R” to bring up the Windows Run dialog box.
- Type “lusrmgr.msc“, then press “Enter”.
- Open “Users“.
- Select “Administrator“.
- Uncheck or check “Account is disabled” as desired.
- Select “OK”.
Enable the Administrator account from Group policy
- Hold the Windows Key while pressing “R” to bring up the Windows Run dialog box.
- Type “gpedit.msc“, then press “Enter”.
- Go to Local Computer Configuration
- Go to Windows Settings
- Go to Security Settings
- Go to Local Policies
- Go to Security Options
- Go to Accounts: Administrator Account Status
- Enable or Disable the setting as desired.
Why you will want to enable the hidden administrator account?
If you are an end user or a regular consumer then there is really no need for you to enable the hidden Windows 10 administrator account. Its main purpose is to give OEM system builders a free hand in tweaking certain systems before the out-of-the box experience is complete. It’s actually a good idea to leave this account disabled as it has free reign over your system, making it a security vulnerability. There’s also nothing that the built-in administrator account can do that a standard Windows 10 administrator account can’t do.
Disable the built-in administrator account
- Type command prompt on the search bar. The command prompt app will soon appear.
- Right click on the command prompt app then click on Run as Administrator. This will allow you to run the app with an elevated permission.
- Type “ net user administrator /active:no “. This command will disable the hidden administrator account. Windows returns “The command completed successfully” if the operation is successful.


