Video Stuttering Windows 10? Try These 8 Fixes (Update, Scan + More)
Experiencing the frustrating issue of video stuttering Windows 10? Look no further! In this comprehensive guide, we’ll provide you with 10 effective solutions to fix video stuttering problems on your Windows 10 device. From updating drivers to adjusting system settings, we’ll walk you through step-by-step instructions to ensure smooth playback and an uninterrupted viewing experience. Say goodbye to the annoyance of video stuttering and enjoy seamless video playback on your Windows 10 system.
Fix Video Stuttering Windows 10 Issue
1. Update Display Drivers
Outdated or incompatible display drivers can often cause disruptions in video playback, resulting in annoying stuttering. In this troubleshooting guide, we’ll walk you through the process of updating your display drivers to ensure optimal performance and smooth video playback on your Windows 10 system. By keeping your drivers up to date, you can eliminate video stuttering and enjoy a seamless viewing experience on your device.
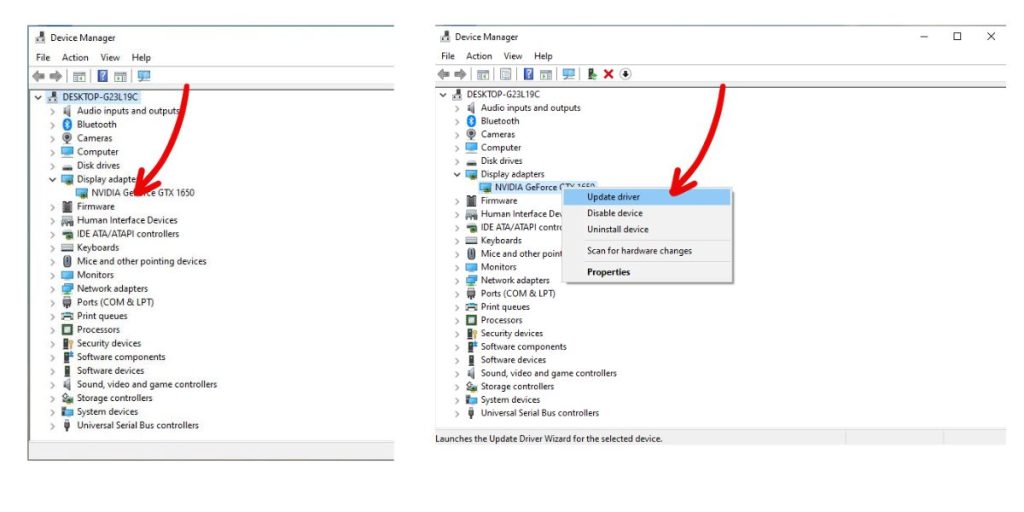
- Open Device Manager.
- Expand Display adapters and right-click your graphics card.
- Select Update driver > Search automatically for updated driver software.
- Restart your PC after installing the updates.
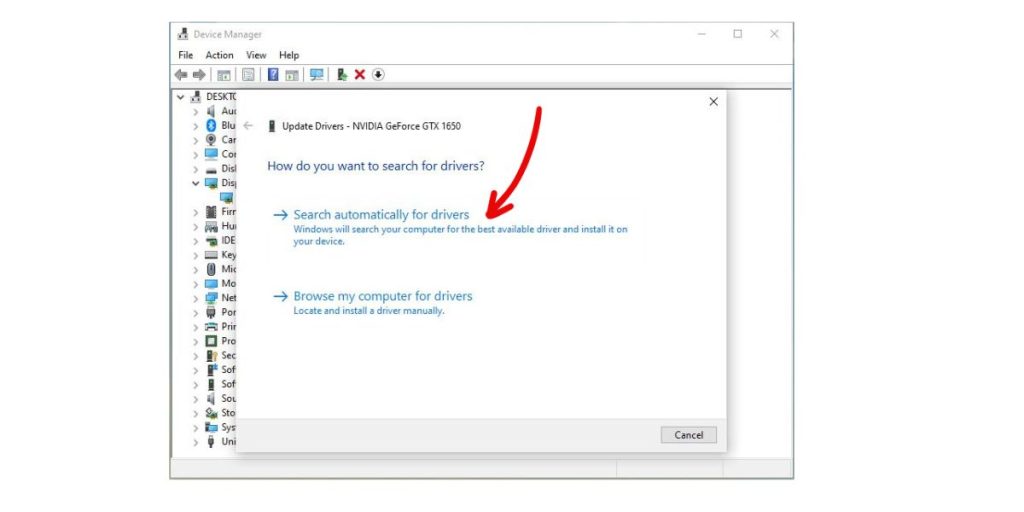
This ensures you have all the latest performance improvements and fixes for smooth video playback.
2. Adjust Graphics Settings
By fine-tuning settings such as refresh rate, resolution, and hardware acceleration, you can optimize your graphics performance and enjoy uninterrupted video playback. Say goodbye to frustrating video stutters and experience seamless visuals on your Windows 10 device by following our step-by-step instructions to adjust your graphics settings.
To switch:
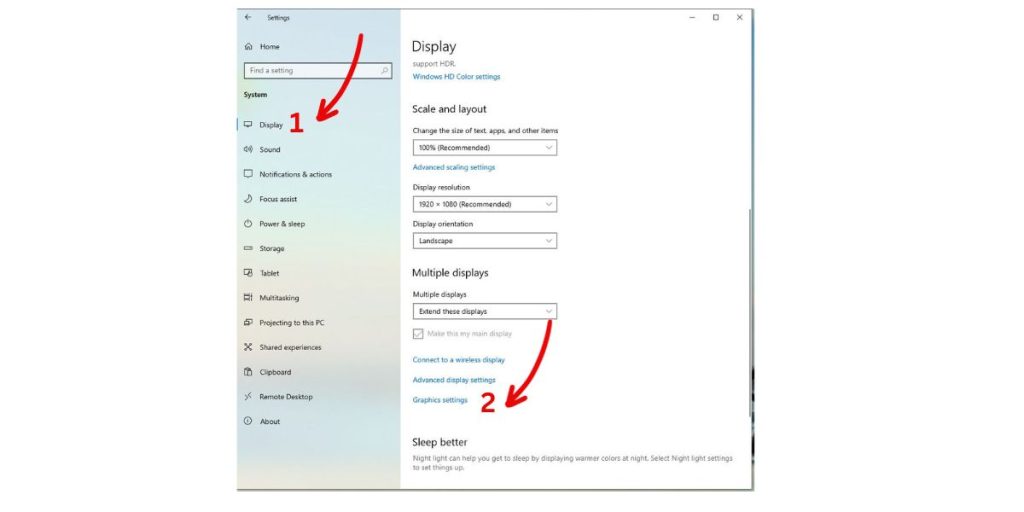
- Go to Settings > System > Display > Graphics settings.
- Click the app with video stuttering issues.
- In the Options menu, choose High performance to force the dedicated GPU.
- Save changes and restart the video player.
Using your more powerful discrete graphics card prevents stuttering problems.
3. Scan for Hardware Changes
Video stuttering can be caused by various factors, including outdated or incompatible drivers, conflicting software, or hardware conflicts. By scanning for hardware changes, you allow your system to detect any changes in the hardware configuration and update the corresponding drivers accordingly. This step can help resolve video stuttering problems by ensuring that your hardware and drivers are properly recognized and functioning optimally. In this brief guide, we will explore how to perform a hardware scan to address video stuttering issues on Windows 10.
Scan for issues:
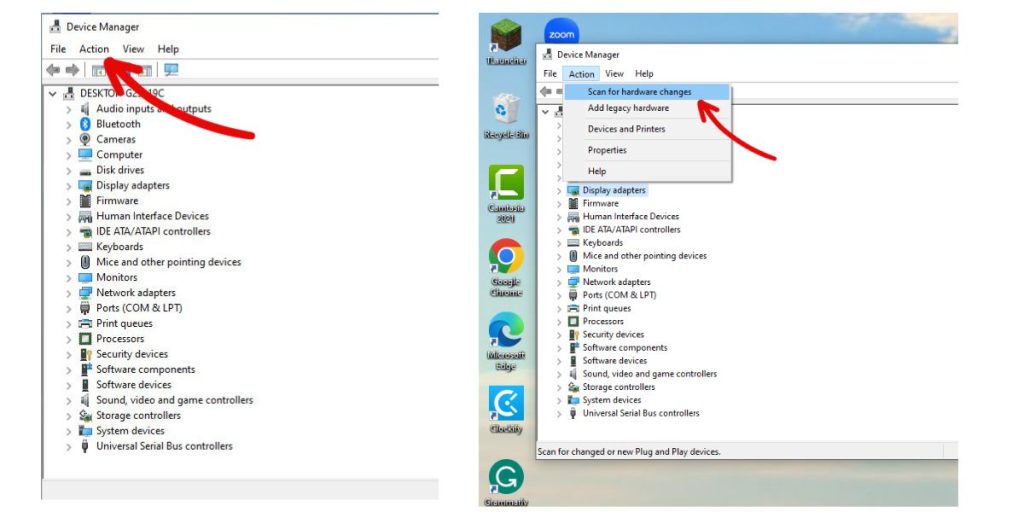
- Open Device Manager.
- Click Action > Scan for hardware changes.
- Follow prompts and restart your PC to apply changes.
Scanning will detect and fix any hardware inconsistencies causing video problems.
4. Close Background Apps
Resource-intensive apps running simultaneously with your video player can starve it of CPU and GPU resources. Close all non-essential background apps first.
Fewer demanding apps allows your video smooth access to your PC’s hardware resources.
5. Run Video Playback Troubleshooter
Windows includes an automated troubleshooting tool specifically for diagnosing video stuttering and playback problems. Access it:
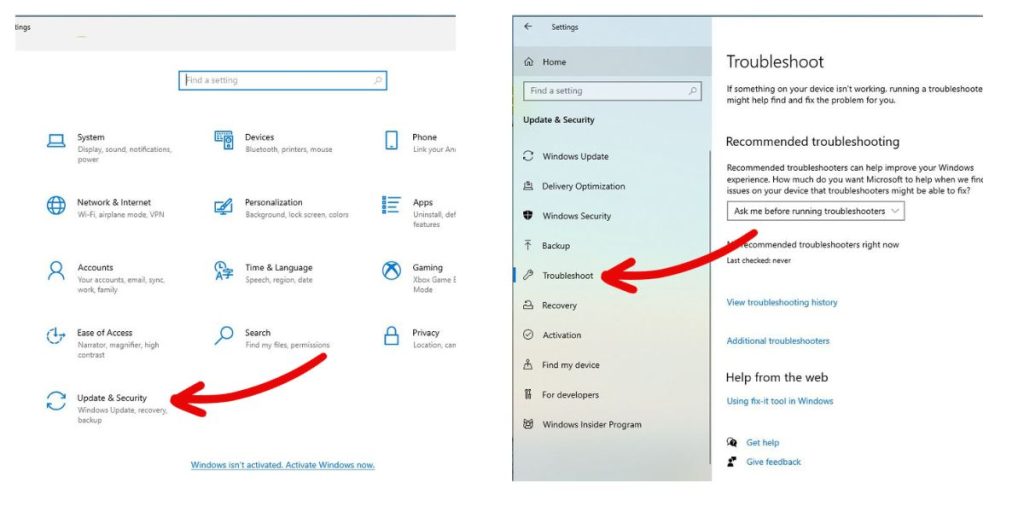
- Go to Settings > Update & Security > Troubleshoot.
- Select Additional troubleshooters > Video playback.
- Click Run the troubleshooter and follow prompts.
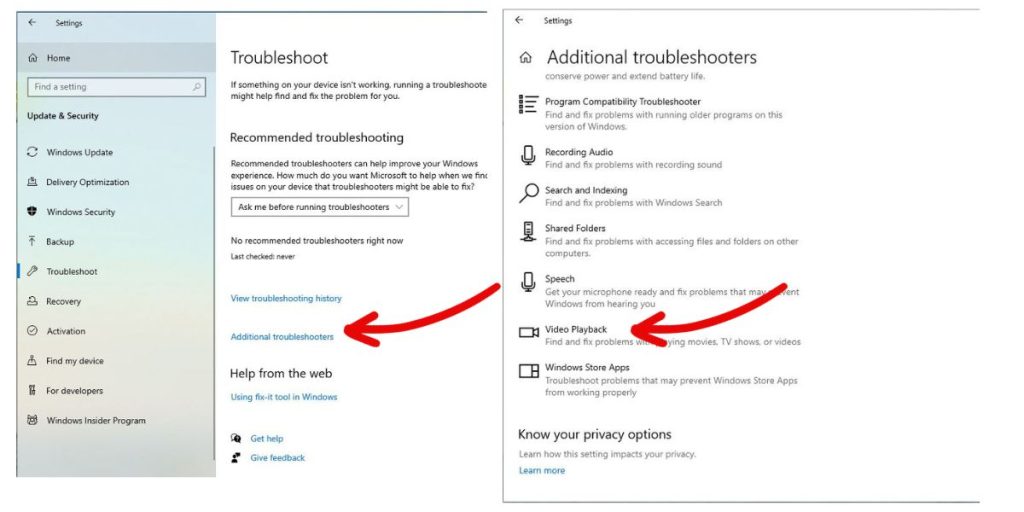
This scanner will check for driver conflicts, software issues, missing codecs and other problems known to disrupt video. Use the recommended fixes.
6. Change Power Settings
Aggressive power saving modes can impact video performance. Change your power plan:
- Search for “power plan” and select Power & sleep settings.
- Click Change plan settings for your current plan.
- Change sleep and screen timeouts to Never.
Disabling power saving gives maximum resources for smooth video playback.
7. Check Drive Speed
If your video files are on a slow mechanical hard drive, this may cause stuttering. For best playback, use an SSD or high speed external drive.
Faster storage reduces latency when reading large video files, preventing choppiness.
8. Update Windows
Keep Windows fully updated to get all the latest patches, drivers and optimizations for video performance.
- Go to Settings > Update & Security > Windows Update.
- Click Check for updates. Install all pending updates.
Updating Windows can resolve bugs causing video stuttering issues.