One of the advantages of using Windows 10 is that you can easily control several aspects of the operating system. Take for instance the incoming or outgoing internet traffic, this can be easily controlled using the built-in firewall program. By default, the firewall will block incoming connections from the internet unless the receiving program is on the exceptions list, but it doesn’t stop outgoing connections. In this latest installment of our troubleshooting series we will show you how to block a program from connecting to the internet in windows 10.
Block a program from using the Internet with Windows Firewall
The easiest way to block outbound internet connections on your computer is by using Windows Firewall. Here’s how you can do this.
Time needed: 5 minutes.
Blocking outbound connection of program
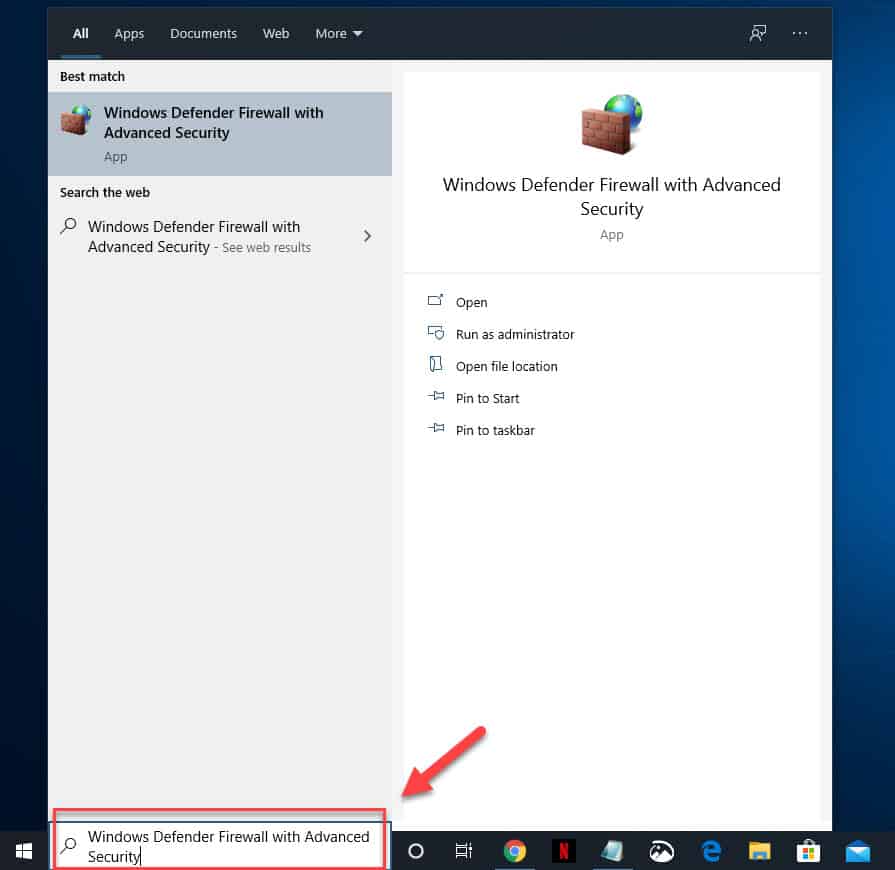
- Type “Windows Defender Firewall with Advanced Security” without the quotation marks on the Windows 10 search bar.
This can be found on the lower left side of the screen.

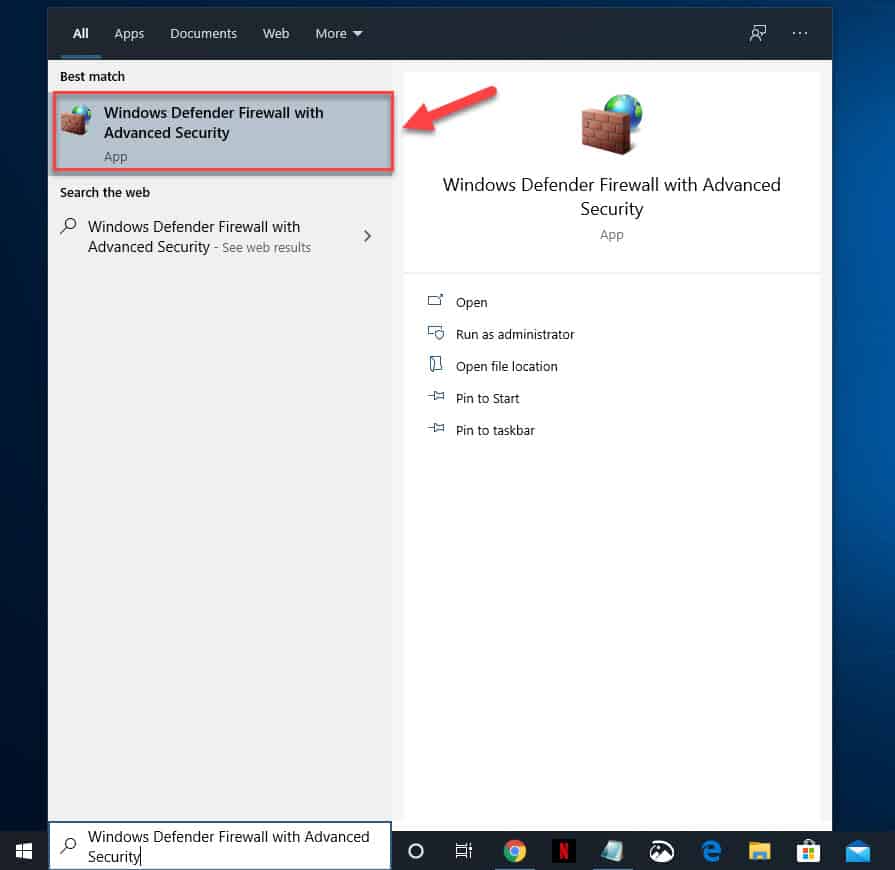
- Click on the Windows Defender Firewall with Advanced Security app that appears.
This will open the firewall application.

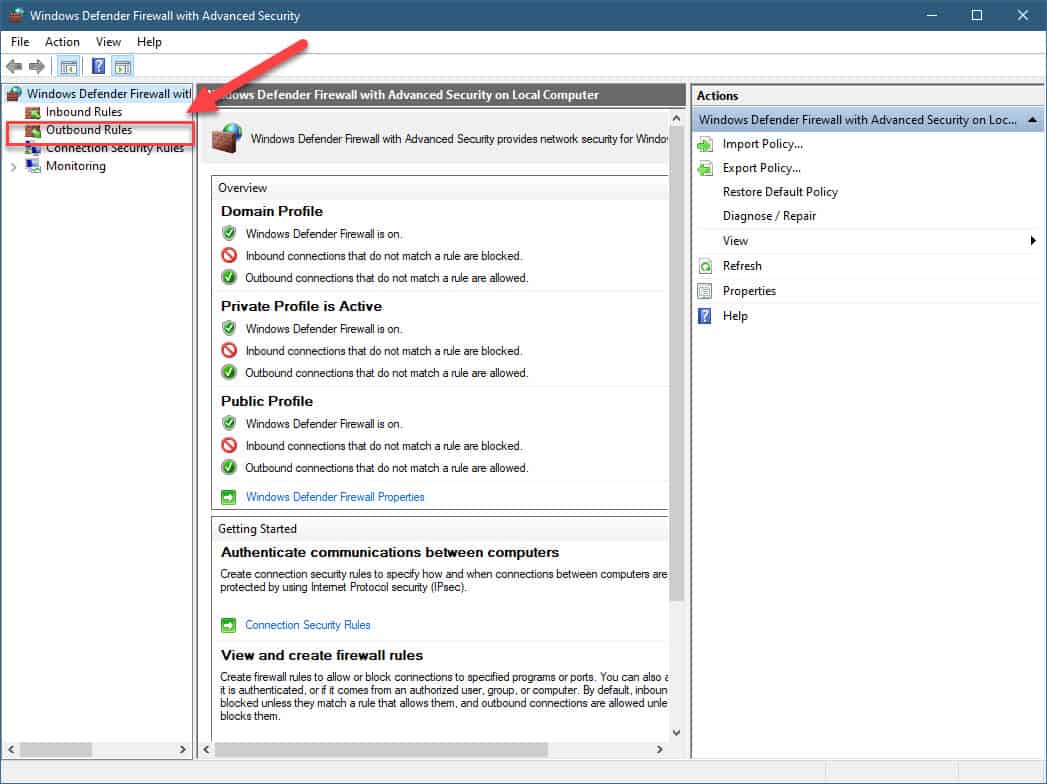
- Click on Outbound rules.
This can be found on the left pane.

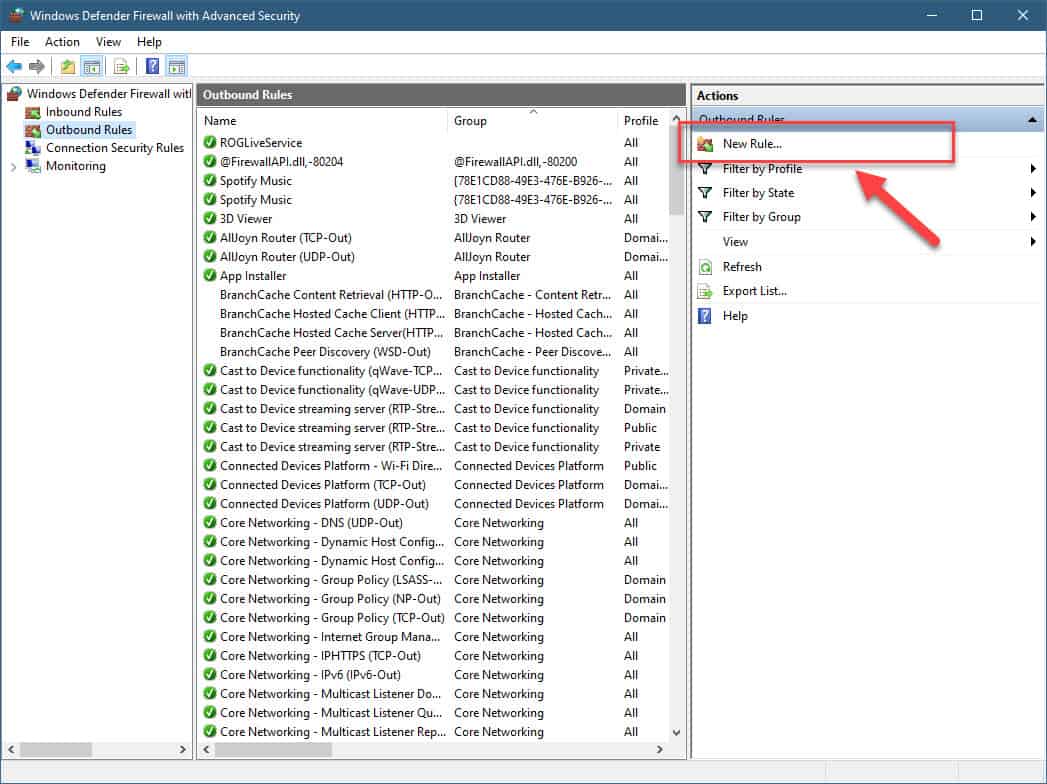
- Click on New Rule.
This can be found on the right pane and will open the New Outbound Rule Wizard.

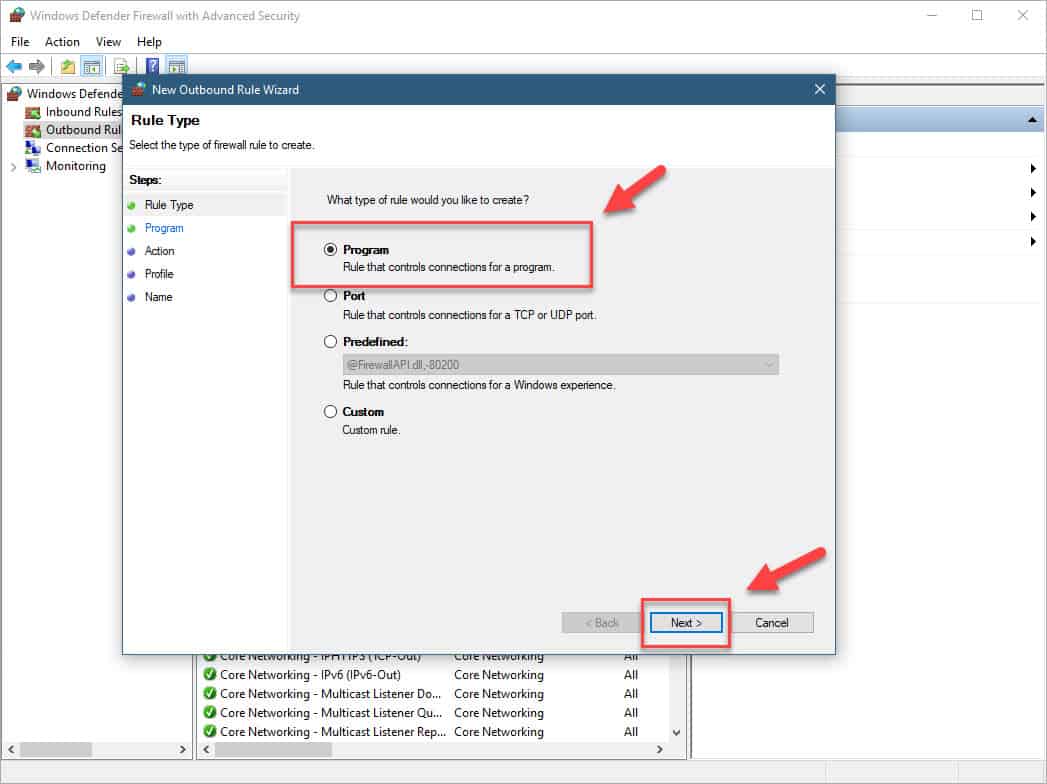
- Select Program then next.
This will allow you to choose which program to block.

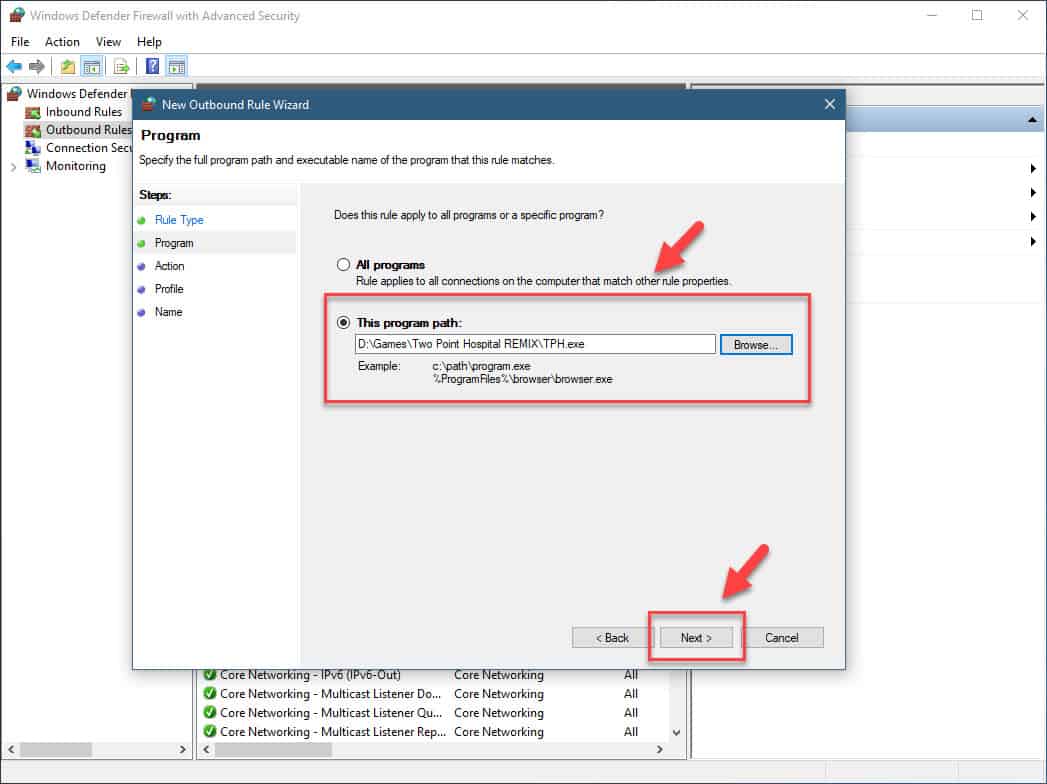
- Click “This program path” then browse to select the program you want to block then click on Next.
This will select the program you want to block.

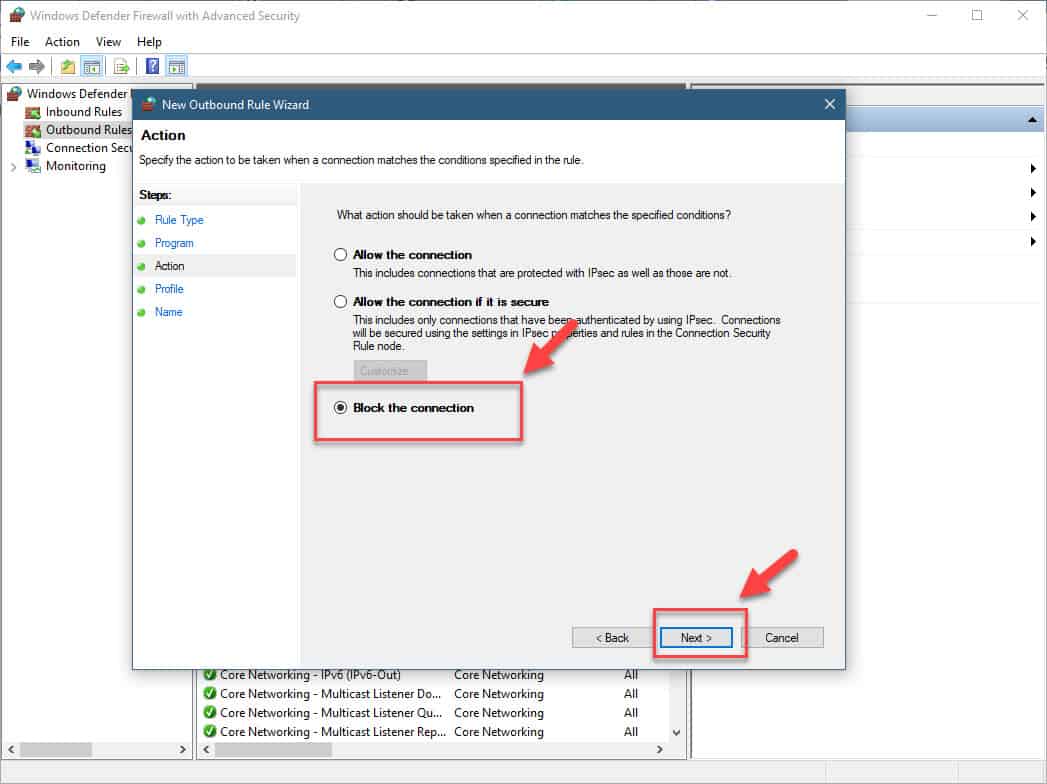
- Select “Block the connection” then click next.
This will block the program from connecting to the internet.

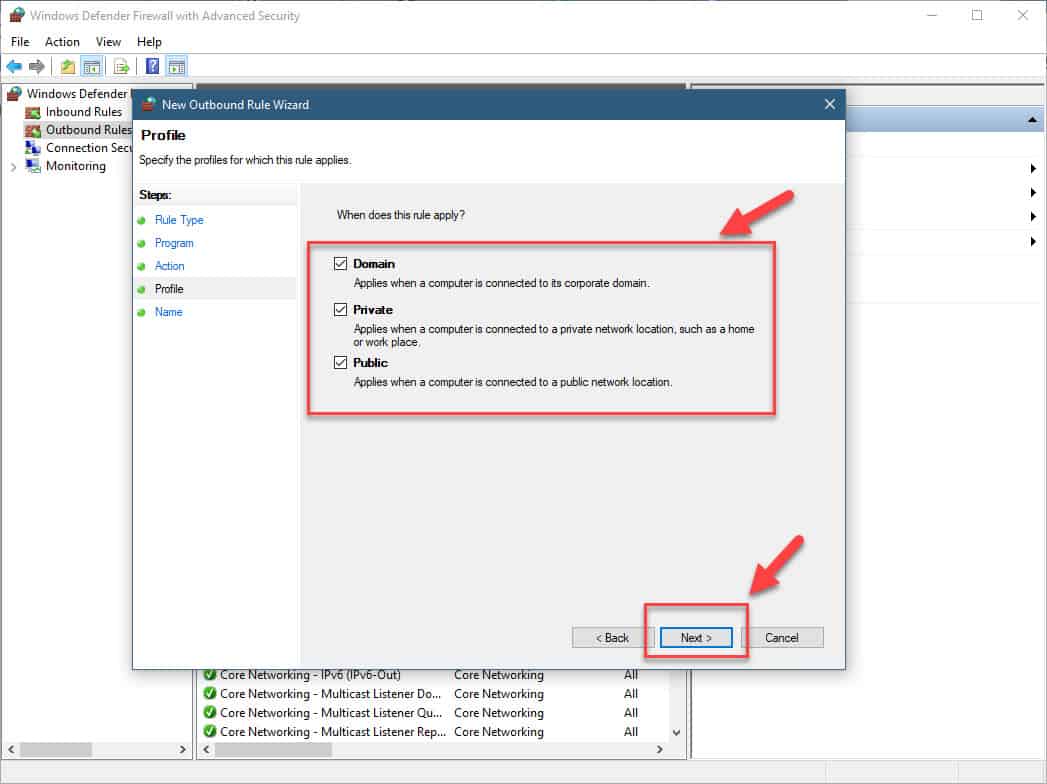
- Choose the rule type.
It’s best to choose Domain, Private, and Public.

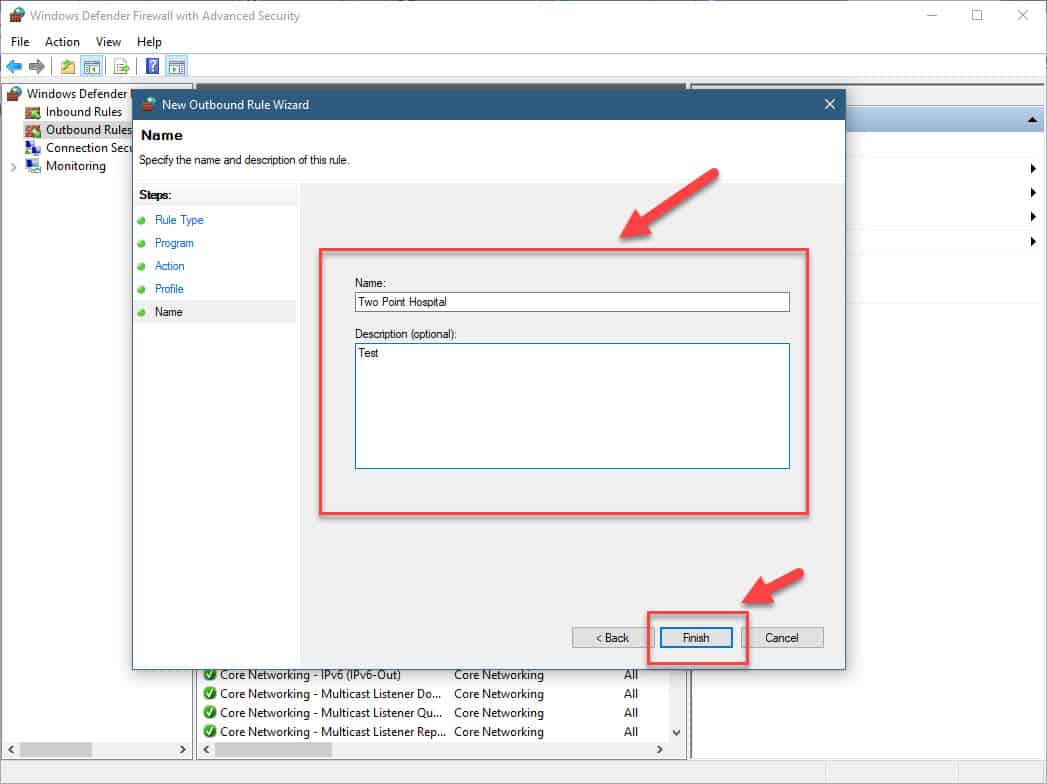
- Give the rule a name and description then click Finish.
This makes the rule easy to identify.

After performing the steps listed above you will successfully block a program from connecting to the internet.
Having Issues with your computer? Feel free to contact us using this form. We’ll try to help.
