How To Extract Audio From Video Files
There are instances wherein you only need the audio clip of a video file. You can either use the audio format to create a remix, or perhaps insert it into another program or video. There are many reasons why you might need to extract an audio file from your existing video file and it can either be from a single clip or from the whole video file. Either way, there are a few ways to do this from any video file that includes MP4, FLV, AVI, MPEG to name a few.
Use VLC Media Player to get Audio
Extracting Audio from Video files using VLC Media Player is one of the easiest and most used process to do this. VLC media player is not just a media player but a software program as well. One of its features is its ability to convert FLV, AVI, MP4 and other video format to MP3 Audio Format.
In here, we will be showing you a simple and easy step on how to do this. Read on below to find out how.
Steps to follow in using VLC Media Player to extract audio
Time needed: 8 minutes.
Here is a step by step guide on how to extract Audio Files from Video Files
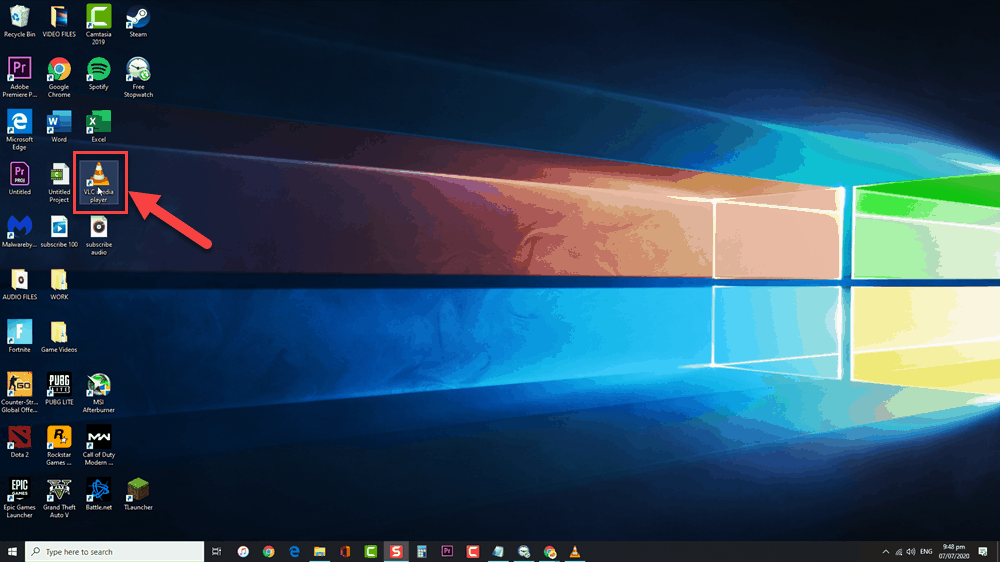
- Launch VLC player
You can download the media player from its official website if you have not installed it yet on your computer.

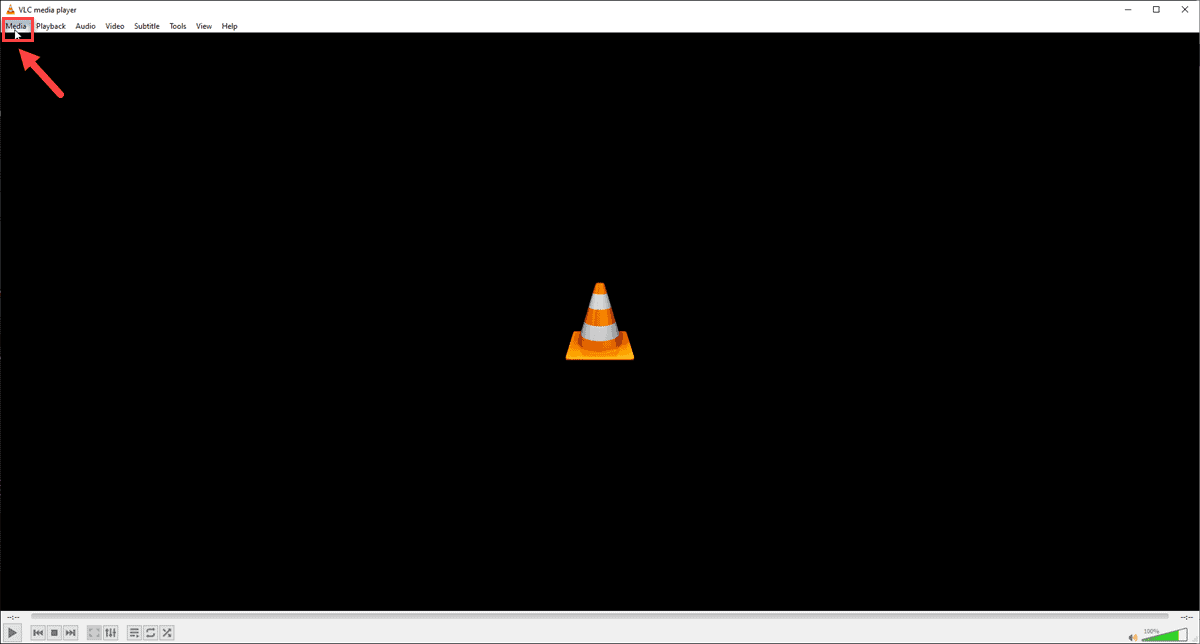
- Click on Media Tab
Located at the upper right corner of the VLC Media Player Screen.

- Click on Convert/Save
Located from the drop down menu. You can also press Ctrl+R to open the dialog using your keyboard. The dialog box is where you can add the video file that you want to extract the audio.

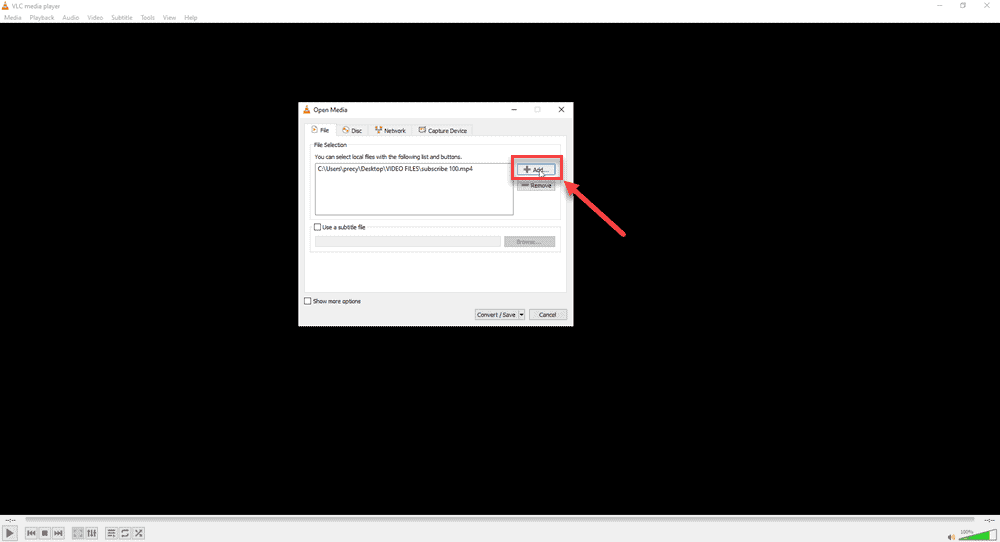
- Click on the Add Button
Choose the desired file that you want to convert to MP3 format from a hard drive file, network, removable media or from a USB.

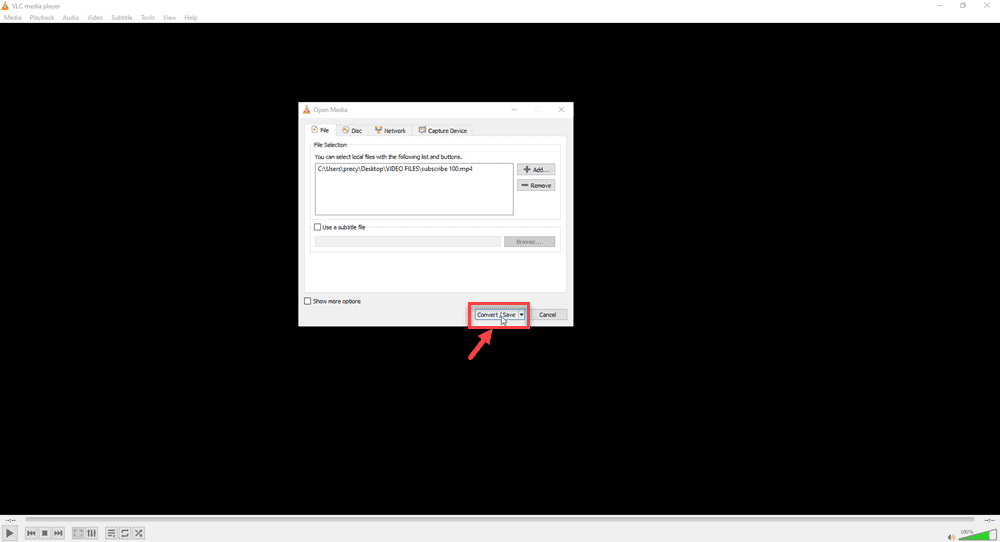
- Click on Convert/Save Tab
You have to make sure to actually hit the Convert/Save Tab and not the small downward arrow beside it as this will show other converting options that you not actually need at this time.
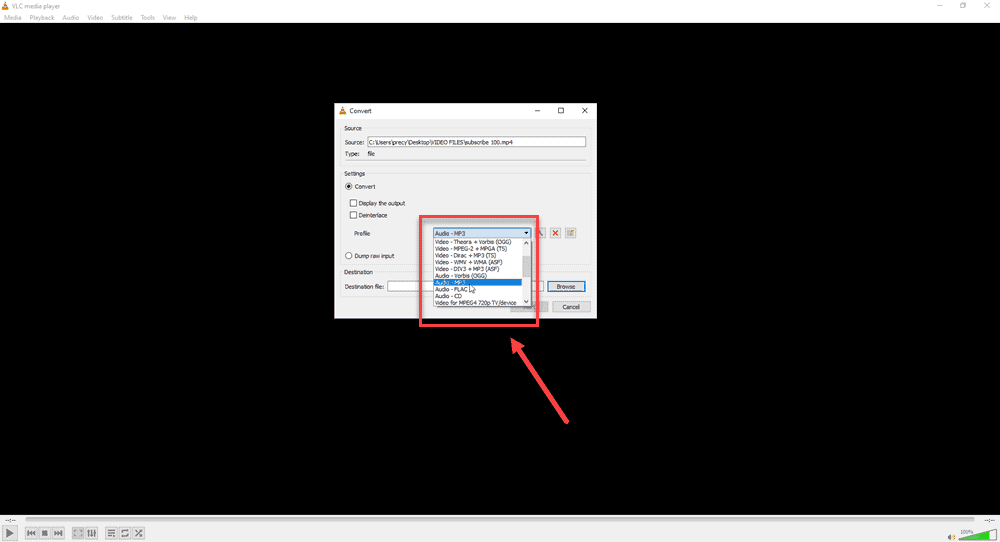
- Select Audio-MP3 option
From the drop menu of the Profile section, select Audio-MP3. You also have other format options to choose from such as Audio-FLAC and Audio-CD, whichever your preference is.
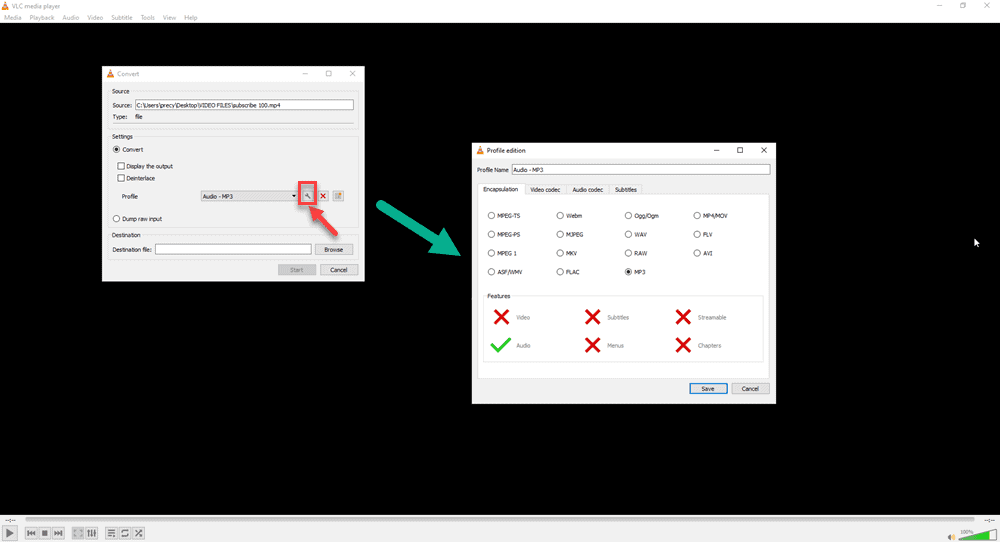
- Click on Settings tab
Settings, a gear icon located next to the desired audio format.
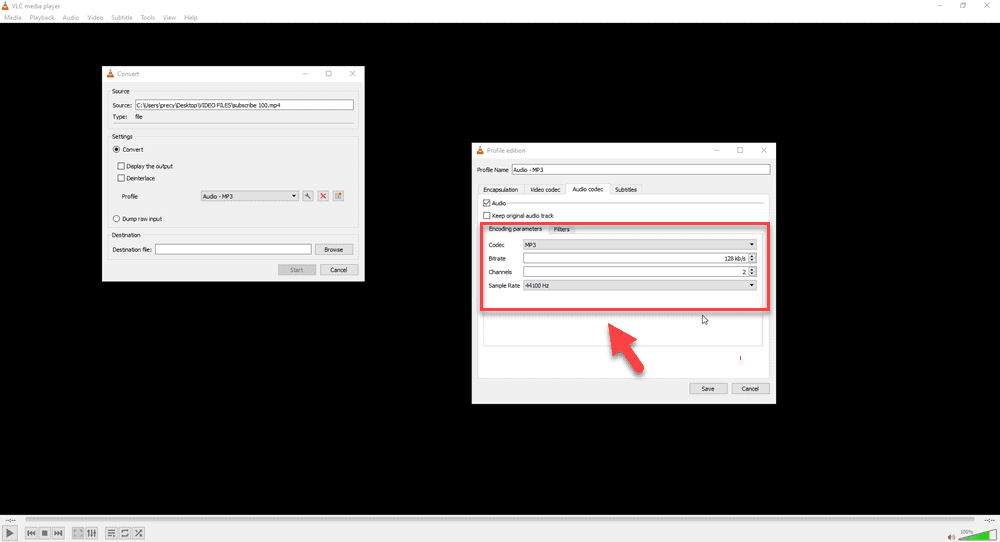
- Select Audio Codec
In here, you will have the option to change output related settings of your audio. You can modify bitrate, channels according to your own preference. The sample rate is set at default of 44100 Hz. But you can modify and change it as well.
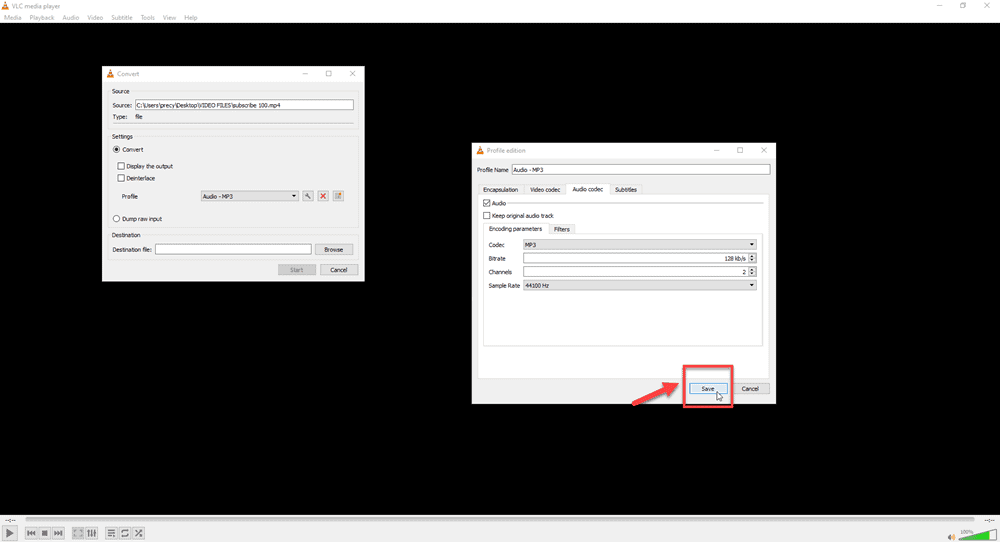
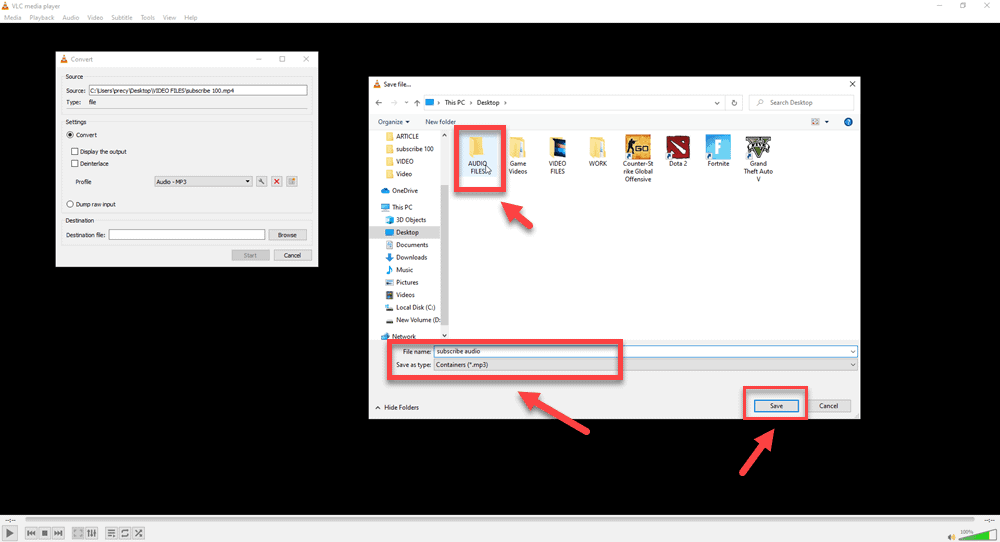
- Click on Save
To save modifications if they are any.
- Click on Browse and Save
At the destination file section, browse the folder where you want your audio output be saved, and enter a name for the file. Make sure to choose a unique filename so as not to overwrite existing files already on the folder. Also, the Container format located at the file name section should read as .mp3.
- Click on Start
VLC media player will now start the extraction process. After which the new audio format will now be available at the selected destination folder.

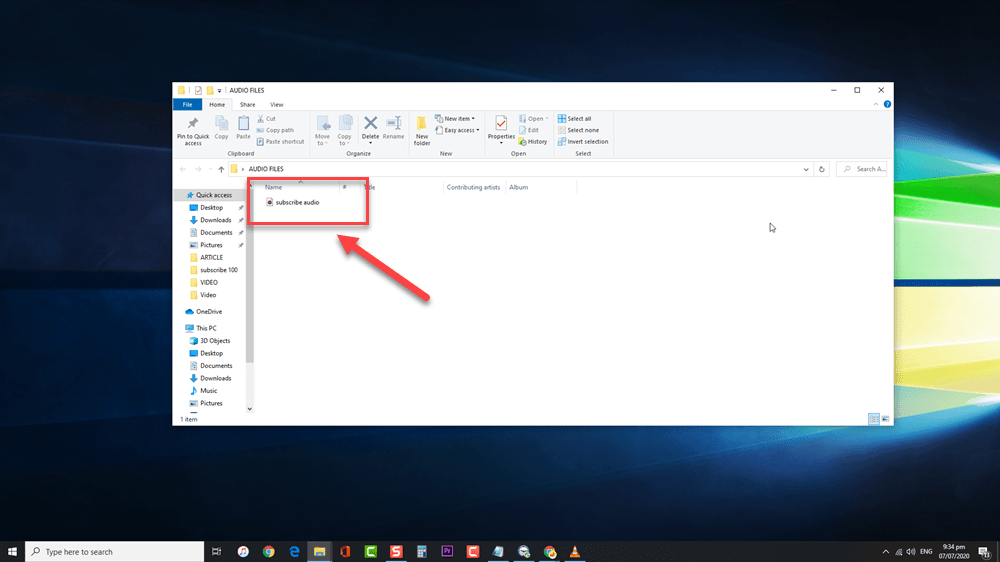
You can extract as many audio files from a video files as possible. There is no limit as to the number of extractions. Just make sure that the new format have a different file name for each. The extracted audio files can be played using mp3 players, computer, smartphone and other devices that supports your selected format for audio output.
After following the steps mentioned above, you have successfully extract audio from video files.
Having Issues with your computer? Feel free to contact us using this form. We’ll try to help.