PUBG Keeps Crashing? Here Are 12 Easy Fixes (Verify, Update + More)
PUBG is one of the most popular battle royale games, but many players have experienced PUBG keeps crashing issue. These crashes can occur randomly during gameplay or when loading into matches, leading to frustration for PUBG players. This article will provide troubleshooting tips to help resolve why PUBG keeps crashing so you can get back in the game.
1. Update Your Graphics Drivers
Outdated or corrupt graphics drivers are a common cause of PUBG crashes. To fix this:
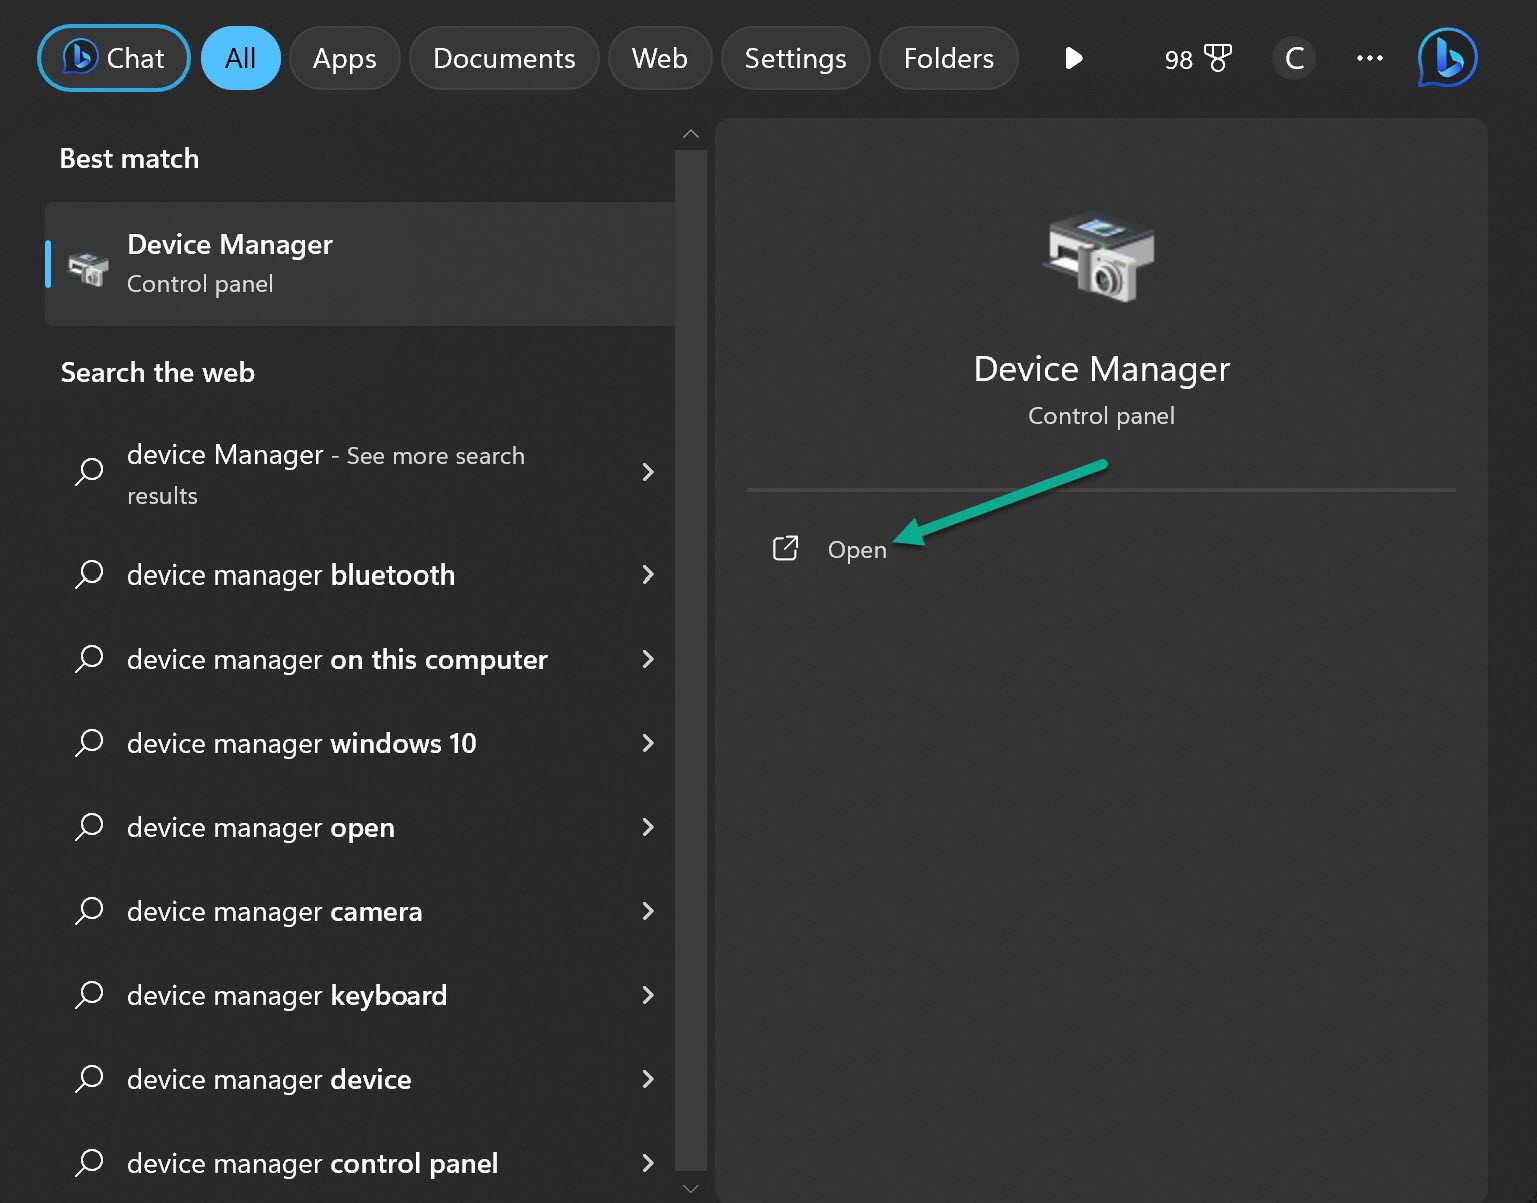
- Open Device Manager
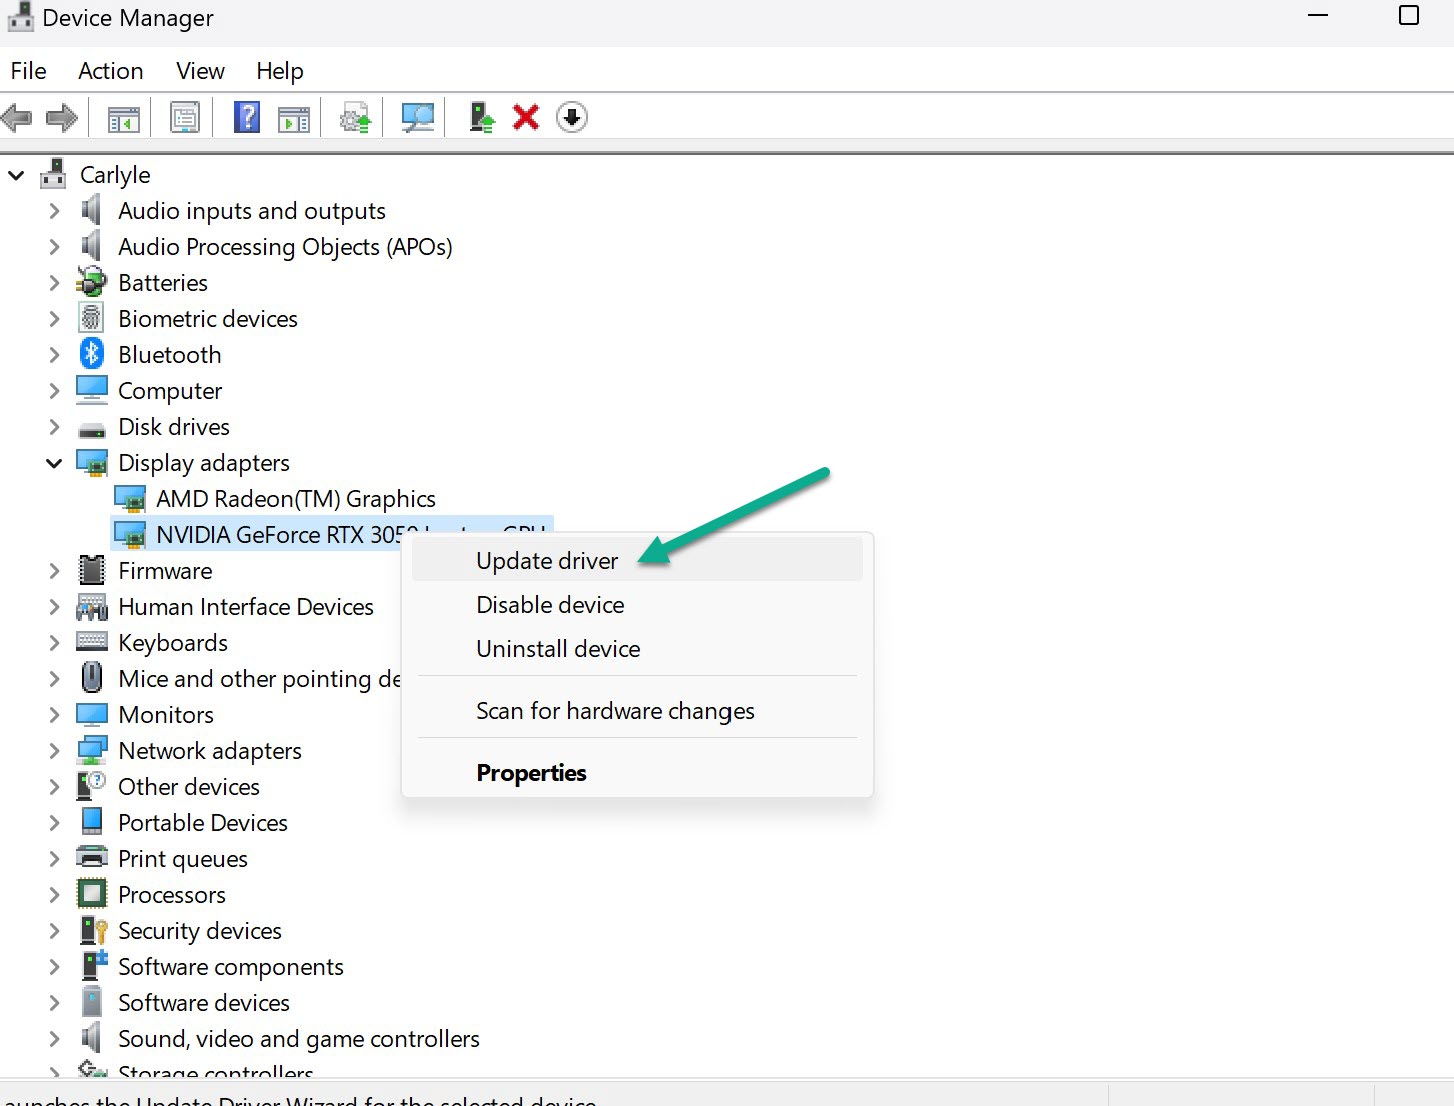
- Expand the Display adapters section

- Right click on your graphics card > Select Update driver
- Search automatically for updated driver software
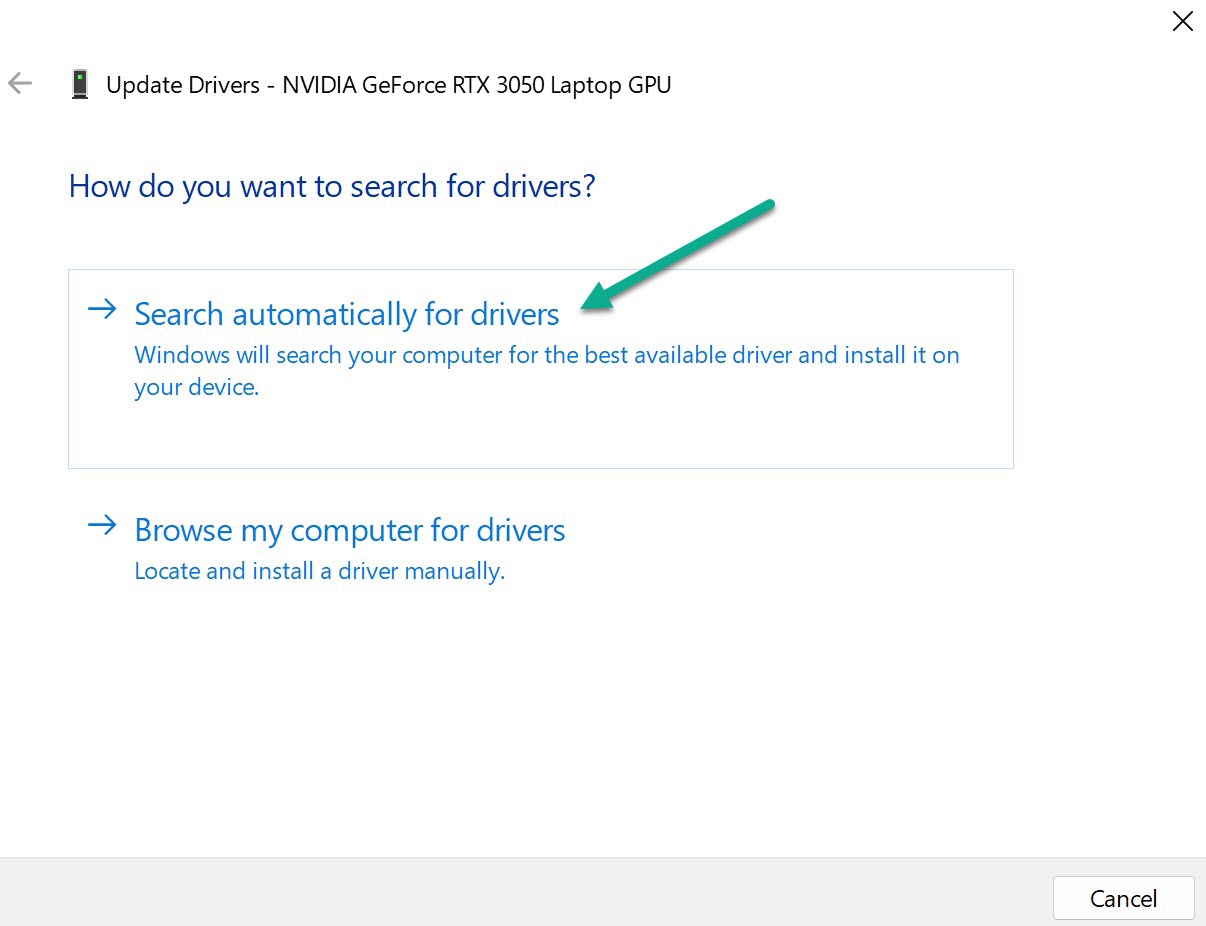
Install the latest driver from NVIDIA or AMD for best results. This will optimize PUBG performance and reduce crashes.
2. Lower the Graphics Settings In-Game
If PUBG crashes on high or ultra graphic settings, lower them to reduce the load on your hardware.
- Open PUBG settings
- Go to the Graphics tab
- Reduce the quality to Medium or Low
- Disable unnecessary effects like ambient occlusion, anti-aliasing etc.
- Apply changes and relaunch PUBG
Lowering the graphics settings can boost FPS, stability and prevent constant game crashes.
3. Update Windows and Drivers
Make sure your Windows OS and hardware drivers are up to date:
- Open Windows Update and install latest patches
- Update chipset, network, audio and other device drivers
- Update BIOS to latest version for performance improvements
Updated Windows and drivers optimize system stability for smooth PUBG gameplay.
4. Close Background Apps and Processes
Too many apps running in the background takes up RAM and CPU resources needed for PUBG. To free up memory:
- Press CTRL + Shift + Esc to open Task Manager
- Go to the Processes tab
- Select unnecessary background apps and click End task
- Disable startup programs not required for gaming
Closing unused processes gives PUBG the system resources it needs to run properly.
5. Run PUBG as High Priority
Prioritizing PUBG in Task Manager can allocate more CPU and RAM to prevent crashes:
- Launch Task Manager during PUBG
- Go to the Details tab
- Right click PUBG > Set priority > High
This dedicates more resources to PUBG so system strain is reduced.
6. Verify Integrity of Game Files
Corrupted or missing game files can trigger PUBG crashes. Verify integrity through Steam to fix this:
- Open your Steam Library

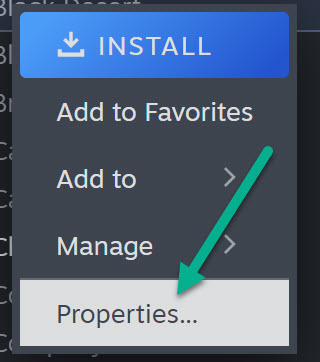
- Right click PUBG > Properties
- Go to Installed Files > Verify Integrity of Game Files
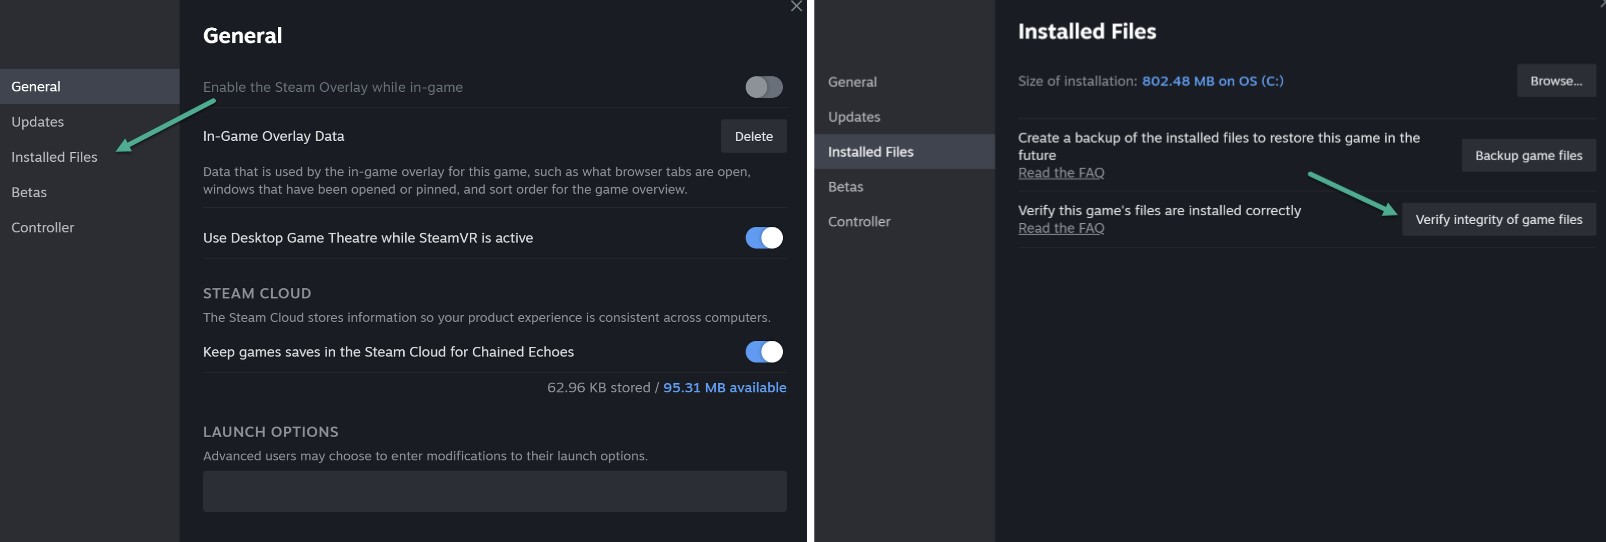
This scans and restores any damaged PUBG files.
7. Disable Overlays
Software overlays from apps like Discord, MSI Afterburner etc. can conflict with PUBG and cause crashes:
- Close any overlay apps before launching PUBG
- Disable the in-game overlay in NVIDIA GeForce Experience
- Disable the Steam in-game overlay
Overlays running alongside PUBG often create stability issues.
8. Clean Reinstall GPU Drivers
Display driver errors are a common PUBG crashing culprit. Do a clean reinstall of GPU drivers:
- Download DDU (Display Driver Uninstaller)
- Boot into Safe Mode
- Run DDU and uninstall NVIDIA/AMD graphics drivers
- Reboot and install latest GPU drivers
This eliminates any corrupted driver files for maximum stability.
9. Disable Fullscreen Optimizations
Windows 10 automatically runs games in borderless fullscreen. This can hurt PUBG performance and cause crashes.
- Navigate to PUBG install location
- Right click TslGame.exe > Properties
- Compatibility tab > Disable fullscreen optimizations
Disabling fullscreen optimizations boosts FPS and reduces crashes.
10. Reinstall or Update PUBG
Outdated game files or corrupt installs are a prime reason for constant PUBG crashes.
- Update PUBG to latest version in Steam
- Verify integrity after update
- If crashes persist, uninstall and reinstall PUBG
Updating or reinstalling fixes damaged files and optimizes game performance.
11. Remove Launch Options
PUBG launch options that helped before can now cause crashing issues after updates. Remove all launch options:
- Right click PUBG in your Steam library
- Select Properties > General tab
- Delete any text in the Launch Options field
- Click OK and relaunch the game
Launch options can become outdated after game patches, leading to crashes.
12. Disable CPU/GPU Overclocking
Overclocking is useful but pushing hardware too far often destabilizes games like PUBG.
- Enter BIOS and load optimized defaults
- Or reduce overclocks to stable levels
This ensures your CPU and GPU run at tested, stable speeds for smooth PUBG gameplay.