How To Fix Windows 10 Does Not Connect To Wi-Fi On Startup
When you turn on your Windows 10 laptop it will usually automatically connect to a saved Wi-Fi network . For example if your laptop is connected to your home wireless network and you set this to always connect to this network if it is within range then whenever you restart the computer it will connect to your Wi-Fi network during the startup process. Sometimes though this does not happen . In our latest installment of our troubleshooting series we will tackle the windows 10 does not connect to Wi-Fi on startup.
Windows 10 does not auto connect to Wi-Fi
There are several factors that can cause this particular problem to occur however one of the most common reasons is if the setting to connect to the Wi-Fi network when it is in range has been turned off.
Time needed: 2 minutes.
Turn on auto connection
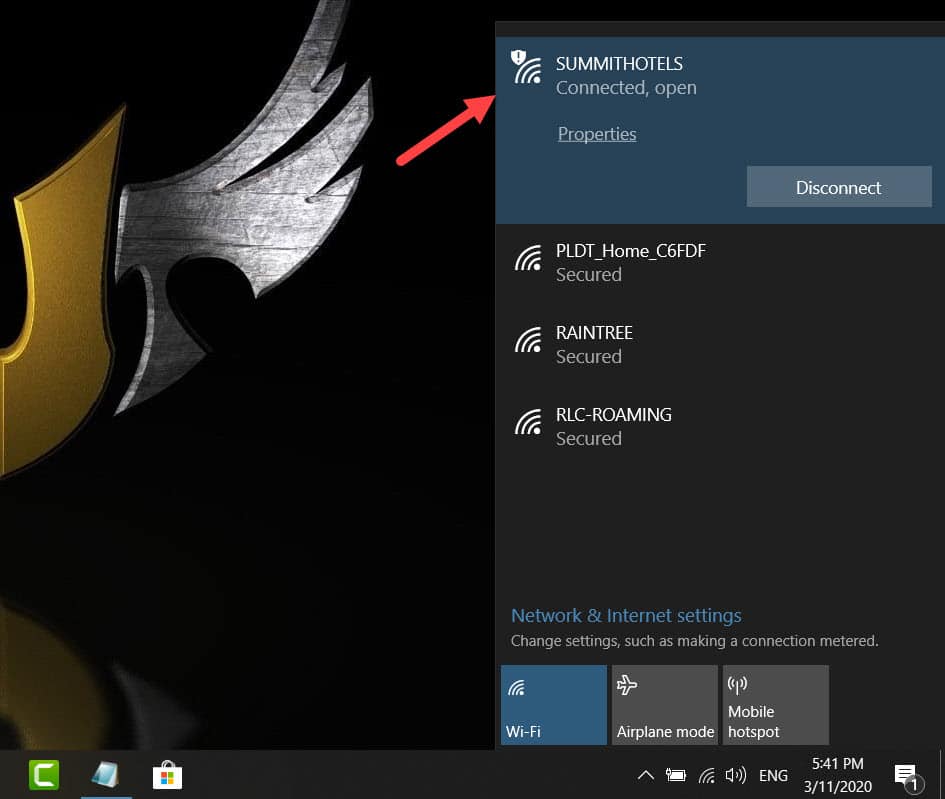
- Click on the Wi-Fi icon on the system tray.
This is located on the lower right side of the screen.

- Connect to the preferred Wi-Fi network.
This is the network you will want to connect to automatically.

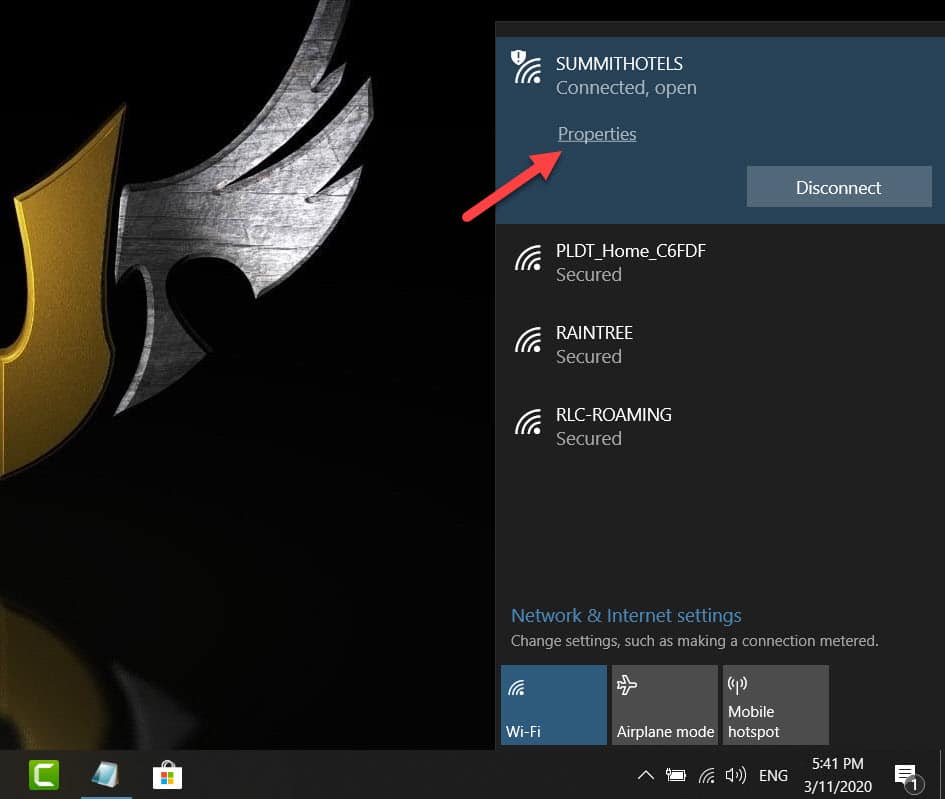
- Click on the Properties link.
This is found below the connected Wi-Fi network.
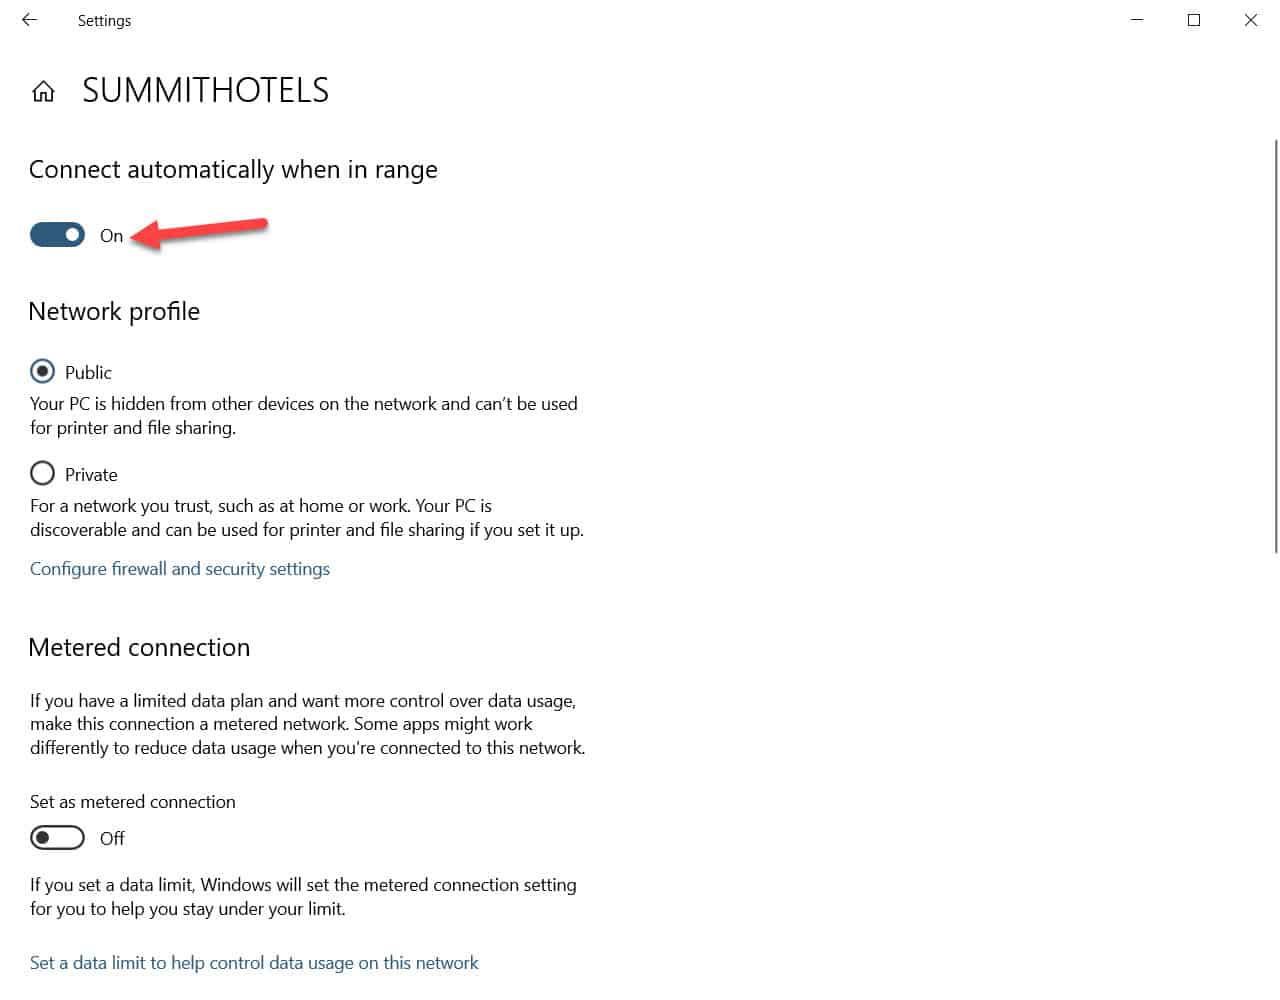
- Toggle the Connect automatically when in range switch to the On position.
This will allow your laptop to connect automatically to this network.

Once you have performed the above steps you should restart your computer then check if Windows 10 does not connect to Wi-Fi on startup issue still occurs.
Prevent the Wi-Fi adapter from turning off when not in use
When you leave your laptop unattended for a certain period of time the battery saver feature of Windows 10 will turn off the power of the Wi-Fi adapter which will result in the laptop getting disconnected from the wireless network. You can prevent this from happening by following the steps listed below.
- Double click on the battery icon found on the system tray.
- Click on battery settings.
- Click on Power & Sleep settings found on the left pane.
- Click on Additional power settings. This is found on the right pane under the Related settings section.
- Click on Change plan settings on the active power plan.
- Click on Change advanced power settings.
- Expand the Wireless Adapter Settings.
- Expand the Power Savings Mode.
- Make sure to select Maximum Performance for the on battery and plugged in options.
Prevent Windows 10 from turning off the network adapter
If the issue is caused by a power management setting then you should make sure to change this setting.
- Right click on the Start button then click on device manager.
- Expand the network adapters section.
- Right click on the wireless adapter then click on Properties.
- Click on the Power Management tab.
- Uncheck the allow the computer to turn off this device to save power option.
Having Issues with your computer? Feel free to contact us using this form. We’ll try to help.