Windows 10 is an operating system that’s popular today owing to its many outstanding features as well as its user friendly interface. It was first released in 2015 and ever since then has been updated several times. Those who constantly work on productivity tasks using their computers will usually want to take screenshots of their work. Here’s what you need to do to take screenshots in windows 10.
Capture screenshot in Windows 10
A screenshot is an image of the screen that is captured which can later on be saved. It is also usually called print screen, screen dump, snapshot, or screen capture. Windows 10 offers several ways for you to do a screenshot which we will be showing you.
Method 1: Use the Snipping Tool to take screenshots
The Snipping Tool was first introduced in Windows Vista and ever since has been included in new Windows releases.
Time needed: 3 minutes.
Screen capture using Snipping Tool
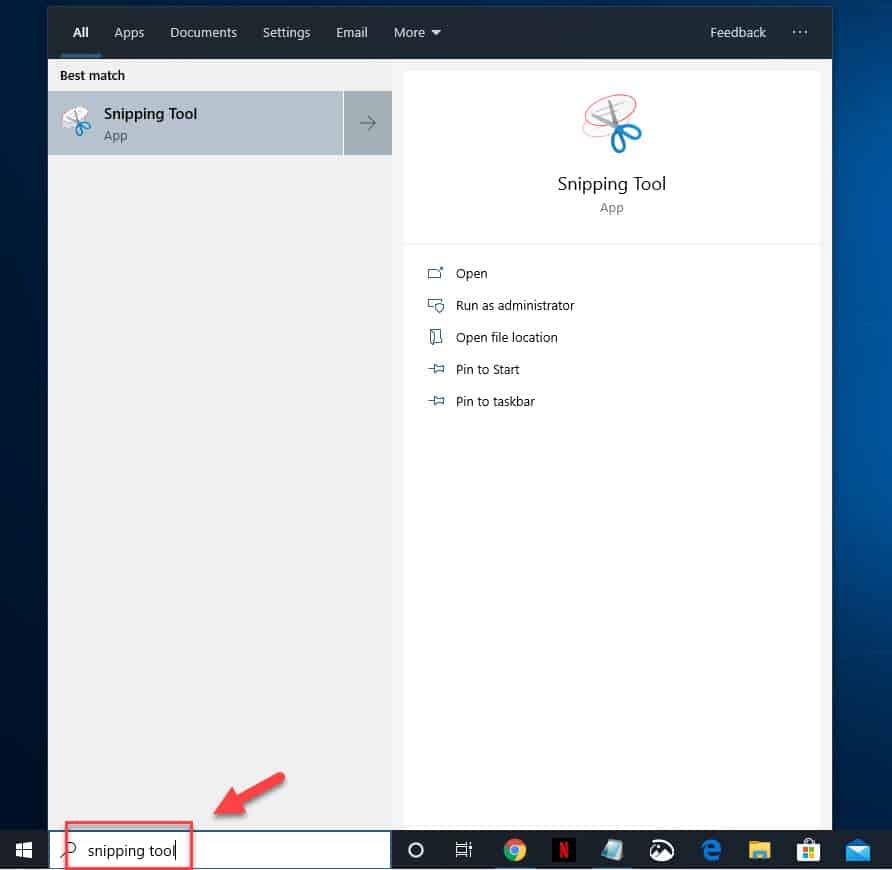
- Type “Snipping tool” without the quotation marks in the search bar.
This can be found at the lower left side of the screen.

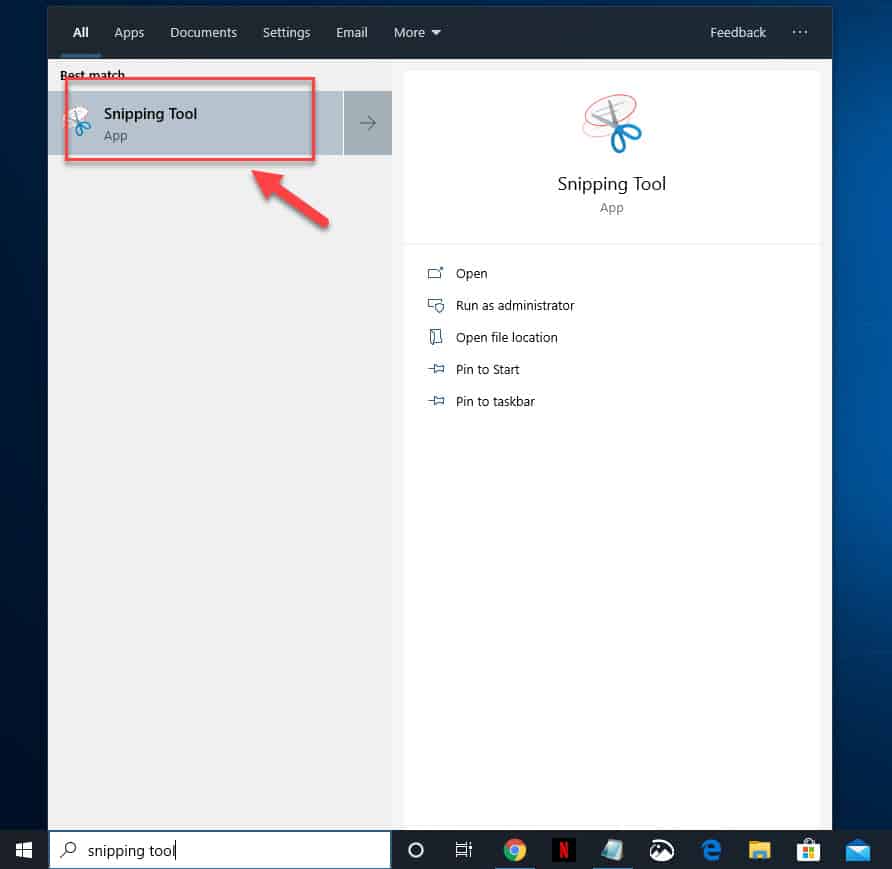
- Click on the Snipping tool app that appears.
This will open the program.

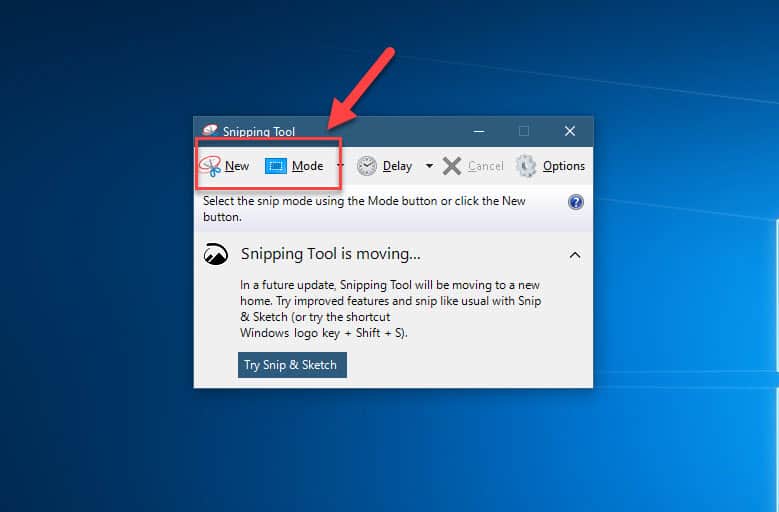
- Click on New then on Mode and click on Full-screen snip if you want the whole screen to be captured.
This will take a screenshot of the current display.

Method 2: Snip & Sketch for easy screenshots in Windows 10
This is the latest version of the Snipping Tool which allows you to easily edit the screenshots that you took.
- Type “Snip & Sketch” without the quotation marks in the search bar. This can be found at the lower left side of the screen.
- Click on the Snip & Sketch app that appears. This will open the program.
- Click on New then click on Full-screen snip if you want the whole screen to be captured. This will take a screenshot of the current display.
Method 3: Use the Print Screen key
If your keyboard has a dedicated Print Screen key then you can click on this to take a screenshot of the whole screen. The image will be saved in the clipboard. You will need to open an image editing software such as Paint then paste the screenshot taken. You can then save this as an image file.
Method 4: Use the Windows + Print Screen key
Pressing the Windows and Print Screen key will automatically save the whole screen grab in the Screenshots folder inside the Pictures folder.
After performing the steps listed above you will successfully take screenshots in Windows 10.
Having Issues with your computer? Feel free to contact us using this form. We’ll try to help.


