When you close your laptop lid it will automatically go to sleep mode. This allows its battery life to be extended since normally you won’t be using the laptop when you close it. There are however instances when you don’t want this to happen such as when the laptop is connected to an external monitor. In this latest installment of our troubleshooting series we will show you how to close laptop without putting it to sleep.
Prevent Windows 10 laptop from going to sleep
The default setting of your laptop is that it will go to sleep when you close its lid or when it is not being used for a certain amount of time. You can change this setting quite easily if you don’t want this to happen.
Change setting from Power options
The best way to prevent the laptop from sleeping when the lid is closed is from the power options setting.
Time needed: 2 minutes.
Choose what closing the lid does
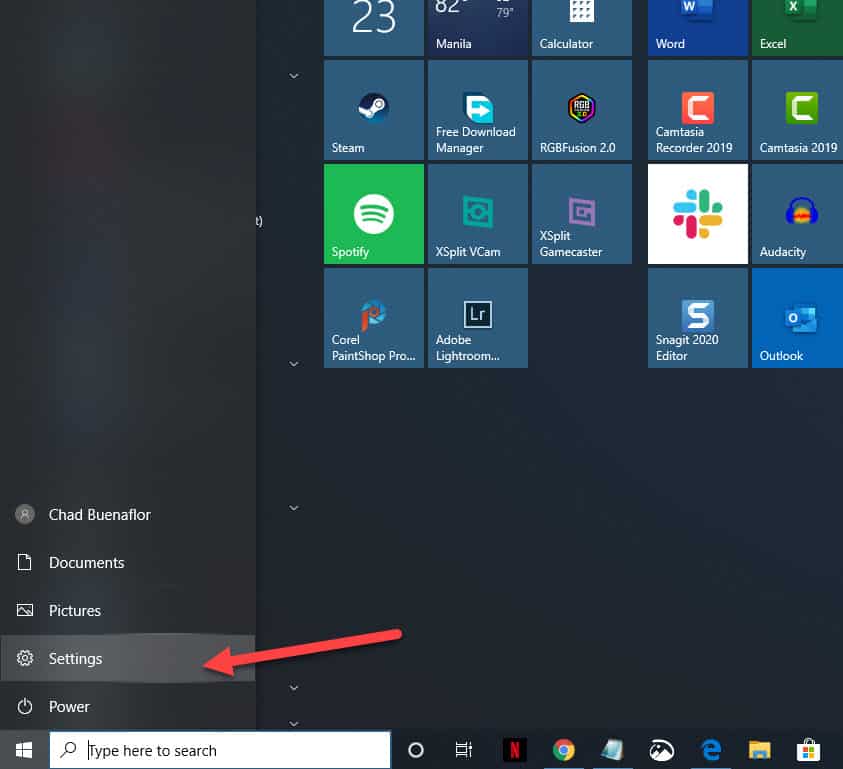
- Click on the Start button.
This is located on the lower left side of the screen.

- Click on Settings.
This will open the Settings window.

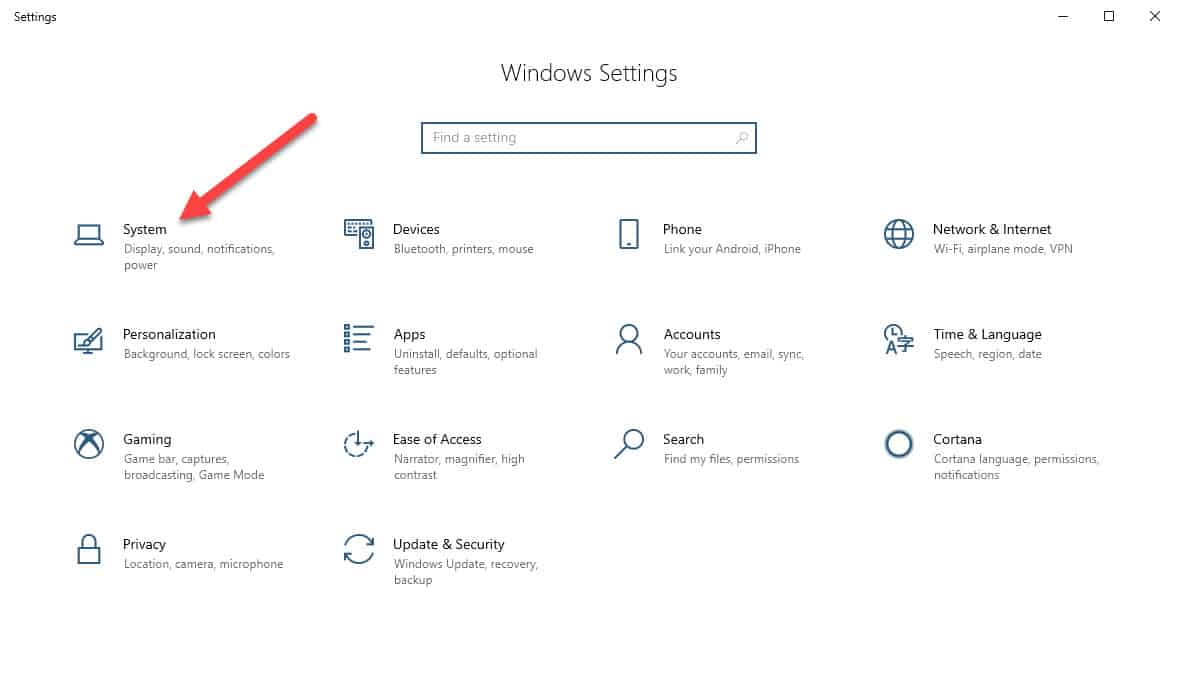
- Click on System.
This is usually the first option on the upper left side of the Settings window.

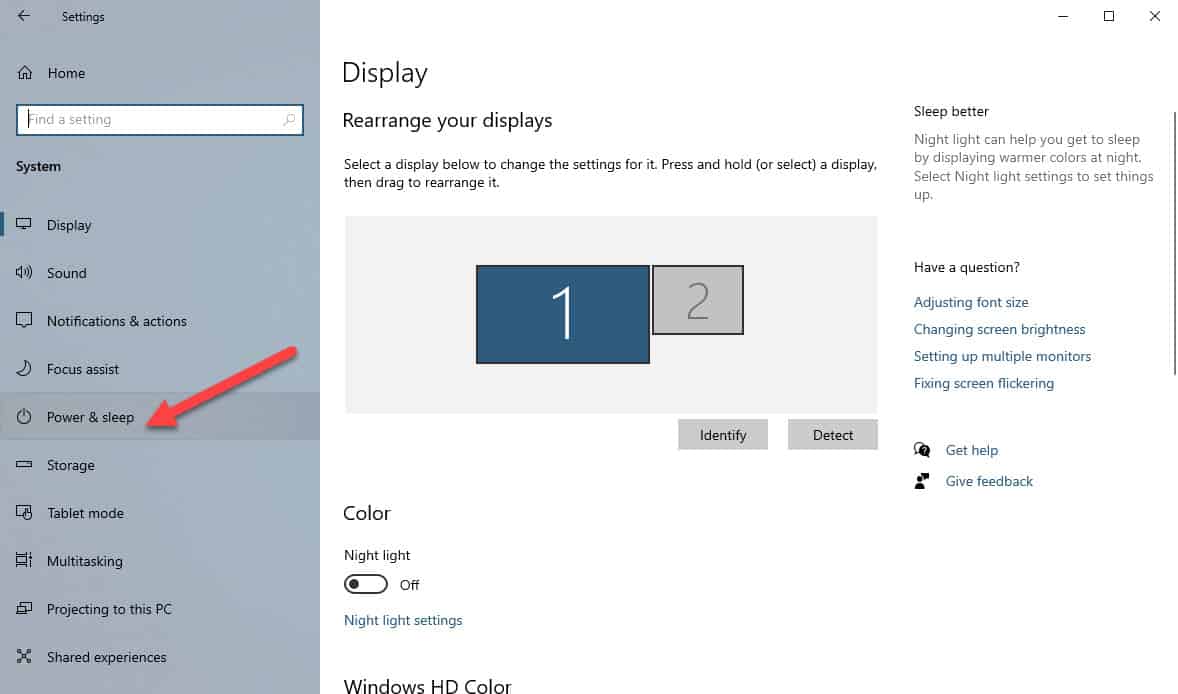
- Click on Power & Sleep.
This is located on the left pane.

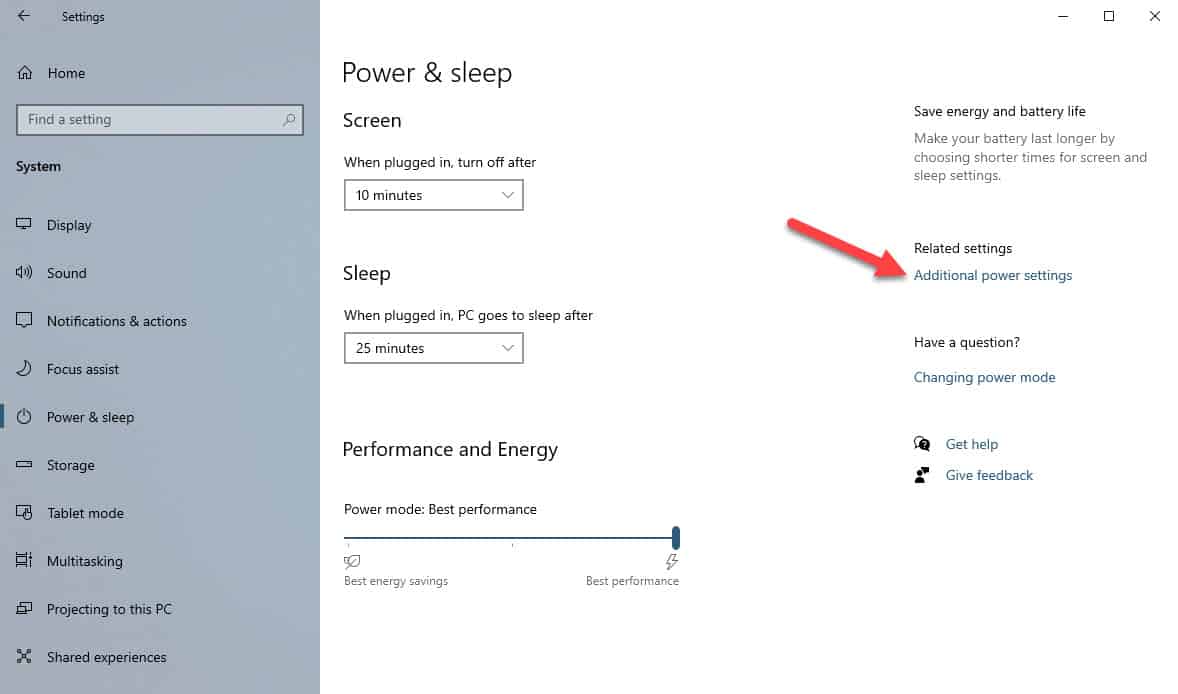
- Click on Additional power settings.
This is a link on the right pane under the related settings field.

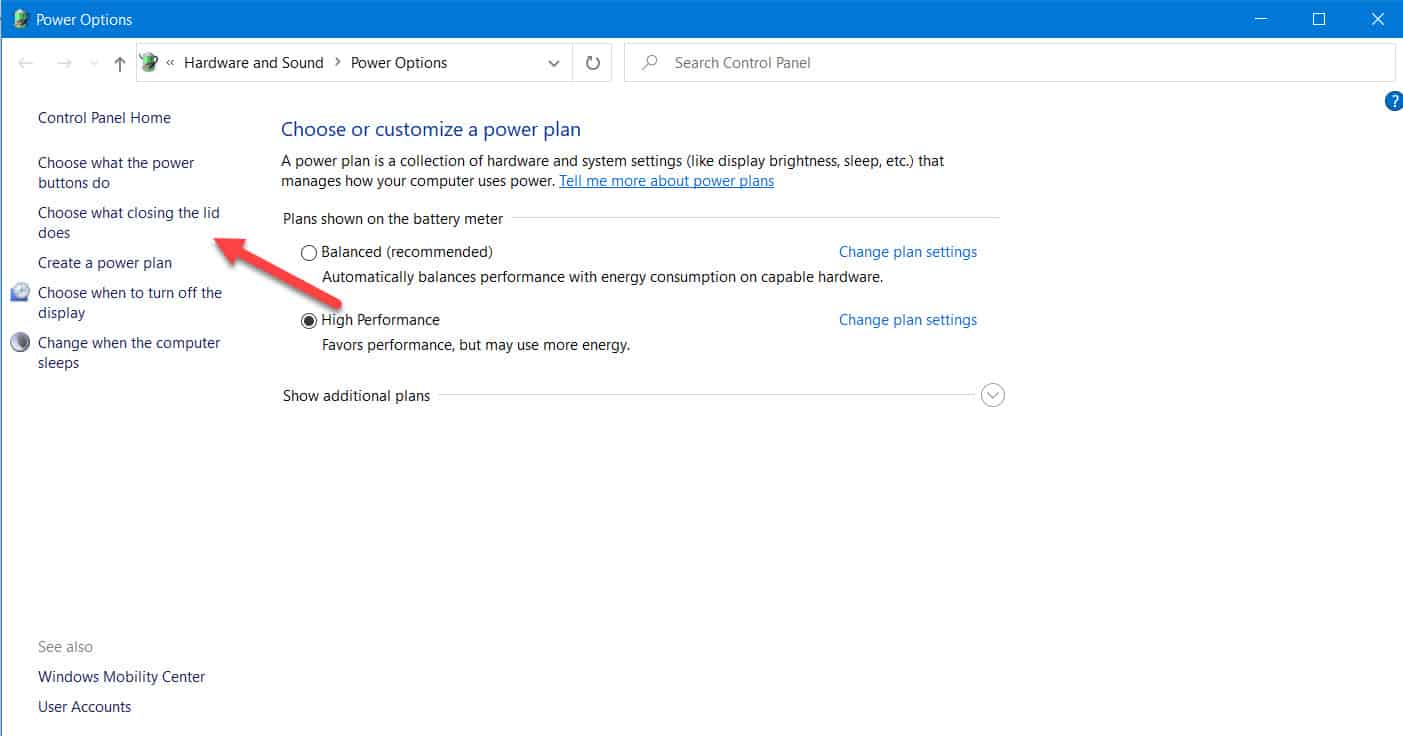
- Click on Choose what closing the lid does.
This is found on the left pane on the power options window.

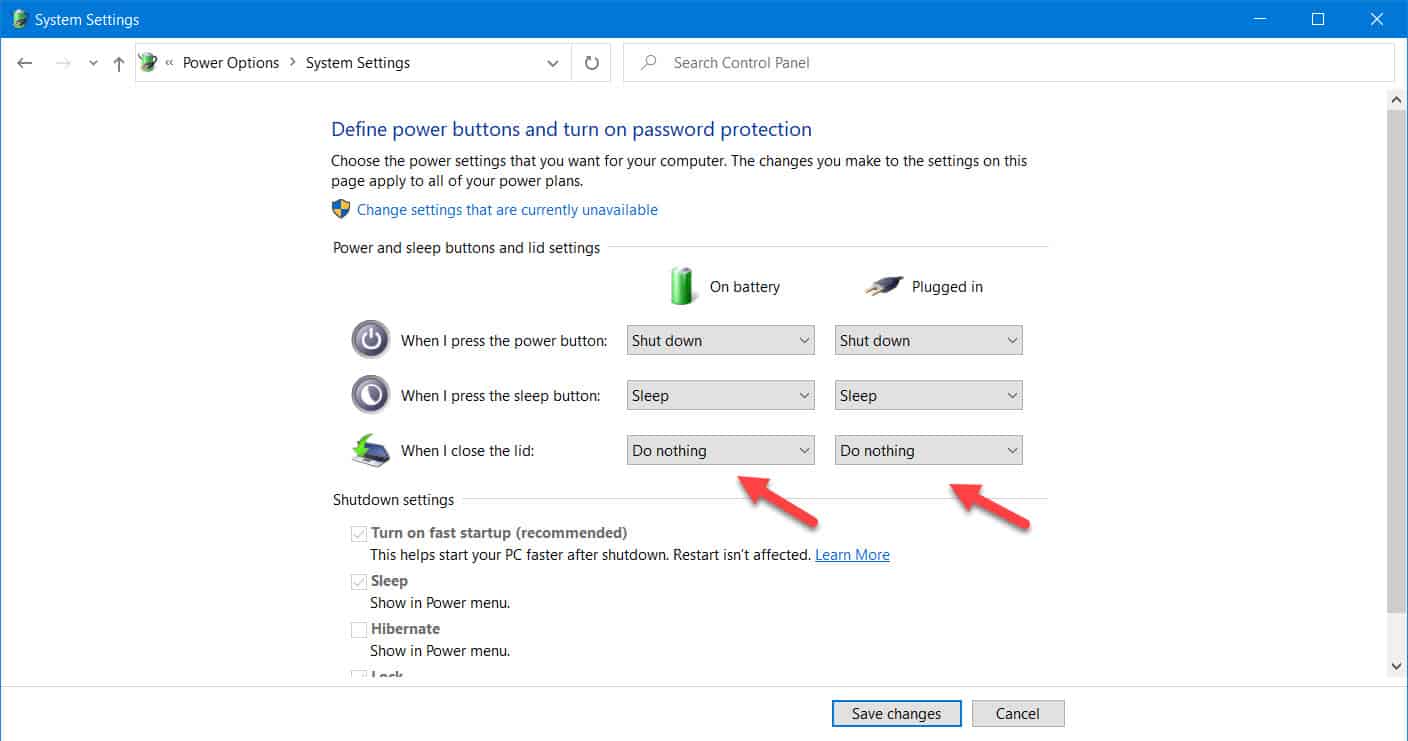
- On the When I close the lid option choose Do nothing for both battery and plugged in.
This prevents the laptop from sleeping when the lid is closed.

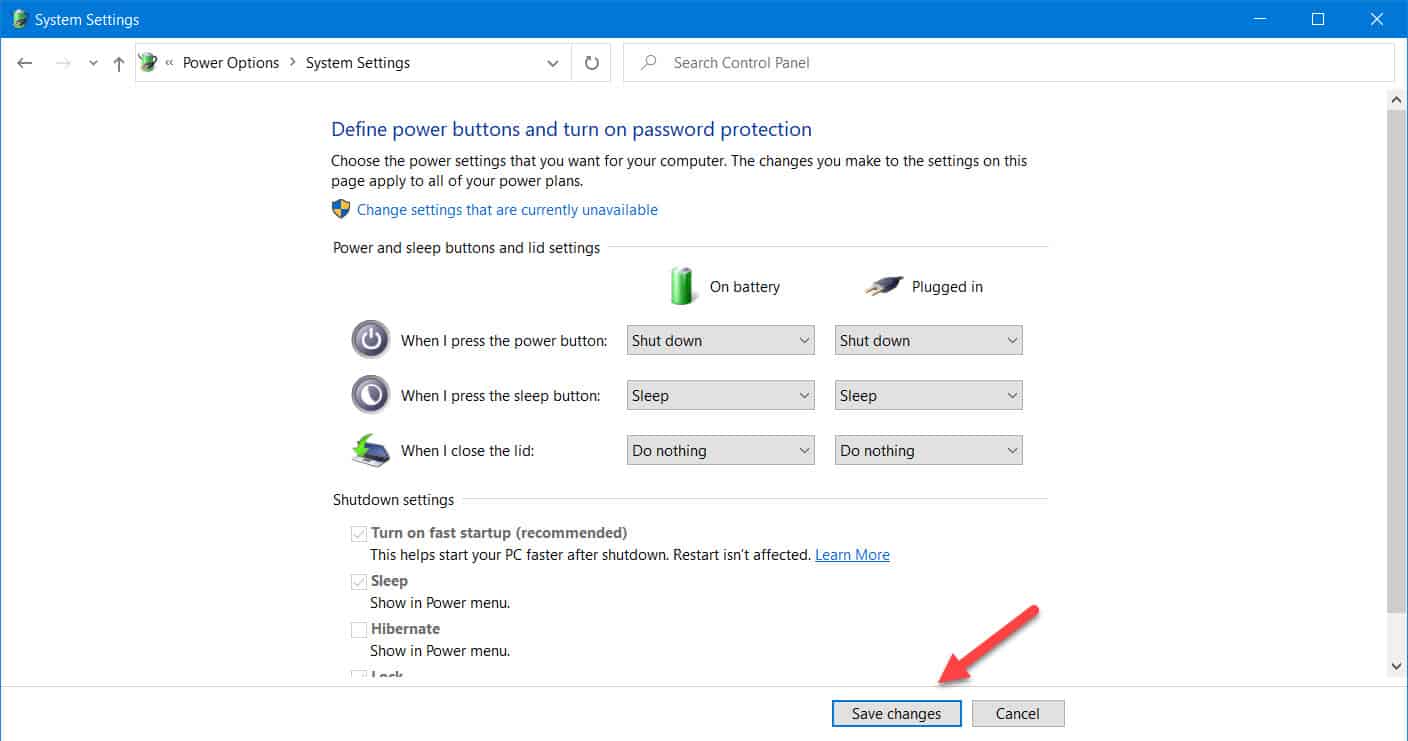
- Click on the Save changes button.
This will save the changes that you made.

After performing the steps listed above you can close laptop without putting it to sleep.
Manage when Windows 10 laptop sleeps
You can also change when your laptop will sleep. You can do this by making your device sleep after a certain period of inactivity has passed.
- Click on Start.
- Click on Settings.
- Click on System.
- Click on Power & sleep.
- Change the setting for “ On battery power, PC goes to sleep after” to a specific amount of time or you can choose never.
- Change the setting for “When plugged in, PC goes to sleep after” to a specific amount of time or you can choose never. The changes you made will take effect immediately.
Having Issues with your computer? Feel free to contact us using this form. We’ll try to help.
