Windows 10, which was first released in 2015, is the most popularly used operating system in most businesses and homes. It has several useful features that makes it the ideal choice for use in desktops and laptops. One such feature is the ability to recover from any issues brought by a new software change. In this latest installment of our troubleshooting series we will show you how to enable system restore in windows 10.
Turn on system restore in Windows 10
System restore is a feature that takes a snapshot of your computer’s working state then saves this as a restore point. You will then be able to revert back to this point in case some issue occurs when updating the operating system, installing a new driver, or installing a new software. Sometimes this feature can be disabled in your computer. Here’s how you can enable it.
Enable recovery option from Control Panel
One of the easiest ways to enable this feature is from the Control panel.
Time needed: 5 minutes.
Turn on System Restore
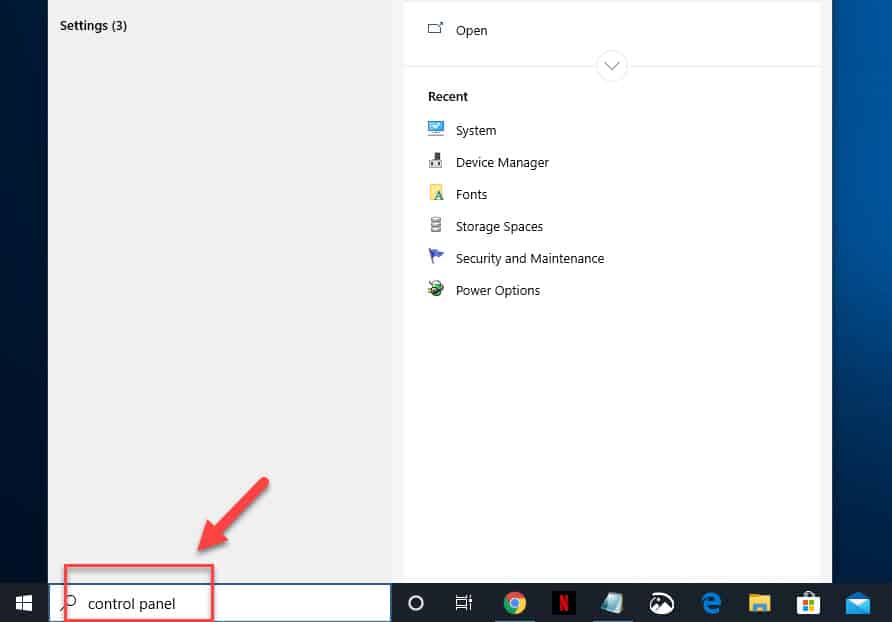
- Type “control panel” without the quotation marks in the search bar.
This is located on the lower left side of the screen.

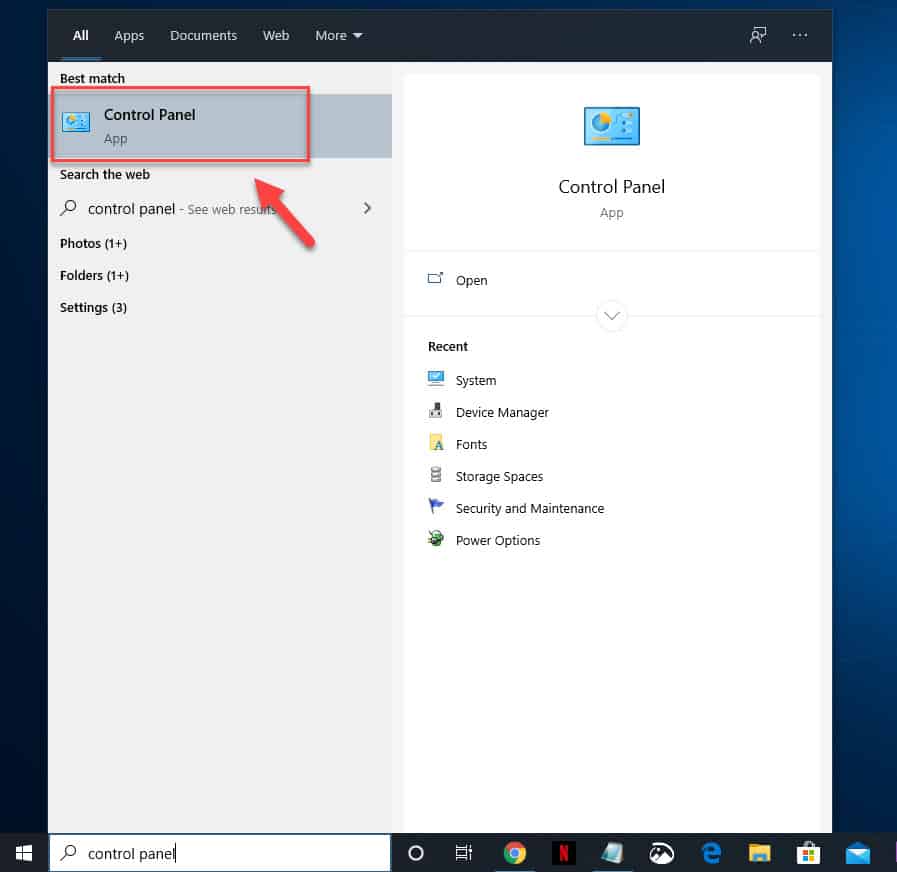
- Click on the Control Panel app that appears.
This will open the Control Panel.

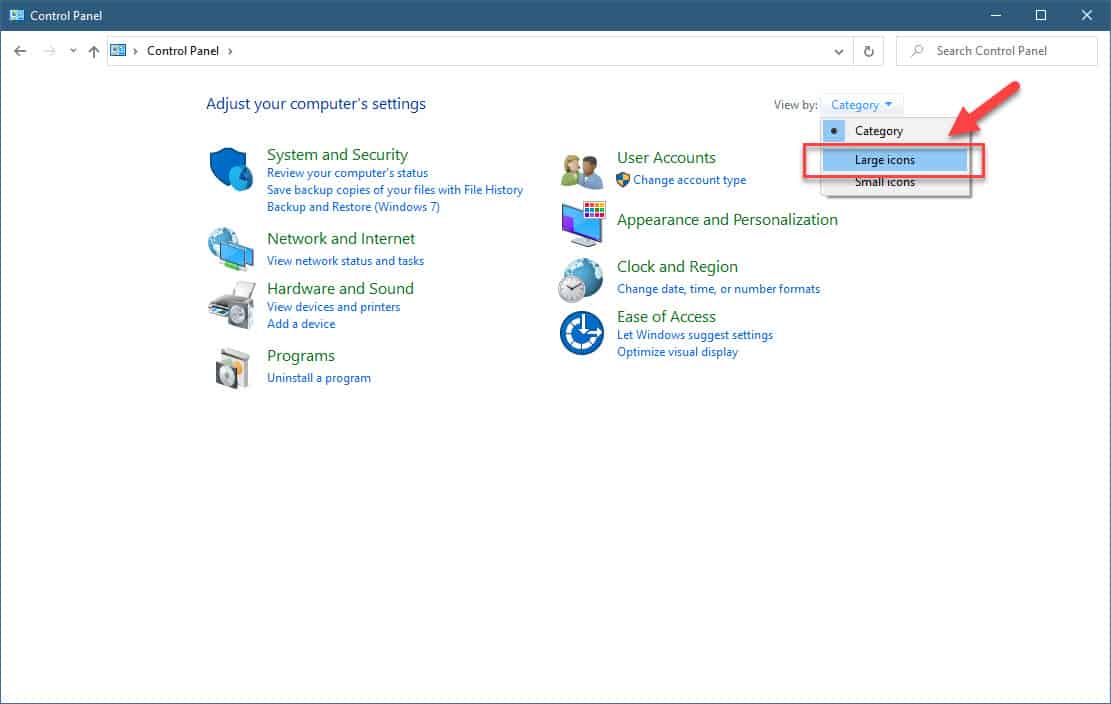
- Change View by settings to Large icons.
This can be found on the upper right side of the window.

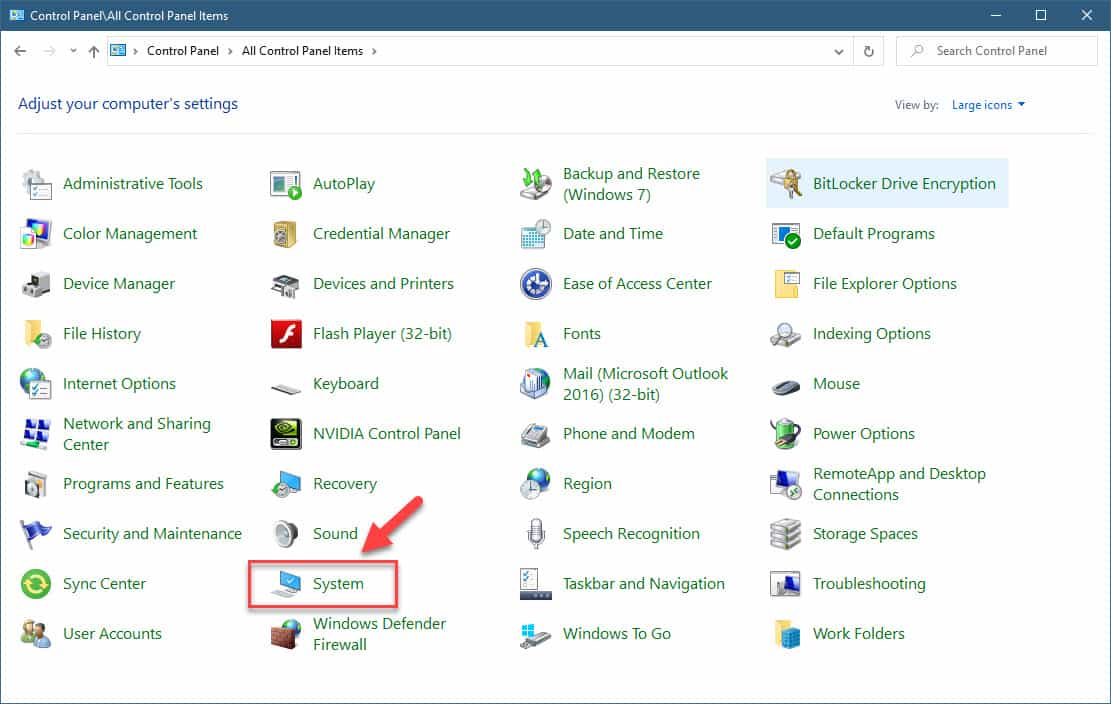
- Click on System.
This opens the computer system settings.

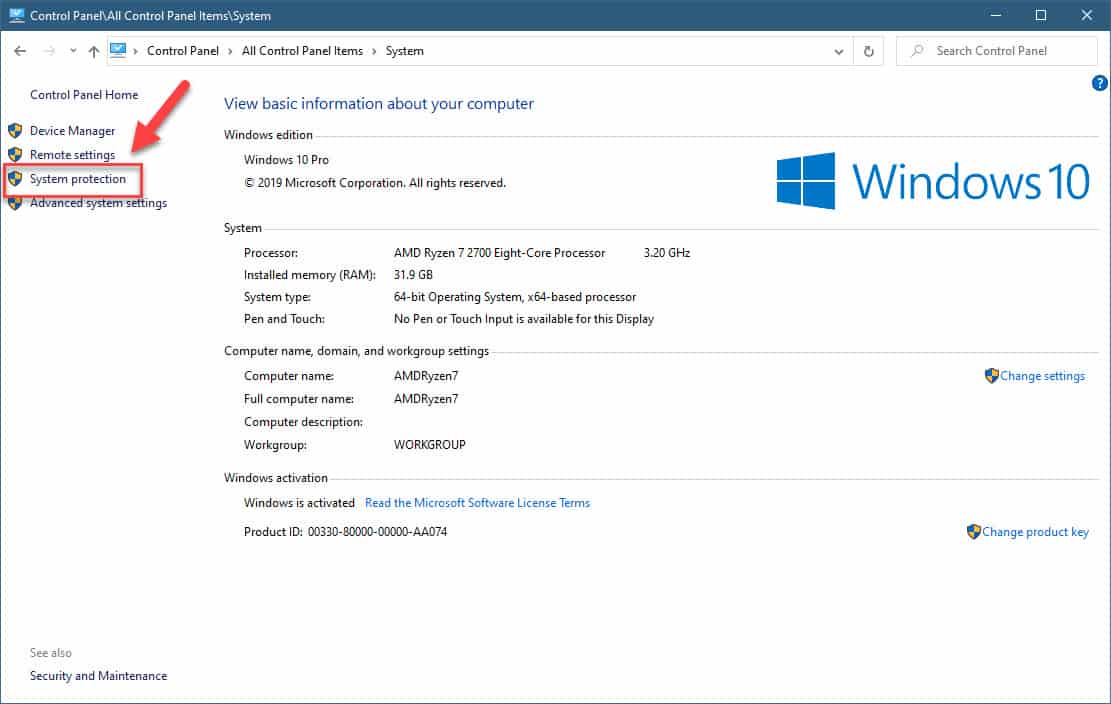
- Click on System Protection.
This can be found on the left side of the window.

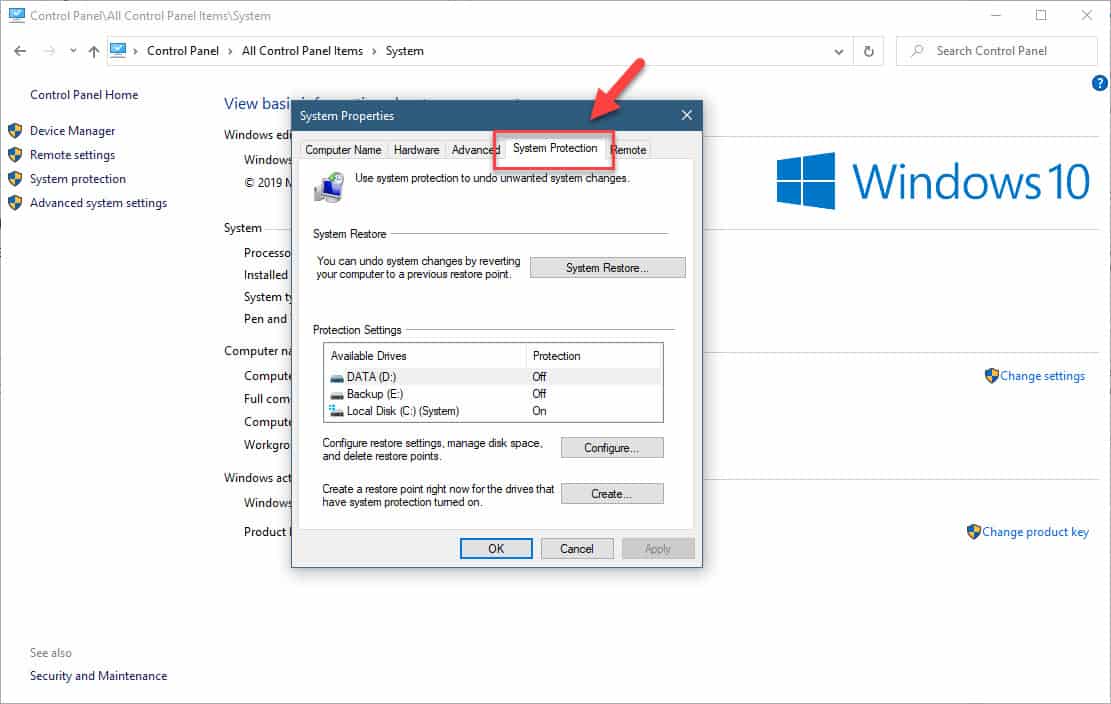
- Click on the System Protection tab.
This is the fourth tab on the System Properties window.

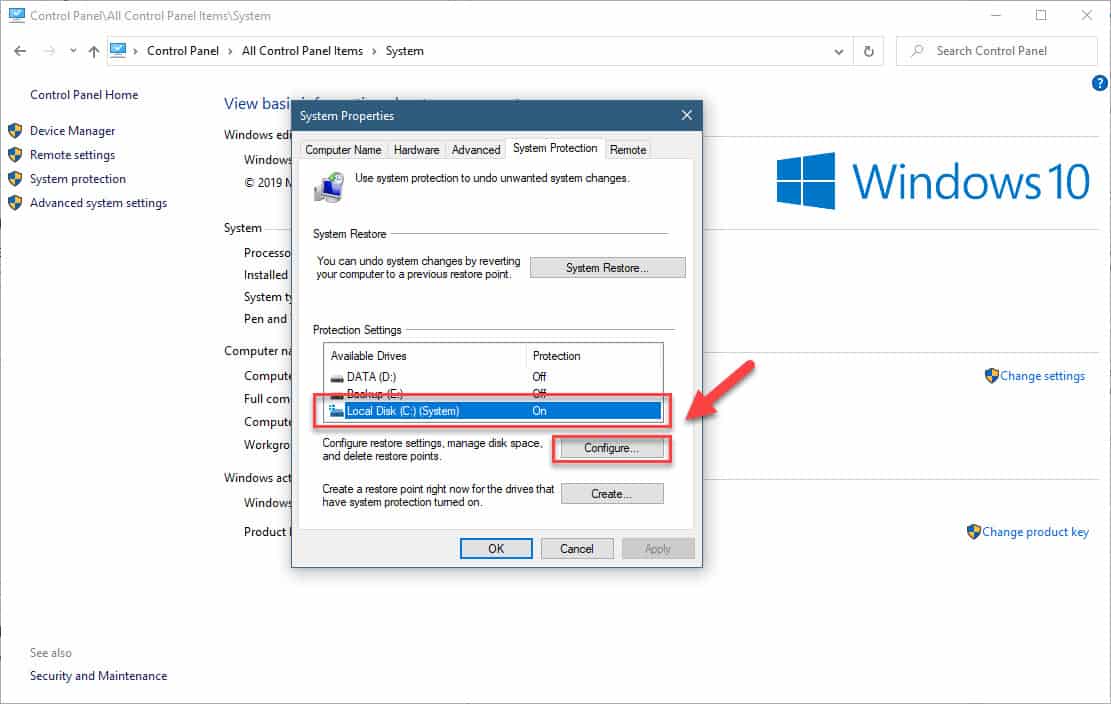
- Highlight the System disk then click on the Configure button.
This allows you to create a restore point on the selected disk.

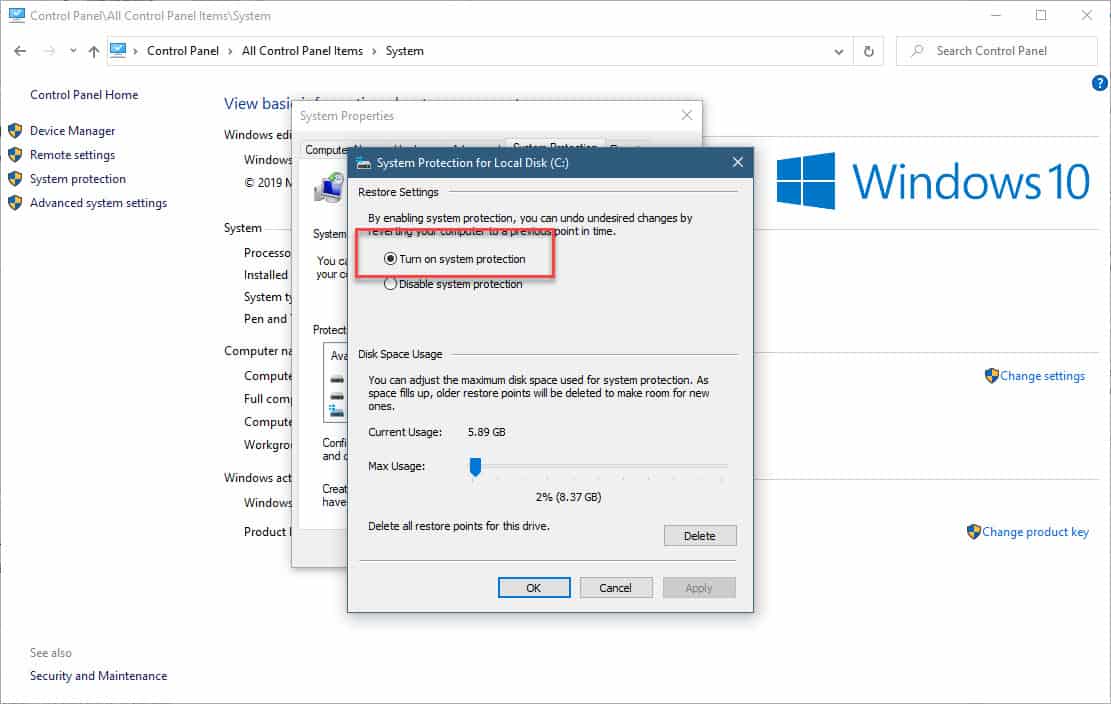
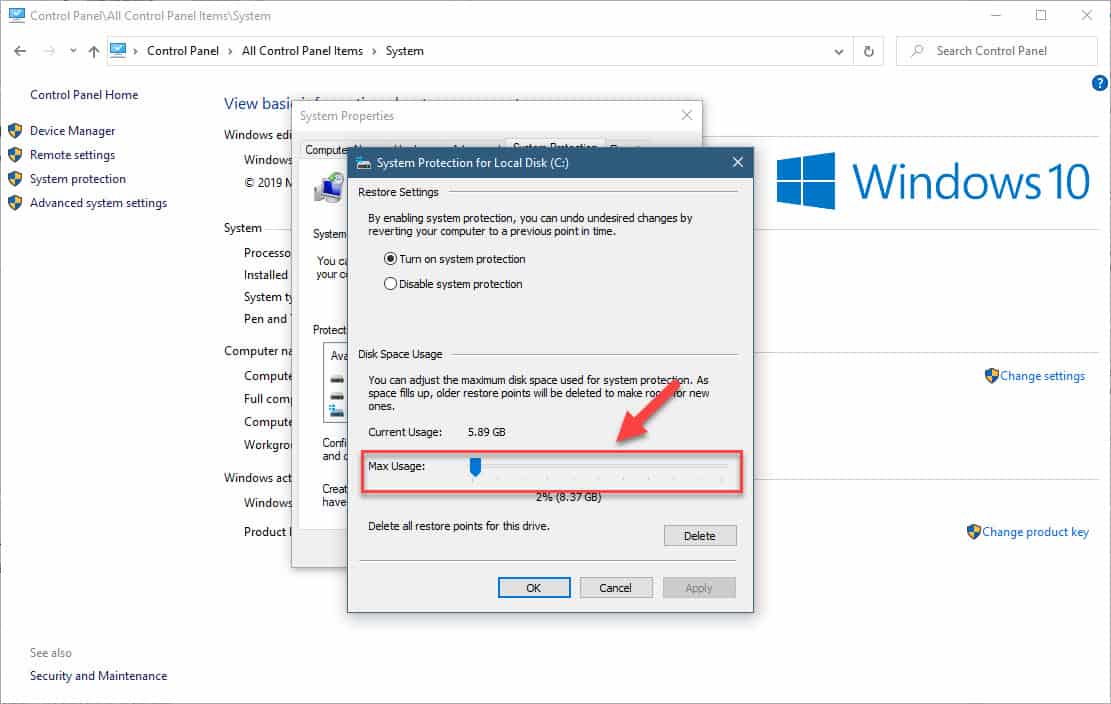
- Select Turn on system protection.
This will enable the system protection of the selected drive.

- Drag the max usage slider to around 2 percent.
This allocates storage space for the restore point data.

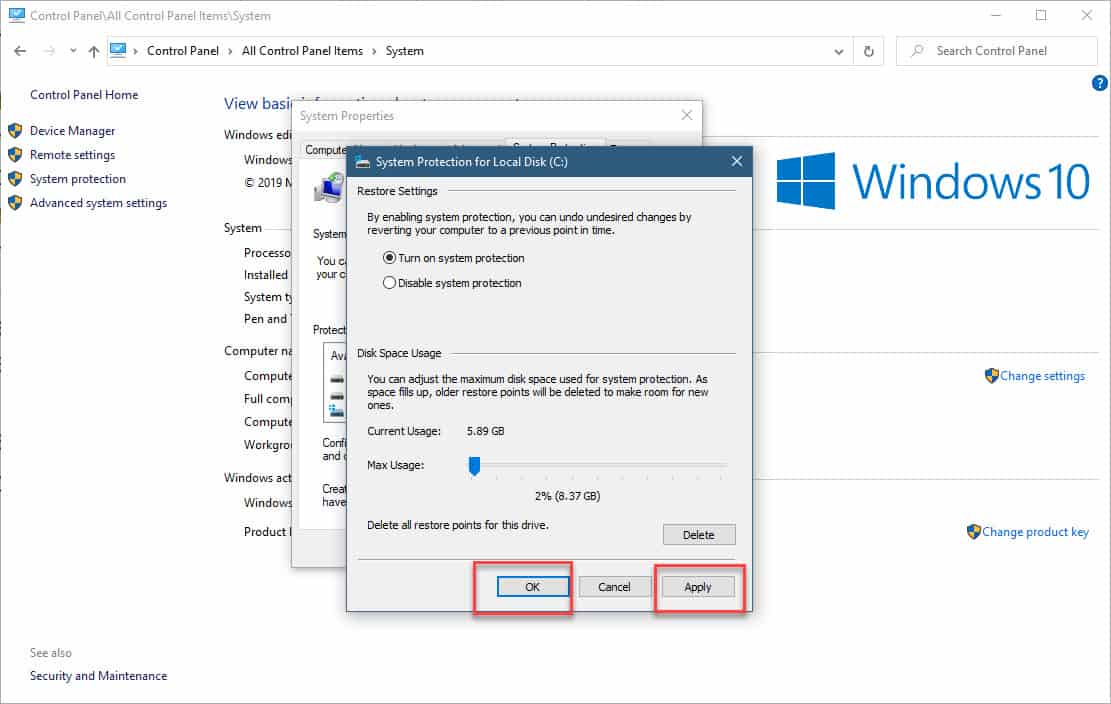
- Click Apply then OK.
This will save the changes that you made.

After performing the steps listed above you will successfully enable system restore in Windows 10.
Having Issues with your computer? Feel free to contact us using this form. We’ll try to help.
