You might have noticed your Windows 10 computer slowing down as you install more apps to it. While one main reason for this slow issue is lack of RAM due to many processes running it can also be caused by low disk space. If your computer is running low on disk space then you will need to remove or delete data that is no longer needed. The best way to do this is to free up disk space with Storage Sense.
Use Storage Sense to Free Up Space on Your Windows 10 Hard Drive
Storage Sense is a built-in tool available in windows 10 that monitors your computer for old and unused files and can remove them automatically after a certain period of time. Files in the Recycle Bin for example no longer have to be manually deleted as they will be automatically removed after 30 days. Temporary files , files stored in the downloads folder, as well as older Windows 10 installations can also be automatically removed by this tool.
The most common file types that can be deleted are as follows:
- Temporary setup files.
- Old indexed content.
- System cache files.
- Internet cache files.
- Device Driver packages.
- System downloaded program files.
- Dated system log files.
- System error memory dump files.
- System error minidump files.
- Temporary system files.
- Dated Windows update temporary files.
Time needed: 3 minutes.
Free Up Disk Space With Storage Sense
- Click on Start.
This is located on the lower left side of the screen.

- Click on Settings.
You can recognize this by its gear icon.

- Click on System.
This is the first option on the upper left side of the new window.

- Click on Storage.
This is located on the left pane.

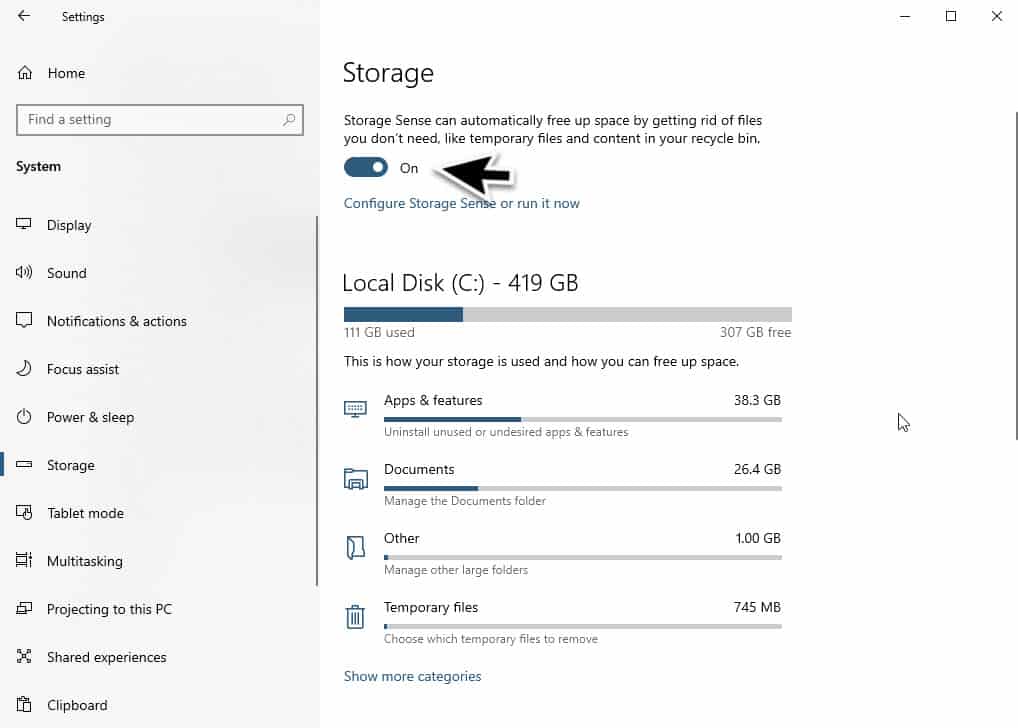
- Turn on the Storage Sense Switch.
This will allow your computer to automatically free up space by getting rid of unused files.

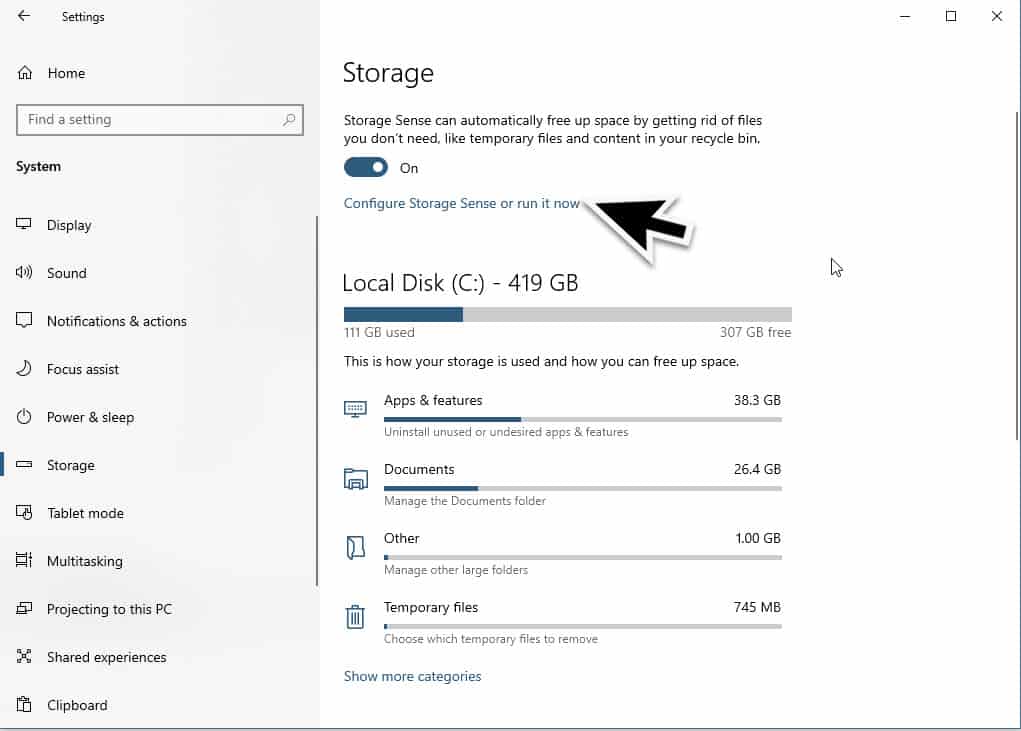
- Click on Configure Storage sense or run it now link.
This allows you to setup Storage Sense.

When configuring Storage Sense you can set it to run at a certain time interval or only when you have low disk space. You can also set the interval on when to delete the temporary files from your computer and if the files in your Downloads folder will be deleted.

If you don’t want to use this feature then you can deactivate it by following the steps listed below.
How To Disable Storage Sense
- Click on Start.
- Open Settings.
- Click on System.
- Click on Storage.
- Turn off the Storage sense toggle switch.
The feature will automatically stop running after performing the steps listed above.
Having Issues with your computer? Feel free to contact us using this form. We’ll try to help.


