Rust Keeps Crashing? Try These 9 Troubleshooting Methods (Update, Verify + More)
Rust is a popular survival game noted for its harsh gameplay and expansive crafting system. However, many players have experienced Rust keeps crashing issue that disrupt and frustrate their gameplay. This article will examine some of the common causes of Rust game crashes and provide troubleshooting tips to help players resolve these crashing issues.
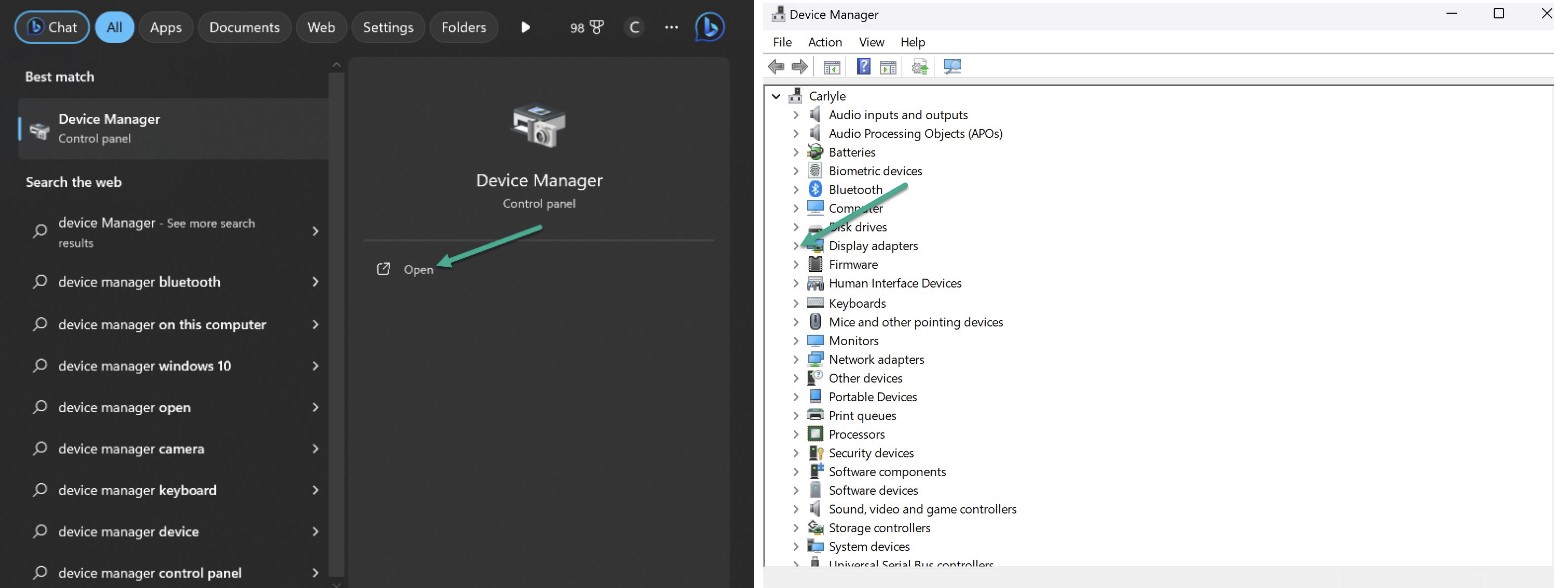
1. Update Your Graphics Drivers
Outdated graphics drivers are one of the most common causes of game crashes. To fix this:
- Open Device Manager and expand the Display adapters section.
- Right click on your graphics card driver > Select Update driver.
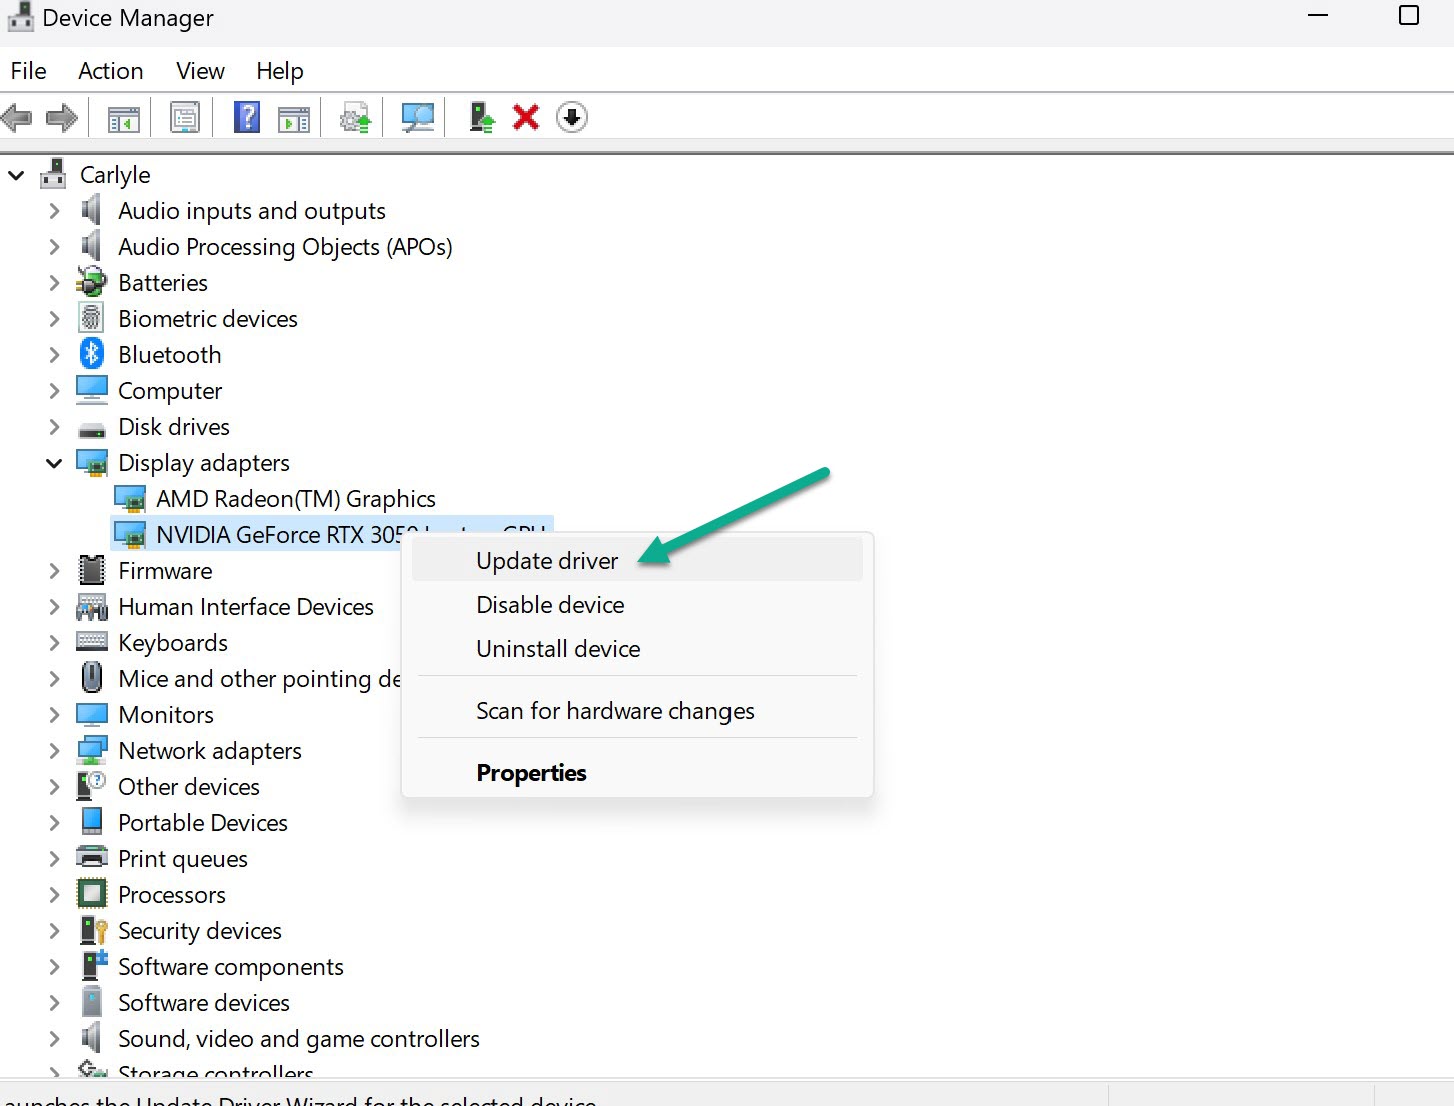
- Choose ‘Search automatically for updated driver software’.
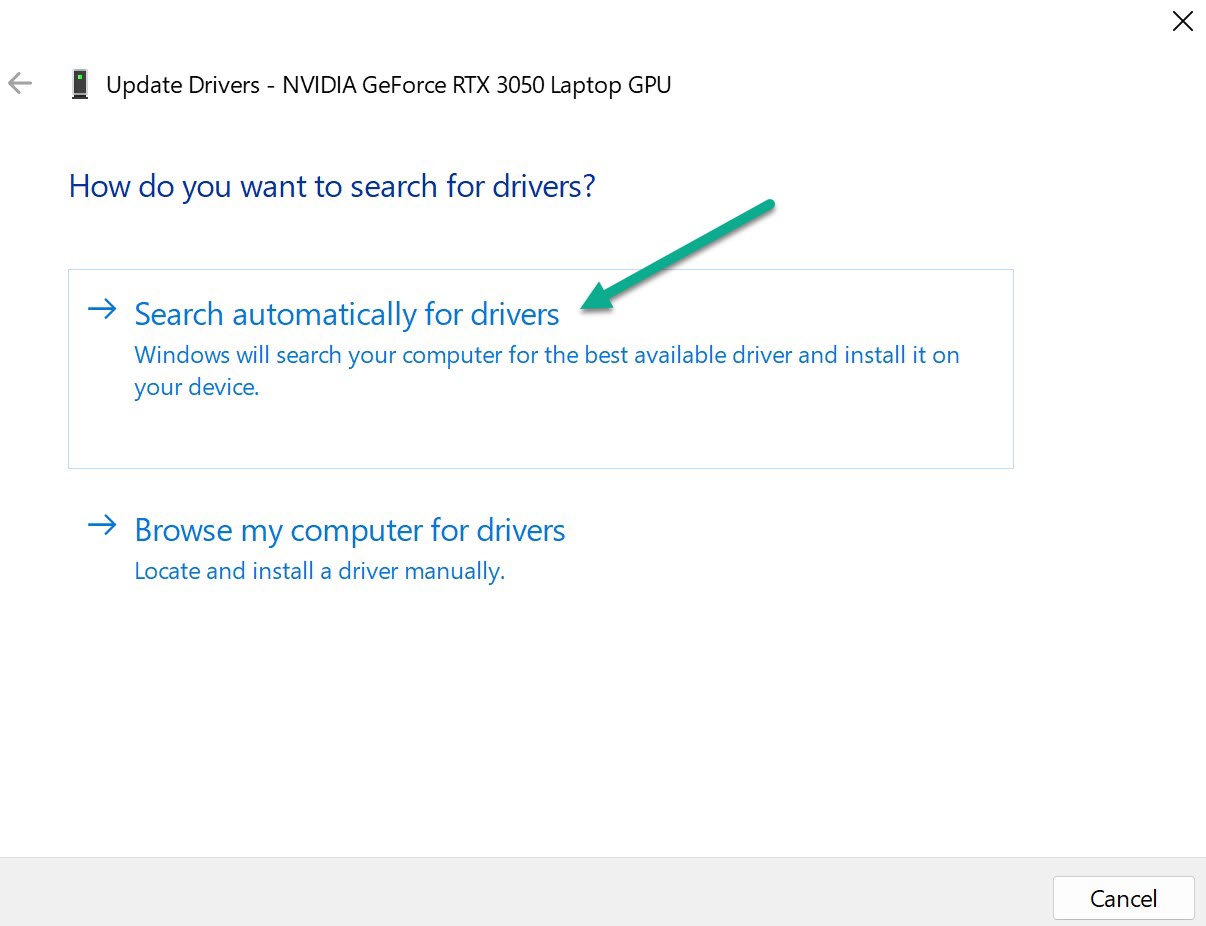
- Restart your PC once the update is complete.

Updating to the latest graphics drivers often resolve game crashing issues. Using a driver update utility like Outbyte Driver Updater makes it easy to keep your drivers up-to-date.
2. Run Steam as Administrator
If Rust crashes on startup, try running Steam as admin:
- Exit Steam completely.
- Right click the Steam shortcut > Select Properties.
- In Compatibility tab, check ‘Run this program as an administrator’.
- Click Apply and OK.
- Launch Steam and run Rust.
This fixes permission issues that prevent Rust from accessing critical game files.
3. Close Background Apps
Apps running in the background can sometimes conflict with games. To fix this:
- Open Task manager > Click Processes tab.
- Check for unnecessary background processes hogging resources.
- Right click each process > Select End task.
- Relaunch Rust after closing background apps.
This prevents resource conflicts that can make Rust crash randomly.
4. Verify Integrity of Game Files
Corrupted Rust files often lead to crashes. Verify your game files through Steam:
- Open your Steam Library.
- Right click on Rust > Select Properties.
- Go to Installed Files tab > Click ‘Verify Integrity of Game Files’.
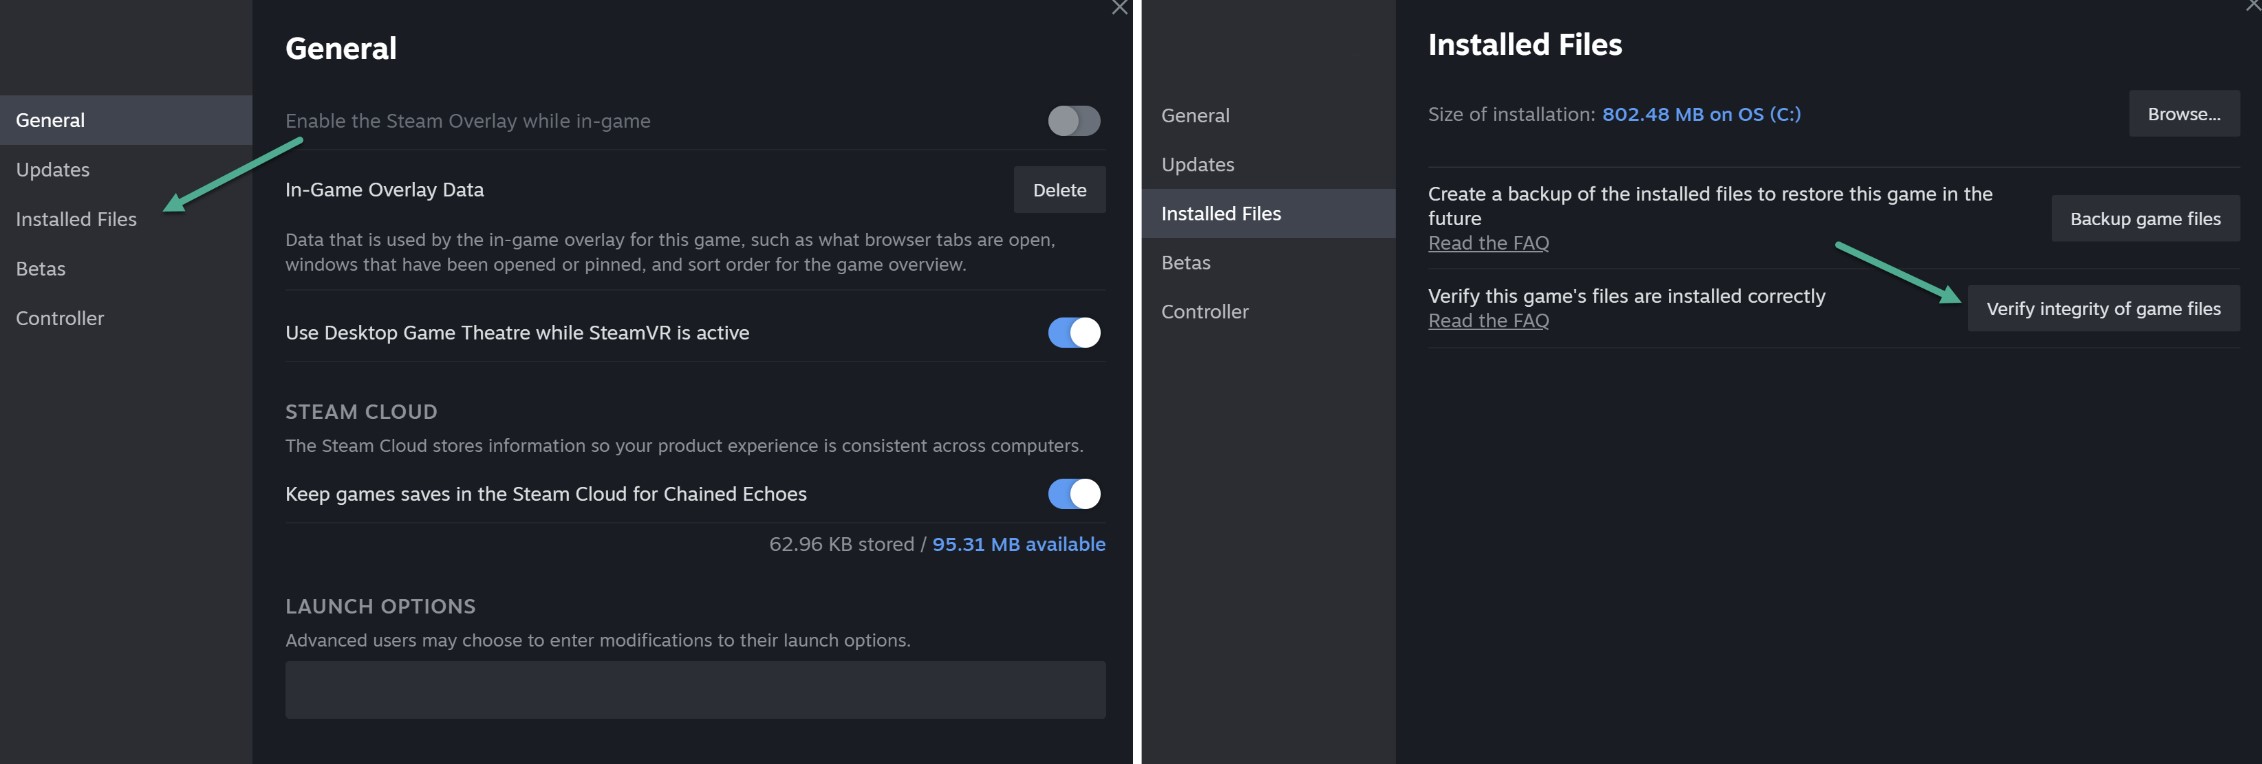
- Wait for the verification process to complete.
- Relaunch Rust.
Steam will automatically fix any damaged or missing files.
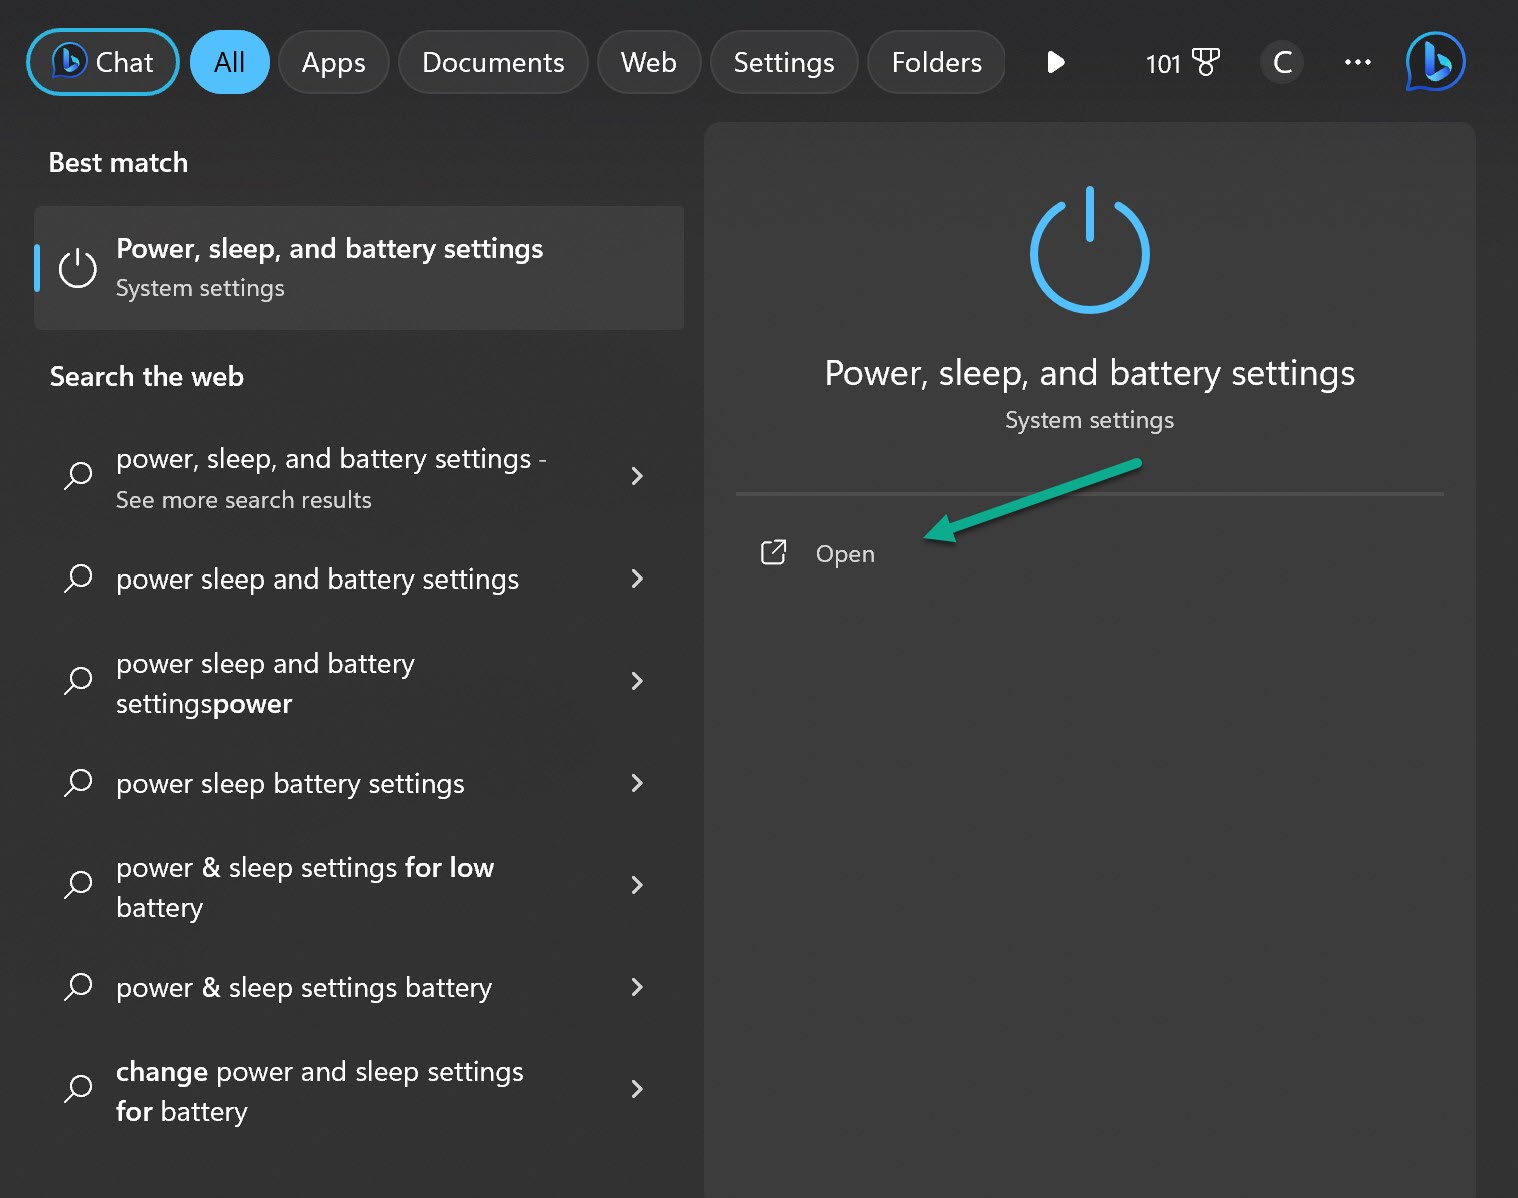
5. Change Power Plan to High Performance
If your PC is set to Balanced or Power saver mode, it can cause performance issues with games. To prevent crashes:
- Open ‘Power, Sleep, & Battery Settings’ in the Start menu.
- Select Best Performance Power Mode.
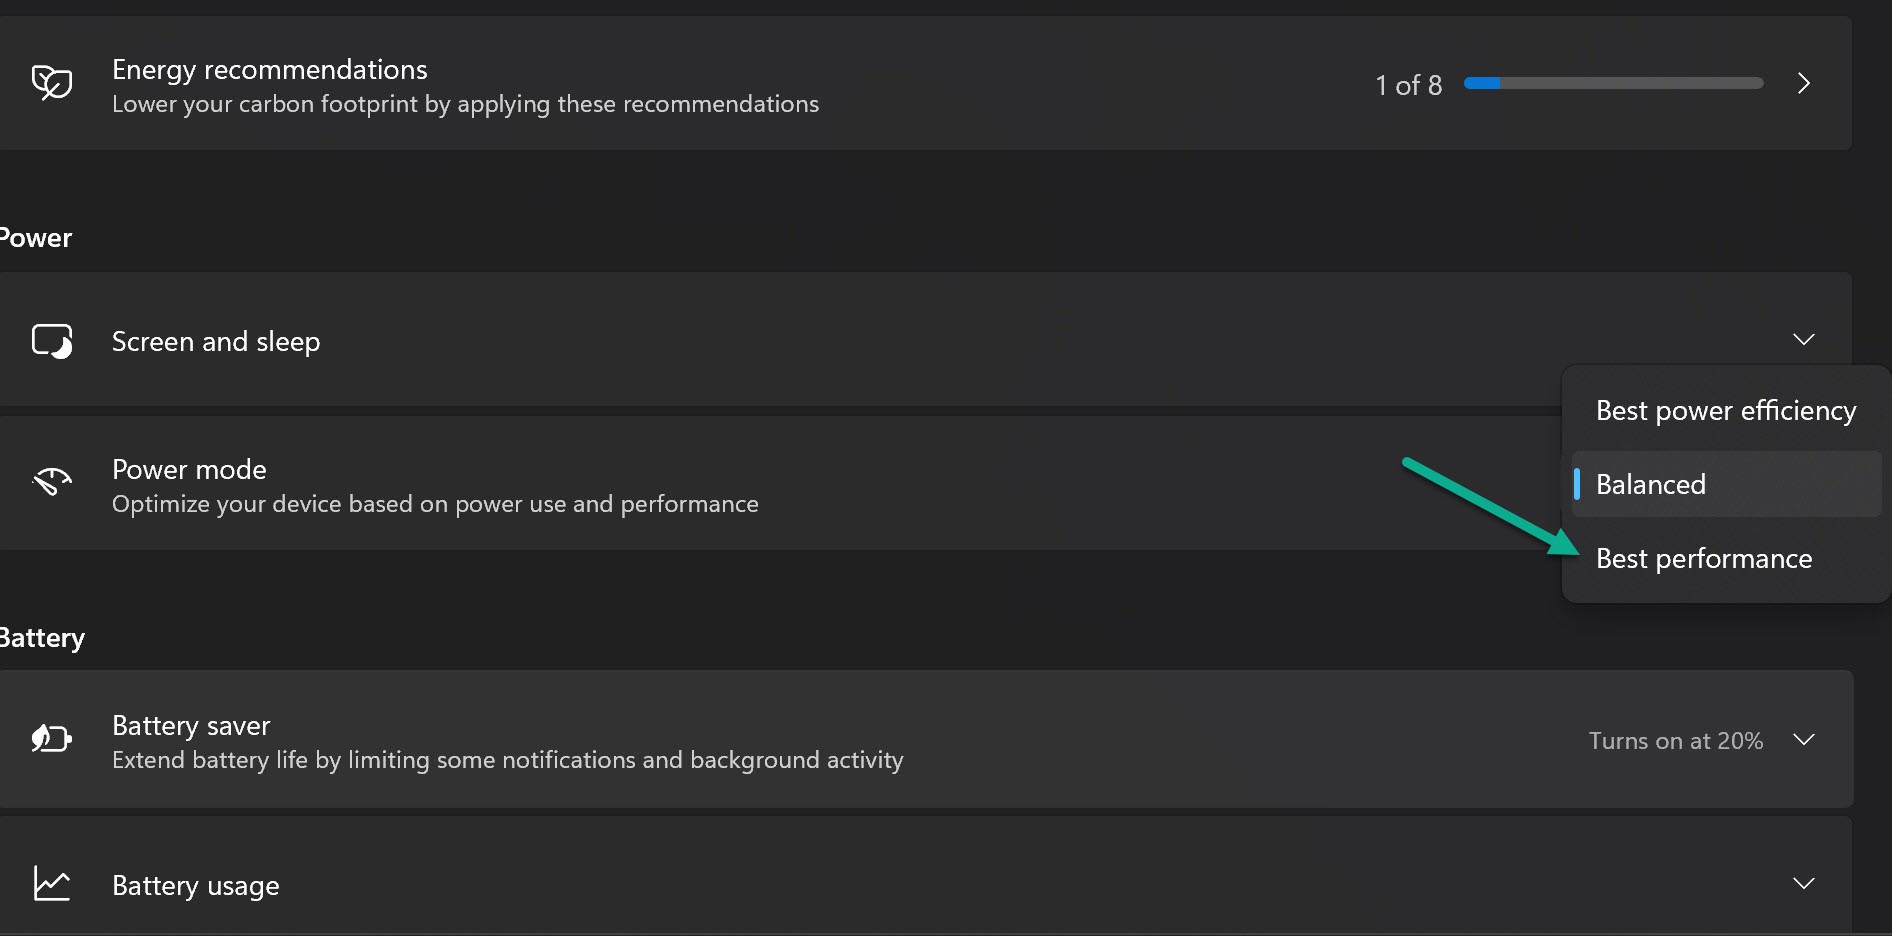
Setting the power plan to High performance disables power saving features that can interfere with games.
6. Increase Virtual Memory
Having insufficient virtual memory can make Rust crash. To increase it:
- Search for ‘System Properties’.
- Click ‘Advanced system settings’ > Performance Settings.
- Go to Advanced tab > Click ‘Change’ under Virtual Memory.
- Uncheck ‘Automatically manage paging file size’.
- Set initial and maximum size to 4096 MB.
- Click Set and OK.
Increasing virtual memory provides additional resources for Rust to run smoothly.
7. Reinstall Rust
If you have tried everything else, reinstalling Rust may fix crashing issues:
- Uninstall Rust through Steam.
- Delete the Rust folder located at ‘\Steam\steamapps\common’.
- Restart Steam to download and install Rust again.
A clean reinstall fixes corrupted files or registry issues causing the crashes.
8. Update Windows
Having an outdated Windows version can also make games unstable.
- Go to Settings > Windows Update.

- Click on ‘Check for updates’.
- Install any available updates.
Updating Windows resolves system bugs and improves stability for gaming.
9. Set Launch Options
Adding launch options optimizes Rust for your system:
- Right click Rust in your Steam Library > Select Properties.
- Click Set Launch Options.
- Enter: ‘-high -maxMem=8192 -malloc=system’
- Replace 8192 with your RAM size.
- Save changes and relaunch Rust.
This allocates more resources for Rust and could fix crashing.