YouTube Freezing in Chrome? Here Are 10 Troubleshooting Tips to Try
YouTube is the world’s most popular video streaming platform. But nothing is more frustrating than YouTube videos freezing or glitching while watching on Google Chrome.
The good news is there are several straightforward troubleshooting steps you can take to resolve YouTube freezing in Chrome issues. Follow the methods below to get videos playing smoothly again.

1. Restart Your Computer
Restarting your computer clears memory issues and resets Chrome. This quick fix eliminates any temporary glitches causing freezing.
To restart your PC:
- Close all open apps and programs.
- Click the Windows Start menu.
- Select “Restart” and confirm.
- Once restarted, launch Chrome and play a video to test.
2. Update Graphics Drivers
Outdated graphics drivers commonly disrupt YouTube playback. Updating to the latest version can fix incompatibility issues.
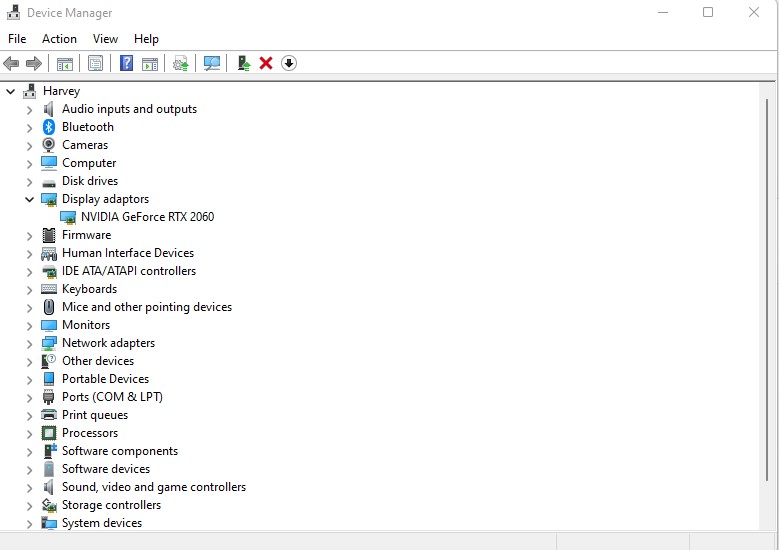
To update your graphics drivers:
- Open the Device Manager.
- Expand the “Display adapters” section.
- Right-click your graphics card.
- Select “Update driver.”
- Restart your PC afterwards.
3. Disable Hardware Acceleration
Hardware acceleration uses your GPU to improve performance but can cause video glitches. Disabling it prevents conflicts.
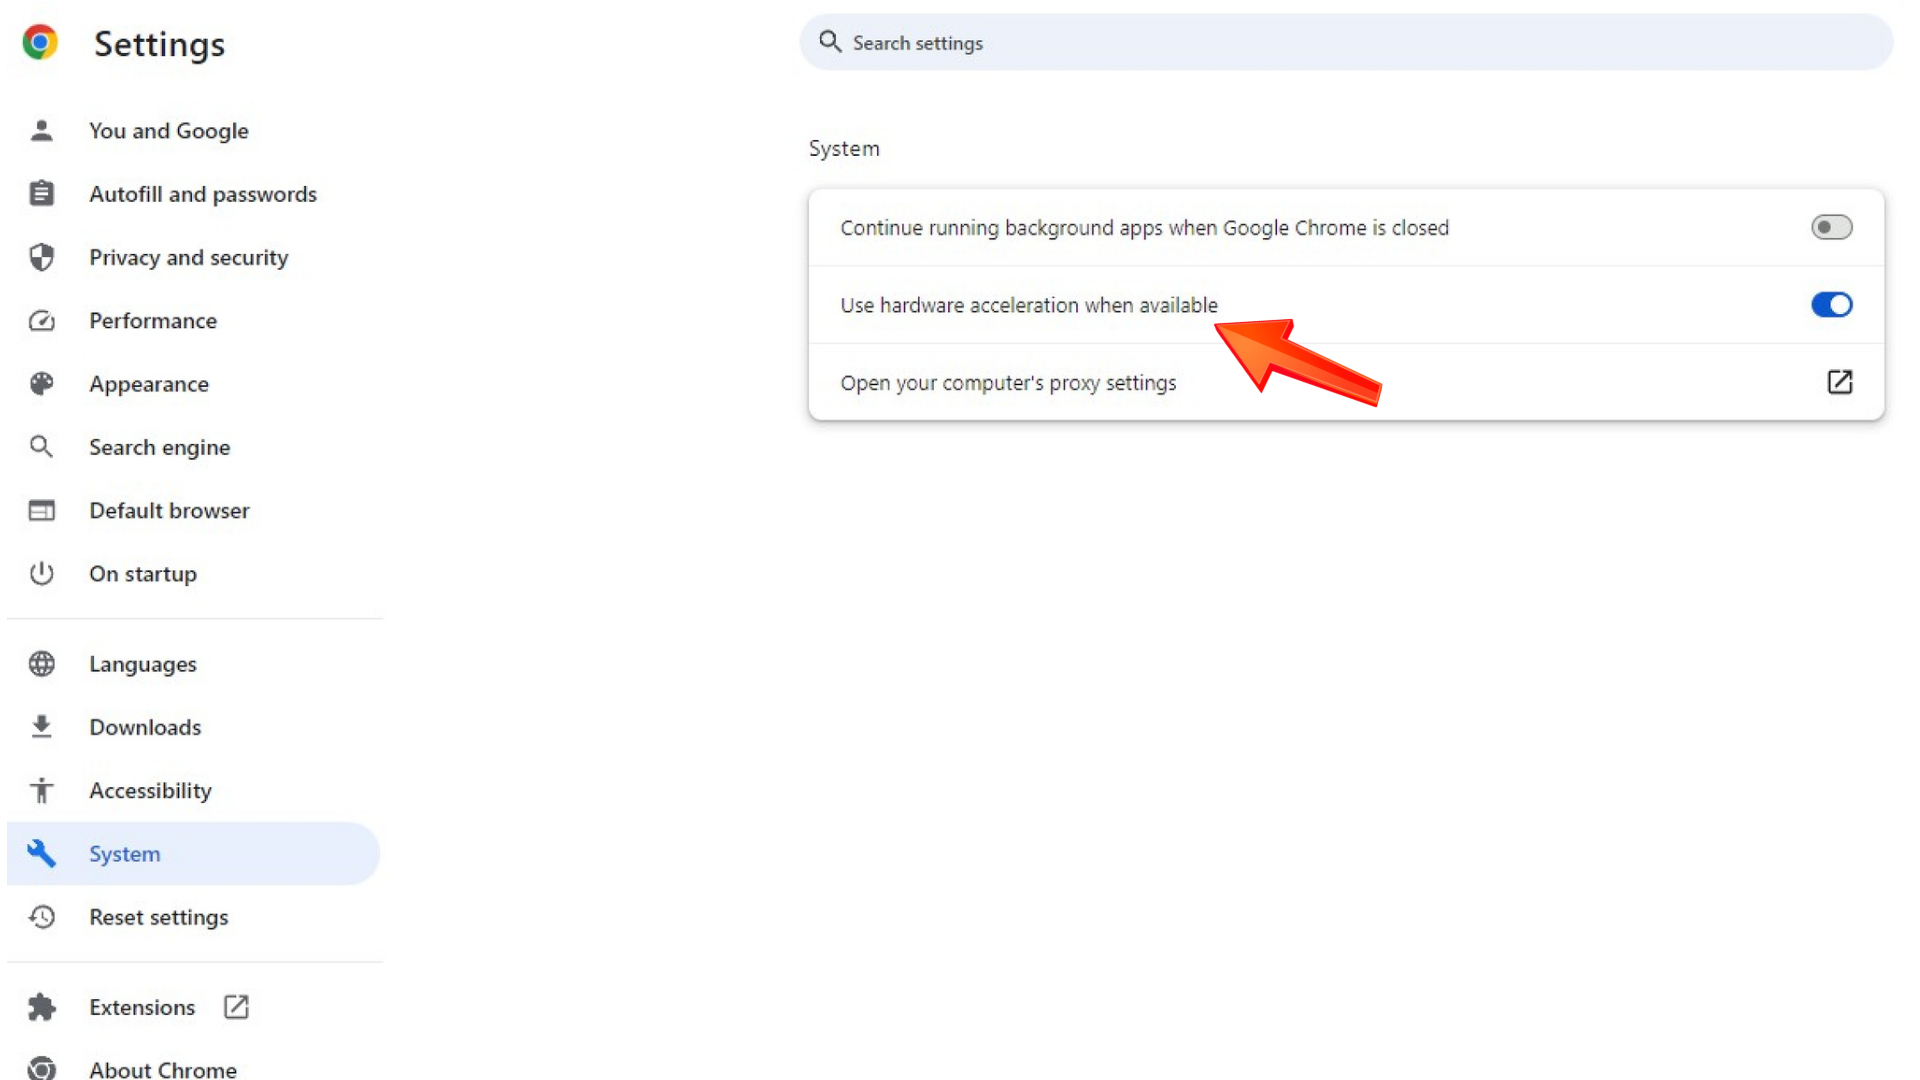
To disable hardware acceleration:
- Open Chrome’s settings.
- Click “Advanced”
- Scroll down to “System.”
- Toggle off “Use hardware acceleration when available.”
4. Clear Browser Cache & Cookies
Large amounts of cached data can bog Chrome down and disrupt videos. Clearing the cache gives Chrome a fresh start.
To clear the cache:
- Click the three-dot Chrome menu.
- Select “Settings.”
- Choose “Privacy and security” in the left menu.
- Click “Clear browsing data.”
- Select all time ranges and data types.
- Click “Clear data.”
5. Disable Extensions
Any problematic extensions running can negatively impact videos. Turn them off one-by-one to isolate conflicts.
To disable extensions:
- Open the extensions page in Chrome.
- Toggle each extension off individually.
- Test a video after disabling each one.
- If fixed, leave the problem extension disabled.
6. Use Incognito Mode
Incognito mode launches Chrome without any extensions or customizations that could interfere with videos.

To try incognito mode:
- Open a new incognito window from the Chrome menu.
- Play a video and see if freezing continues.
- If videos play normally, an extension is likely causing issues.
7. Check for Overheating
Overheating computers often struggle to play resource-intensive YouTube videos. Monitor temperatures to identify overheating.
To check for overheating:
- Use a program like Speccy to track CPU/GPU temps.
- If any components are overheating, take steps to improve cooling immediately.
- Lowering graphics settings may also help reduce temperature issues.
8. Update Software
Having the latest Chrome, graphics drivers, Windows, and hardware firmware is vital for smooth playback.
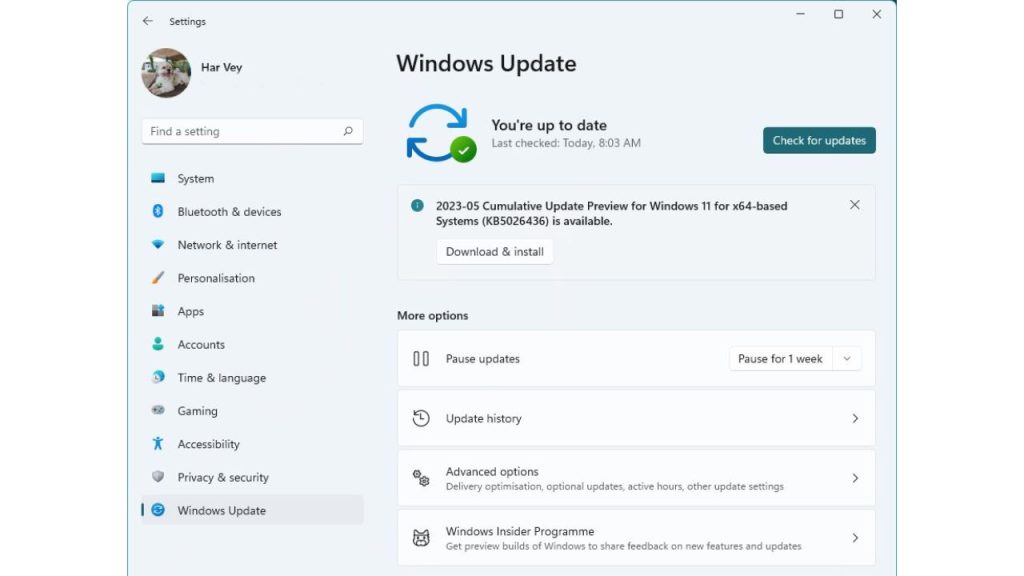
To update your software:
- Check for browser, graphics, chipset, and Windows updates.
- Install any available updates.
- Enable automatic driver and Windows updates if not on already.
9. Tweak Playback Settings
Changing a few Chrome flags and Windows settings can optimize your system for improved video performance.
To tweak settings:
- In Chrome, enable “smooth scrolling” and other video-related flags.
- Increase Windows page file size.
- Disable “fullscreen optimizations” in Windows.
- Adjust advanced performance-related settings.
10. Refresh Chrome
Resetting Chrome eliminates any stubborn freezing issues caused by corrupt software settings.
To refresh Chrome:
- Copy saved bookmarks and other important info.
- Reset Chrome to factory settings via the settings menu.
- As a last resort, uninstall and reinstall Chrome.
Follow the step-by-step instructions above to troubleshoot and resolve your freezing YouTube problems in Chrome. Let me know if you have any other questions!