How To Fix Lifesize Webcam Not Working
Lifesize is one of the popular video conferencing platforms that a lot of people are using today. It supports high definition video and high quality audio which is an advantage in business environments. The free version runs on a browser and requires that you sign up for an account before you can use the service. Although this is a solid performing platform there are instances when certain issues can occur. In this latest installment of our troubleshooting series we will tackle the Lifesize webcam not working issue.
Lifesize camera not working
One of the common issues that people are experiencing when joining or hosting a Lifesize meeting is that their webcam does not seem to work. Here’s what you need to do to fix this problem.
Pre-requisites:
- Close other programs running in your computer that might be using the camera.
- Restart your computer.
Method 1: Select the correct camera
The first thing you will need to do is to make sure that Lifesize is detecting and using the correct camera.
Time needed: 3 minutes.
Lifesize camera setting
- Login to your Lifesize account.
This will run the web app which you can do this from Lifesize.com.

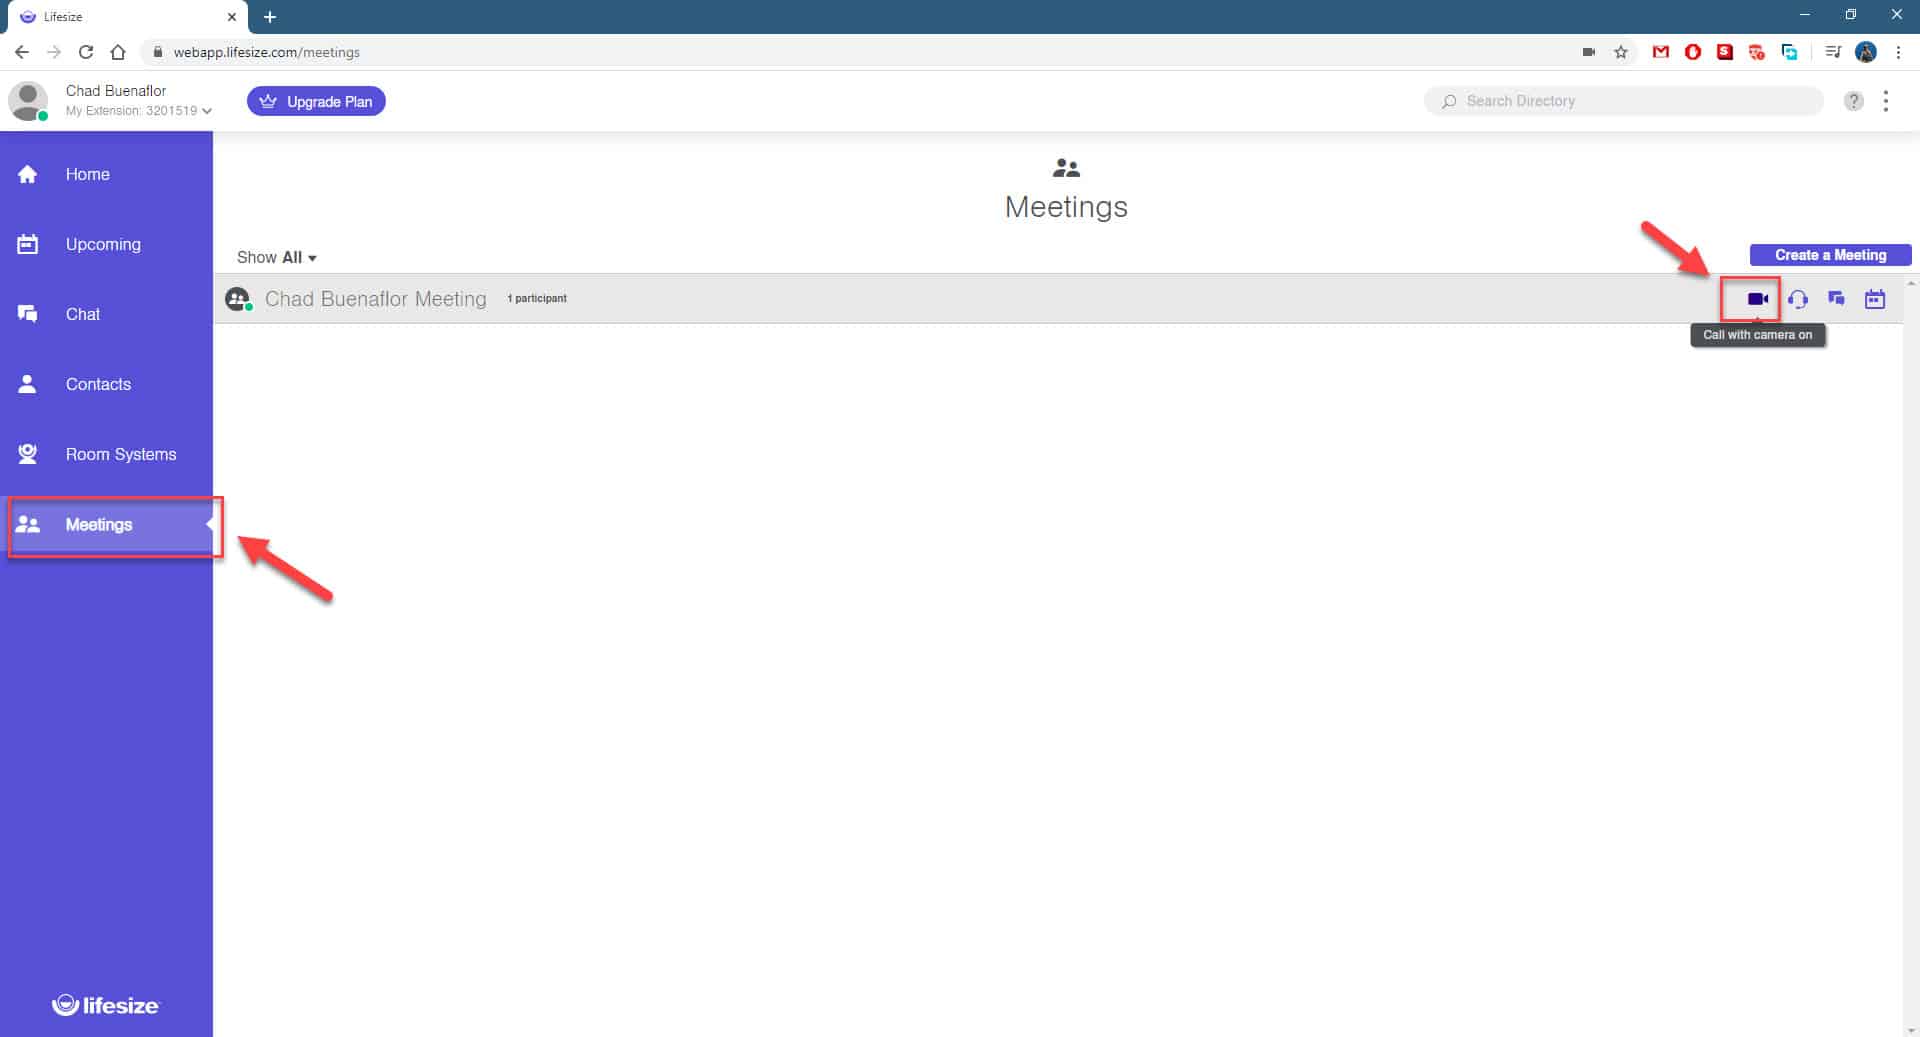
- Start a meeting.
You can do this by clicking on the Meetings link on the left pane then highlight the meeting name and click on the call with camera on link.

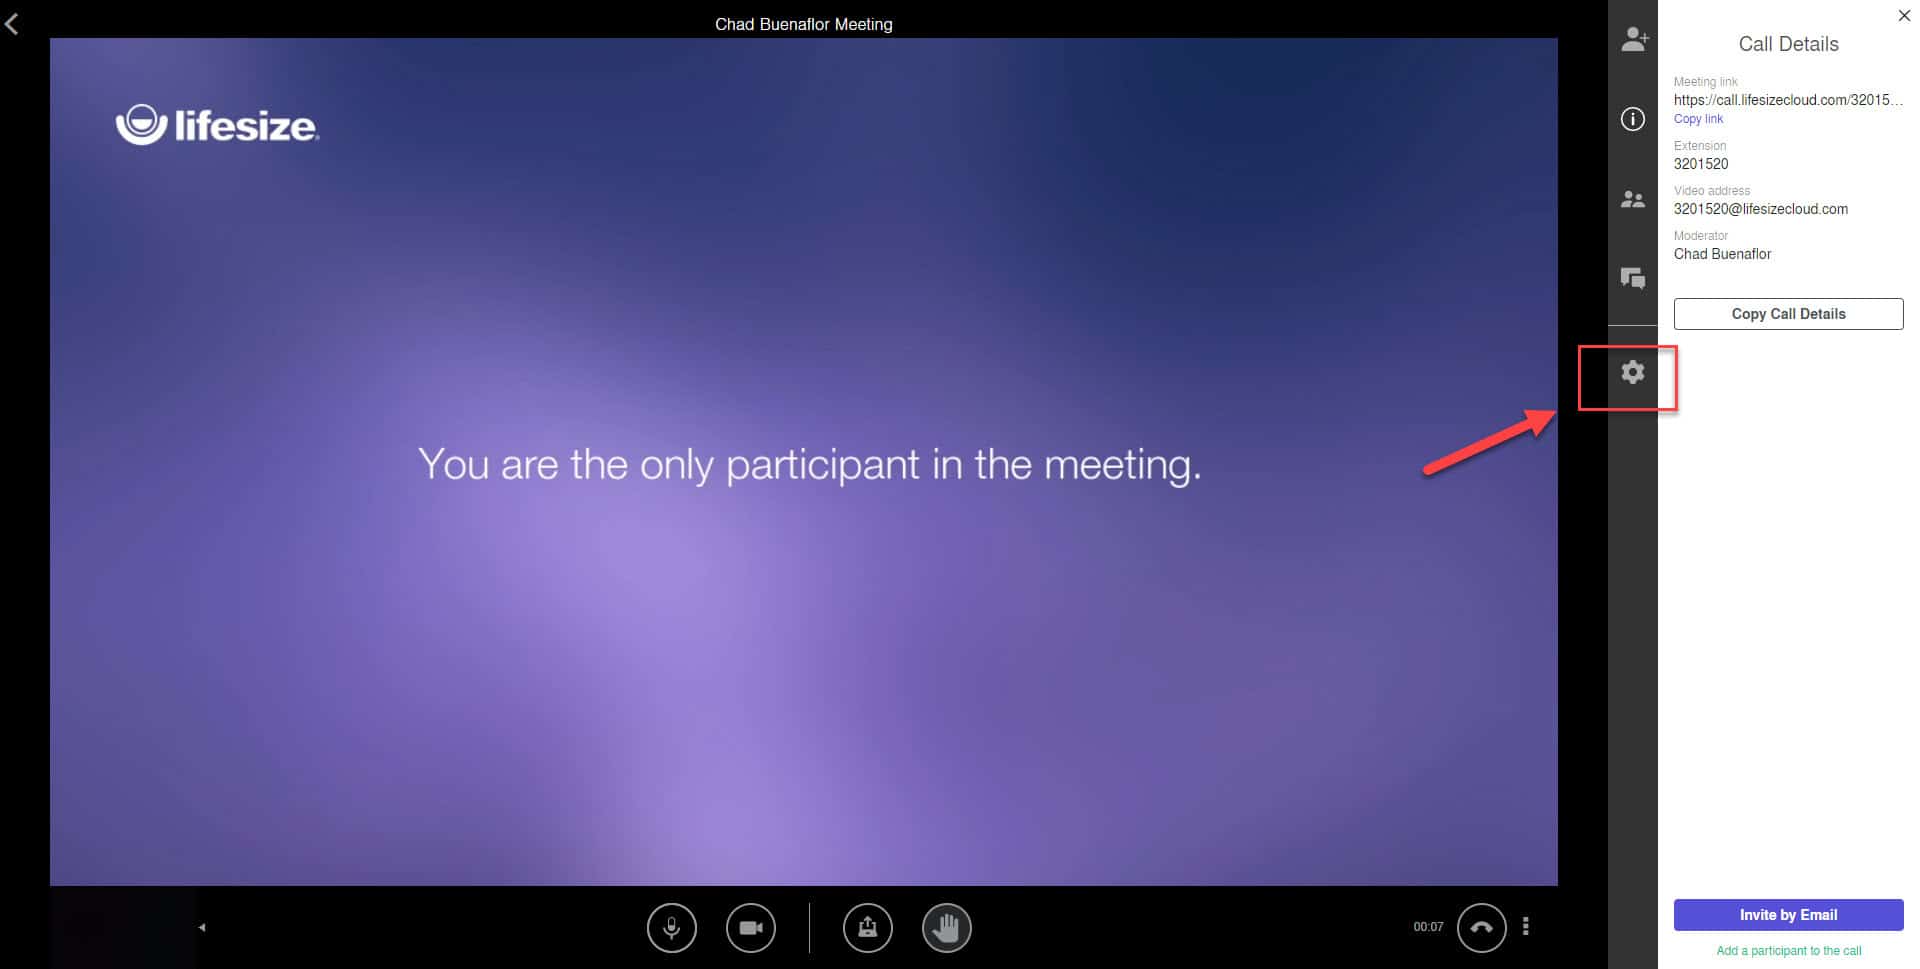
- Click on the Settings icon.
This can be found on the right part of the screen.

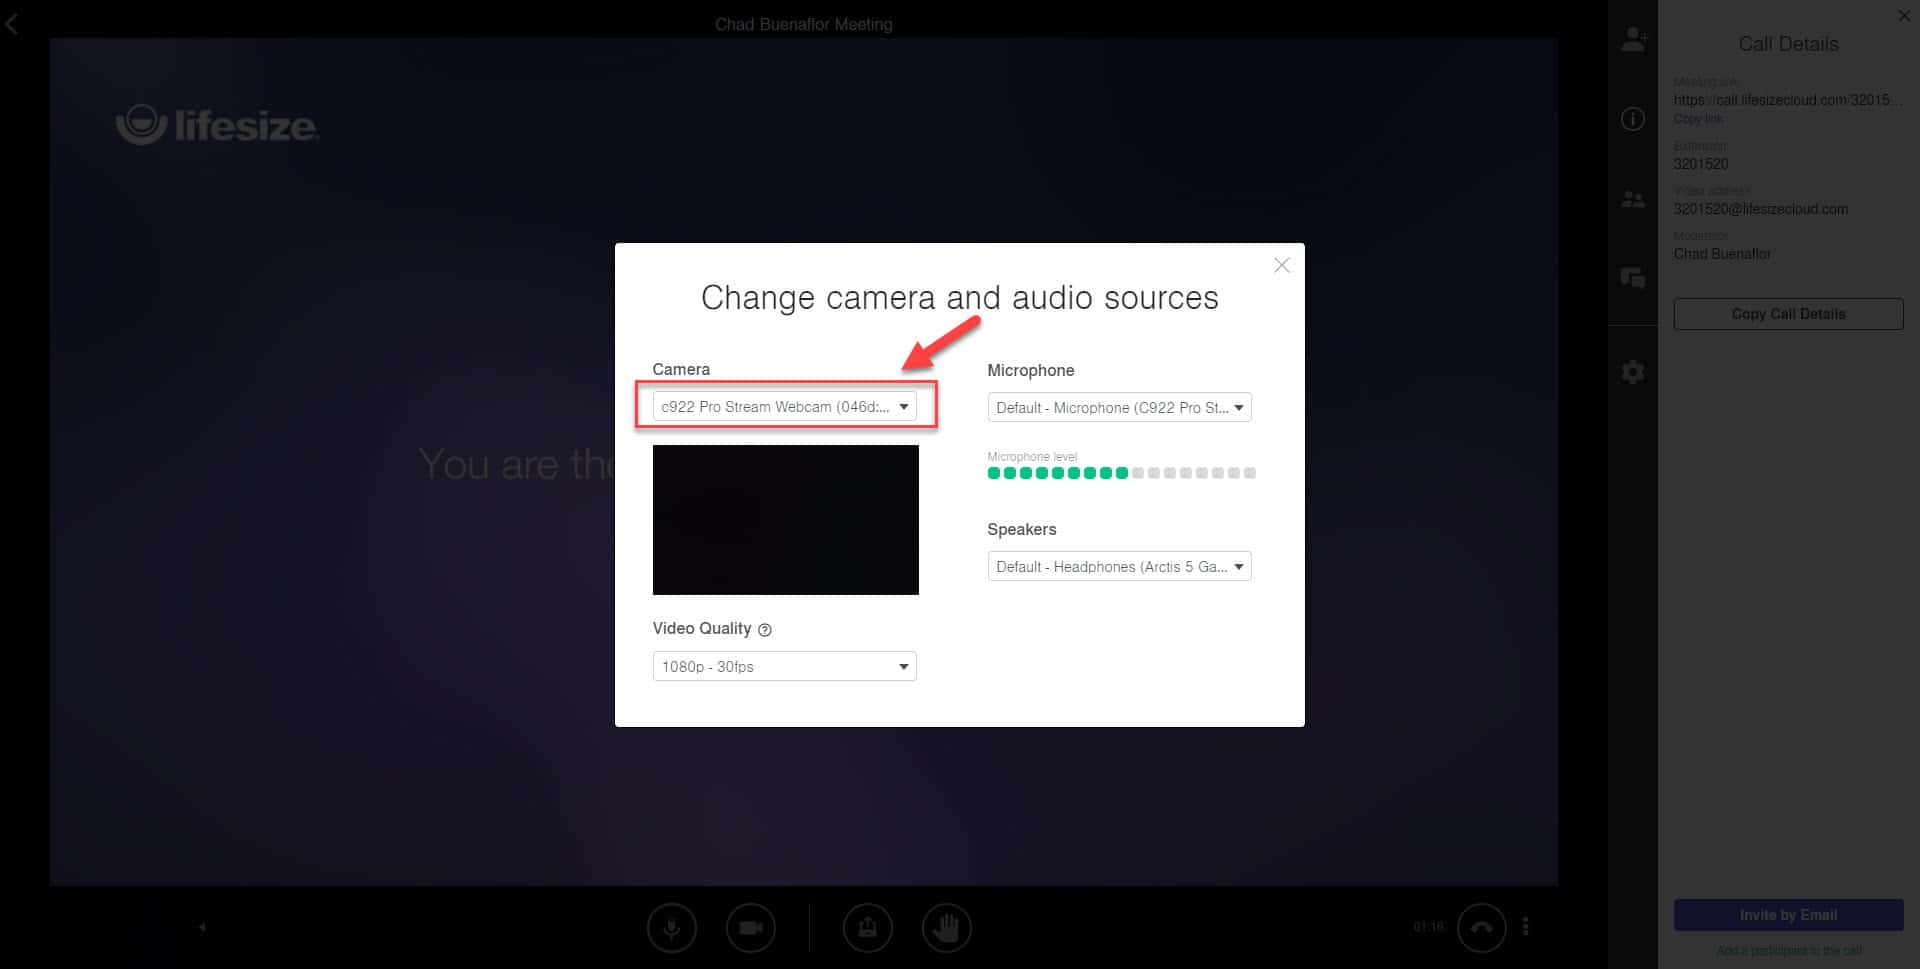
- Choose the correct camera.
This can be done from the camera drop down box.
Method 2: Make sure Lifesize is given permission to use the camera
Sometimes this problem can be caused because Lifesize is not given permission to use the camera. You might have clicked block when the permission pop-up appeared. Here’s what you need to do when using the Chrome browser.
- Open the Google Chrome browser.
- Click on More.
- Click on Settings.
- Click on Privacy and security.
- Click on Site Settings.
- Click on Camera.
- Click on the forward arrow located after Lifesize.
- Make sure that Allow is chosen on the Camera drop down box.
Method 3: Make sure the webcam can be detected by Windows 10 to fix Lifesize camera not working
You should make sure that the camera is functioning properly. The best way to do this is to check if it is detected by your computer.
- Click on the Start button. This is located on the lower left side of the screen.
- Click on Camera. You can find this in the Start menu list of applications.
- Click on the Take Video button and record a few seconds of video. You can tell if it is working if you are able to playback the video.
In case the camera is not working then try disconnecting it from its USB port then connect it to a different USB port. You should also try to restart the computer then repeat the steps listed above. If the problem persists then try reinstalling the webcam driver or use a different webcam.
After performing the steps listed above you will successfully fix the Lifesize webcam not working issue.
Having Issues with your computer? Feel free to contact us using this form. We’ll try to help.